Bio-Rad PV92 PCR Informatics Kit User Manual
Page 6
2
. There are two protocols for staining your gel.
Your instructor will inform you which one you
will use.
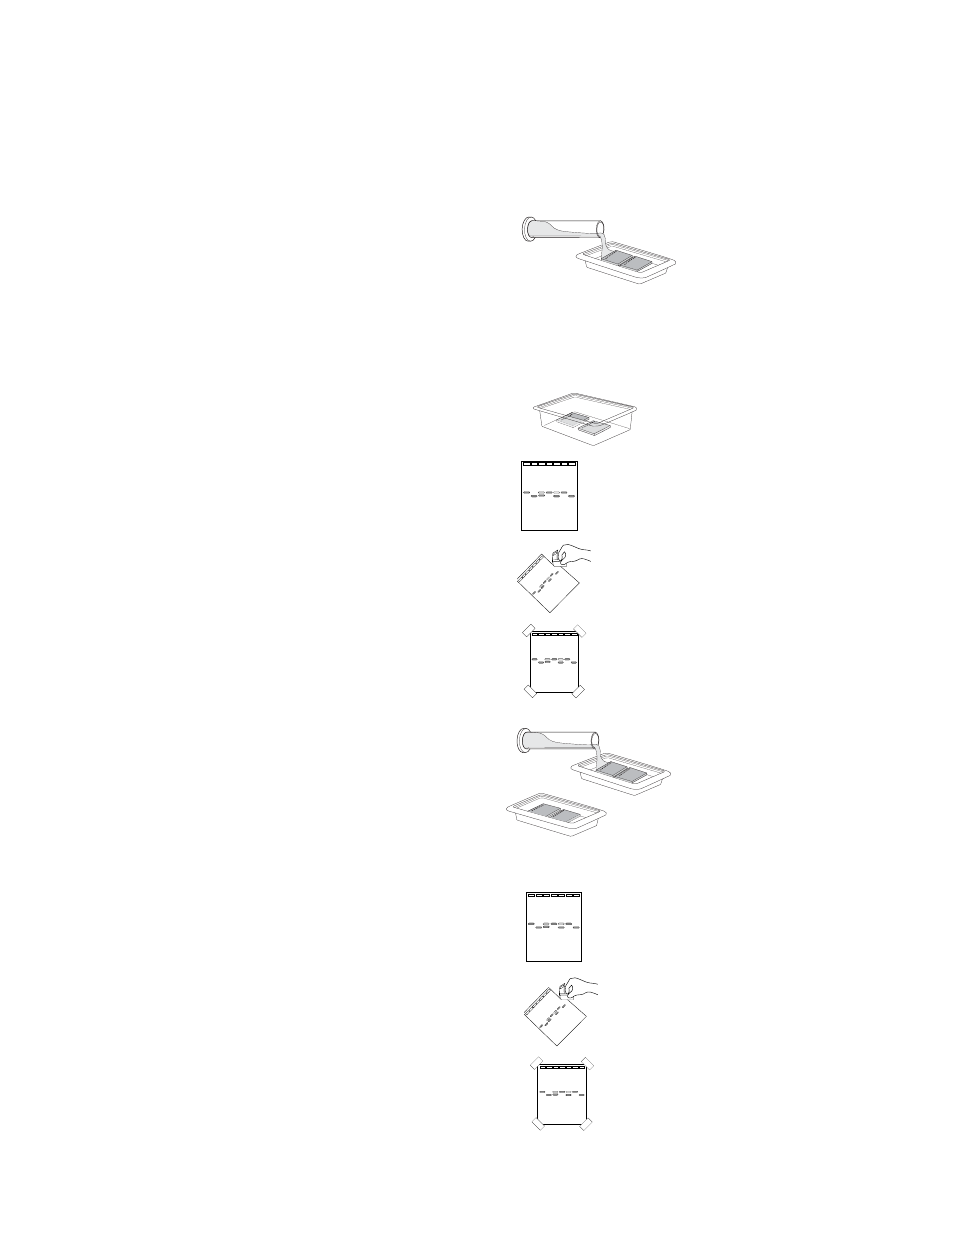
Protocol 1: Quick staining (requires 12–15
minutes)
a. Add 120 ml of 100x Fast Blast stain into
your staining tray (2 gels per tray).
b. Stain the gels for 2 minutes with gentle
agitation. Save the used stain for future
use. Stain can be reused at least 7 times.
c. Transfer the gels into a large washing con-
tainer and rinse with warm (40–55°) tap
water for approximately 10 seconds.
d. Destain by washing twice in warm tap
water for 5 minutes each with gentle shaking
for best results.
e. Place the gel on a light background and
record your result. With a permanent marker,
trace the wells and band patterns onto a
clear sheet of plastic or acetate sheet.
f. With the help of your instructor, determine
whether you are homozygous or heterozy-
gous for the Alu insertion.
g. Trim away any empty lanes of the gel with
a knife or razor blade.
h. To obtain a permanent record, air-dry the
gel on gel support film. Tape the dried gel
onto your lab notebook. Avoid exposure of
the stained gel to direct light, since it will
cause the bands to fade.
Protocol 2: Overnight staining
a. Add 120 ml of 1x Fast Blast DNA stain to
your staining tray (2 gels per tray).
b. Let the gels stain overnight, with gentle
shaking for best results. No destaining is
required.
c. The next day, pour off the stain into a waste
beaker.
d. Place the gel on a light background and
record your result. With a permanent marker,
trace the wells and band patterns onto a
clear sheet of plastic or acetate sheet.
e. With the help of your instructor, determine
whether you are homozygous or heterozy-
gous for the Alu insertion.
f. Trim away any empty lanes of the gel with
a knife or razor blade.
g. To obtain a permanent record, air-dry the
gel on gel support film. Tape the dried gel
into your lab notebook. Avoid exposure of
the stained gel to direct light, since it will
cause the bands to fade.
38