Bio-Rad Gel Doc™ XR+ System User Manual
Page 3
5. The Windows 2000 and XP operating systems will
detect the new device. For the ChemiDoc XRS,
you will need to guide Windows through the driver
installation.
Windows 2000: A list of compatible devices will be
shown. Select ChemiDoc XRS and select Next.
Note: For Windows 2000 installations, it is also
necessary to run RSConfig from the program files
menu. Make sure that the camera is powered on and
that the FireWire cable is connected to the computer.
Run RSConfig from the Quantity One program menu
and select OK.
Windows XP: Do not connect to the Internet; instead
select “Automatically search for the best driver”.
Select Next, and Windows XP will automatically install
the driver.
Mac:
1. Insert The Discovery Series
™
software CD into the
CD-ROM drive of the Mac. The CD will show up on
the desktop as an icon.
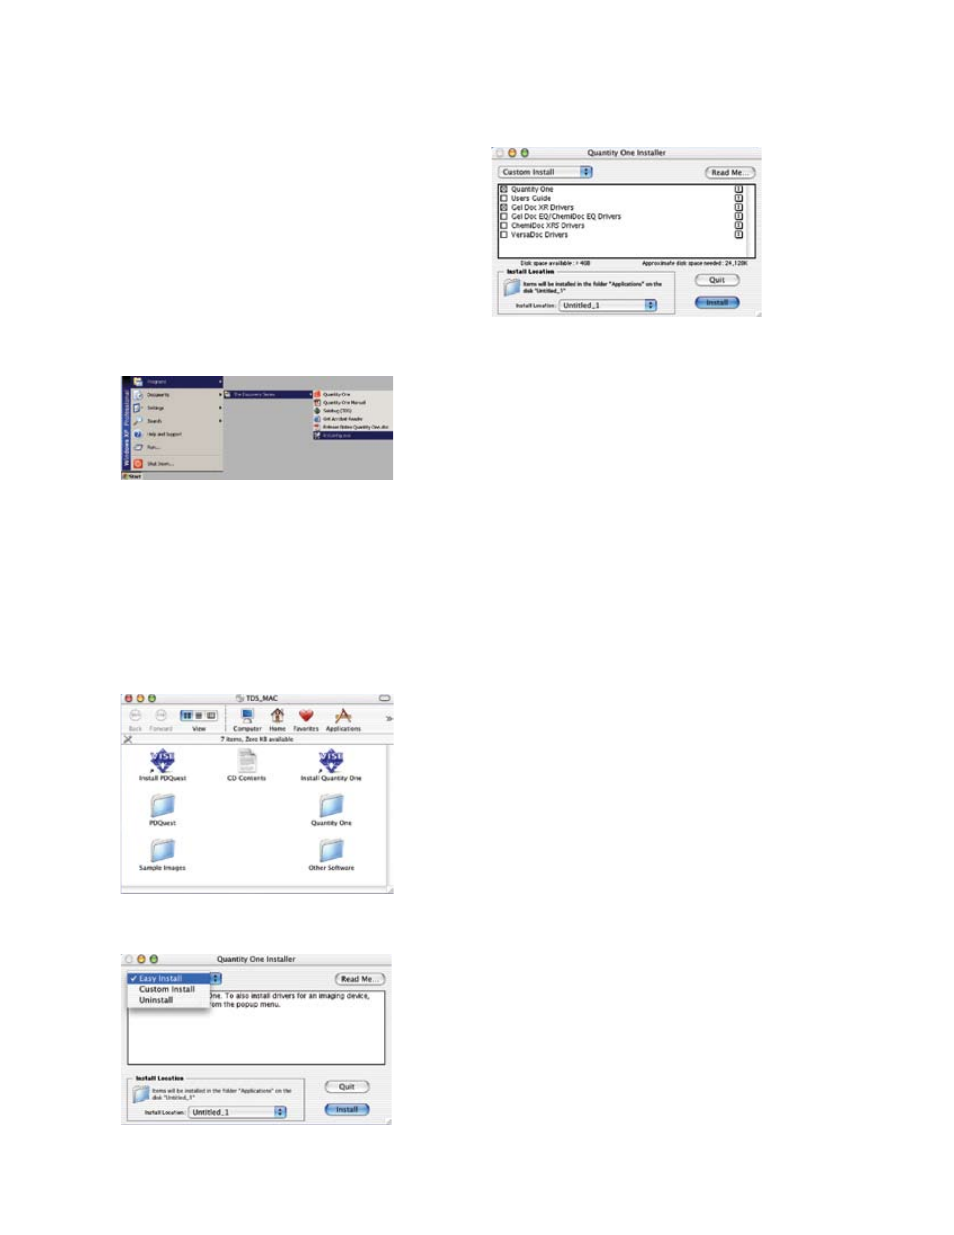
2. Double-click on the CD icon to open the window:
3. Click on the installer for your application, and follow
the prompts to the following installation wizard:
4. From the drop-down menu, select “Custom Install”.
5. Select the driver you want to install. If you have not
yet installed the Quantity One application, select that
as well.
6. When you have made your selections, click Install to
complete the installation.
7. After installation is complete, plug the FireWire cable
from the camera into the Mac. Ensure that the power
supply for the camera has power connected to it.
Additionally, on the ChemiDoc XRS, make sure that
the power switch is turned on.
Launch the Software
Double-click on the Quantity One icon located on your
desktop or in the program directory.
Acquire Image Optimization Files
The first time that you run the software, you will need to
acquire image optimization files.
1. Select Gel Doc XR or ChemiDoc XRS under the File
menu.
2. Follow the instructions provided on the screen to
enable proper functioning of the system. This will take
approximately 2 minutes for each system.
Note: It is necessary to remove the lens cap after these
files have been acquired.
Perform a Test Run
1. Place the focusing target into the darkroom.
2. Turn on the epi-white lights.
3. Verify functionality of the iris, zoom, and focus
controls using the control panel in the software or
on the side of the darkroom.
4. You are now connected to your Bio-Rad imaging
system. Follow the onscreen steps through a
complete acquisition routine.