Bio-Rad Trans-Blot® Turbo™ Transfer System User Manual
Page 20
The transfer packs are vacuum sealed. Check that the membrane does not lift away with the foil
packaging lid. If necessary, hold the edge of the membrane and peel while opening the pack.
Note: The base of the tray is PETG plastic and can be recycled according to local regulations for class 1
plastics.
3.2 Placing a Transfer Pack into the Cassette
See Figures 9 and 10 for step-by-step instructions to place a transfer pack into a cassette.
• The membranes and stacks are designed to be lifted from the tray and placed in the cassette. Do
not invert the stacks when removing them from the tray
• The assembled transfer packs should be reasonably centered and flat within the base of the
cassette (anode)
• We do not recommend moving the stacks once they are placed, as this may introduce air between
the layers. If the stack must be moved after placement, use a blot roller to expel any trapped air
bubbles.
• Each stack uses multiple layers of material for maximum transfer efficiency. Removing stack layers
is not advised
• Refrain from adding any extra transfer buffer to the cassette, saturated transfer stacks provide
ample transfer buffer.
Figure 8 shows the proper final assembly of the blotting sandwich in the cassette and is applicable to all
transfer packs.
• If the gel and ion reservoir stacks are layered out of order during assembly of the blotting sandwich,
carefully disassemble the components so as not to damage the membrane. Reassemble the stack
and use the blot roller to remove air bubbles between the components
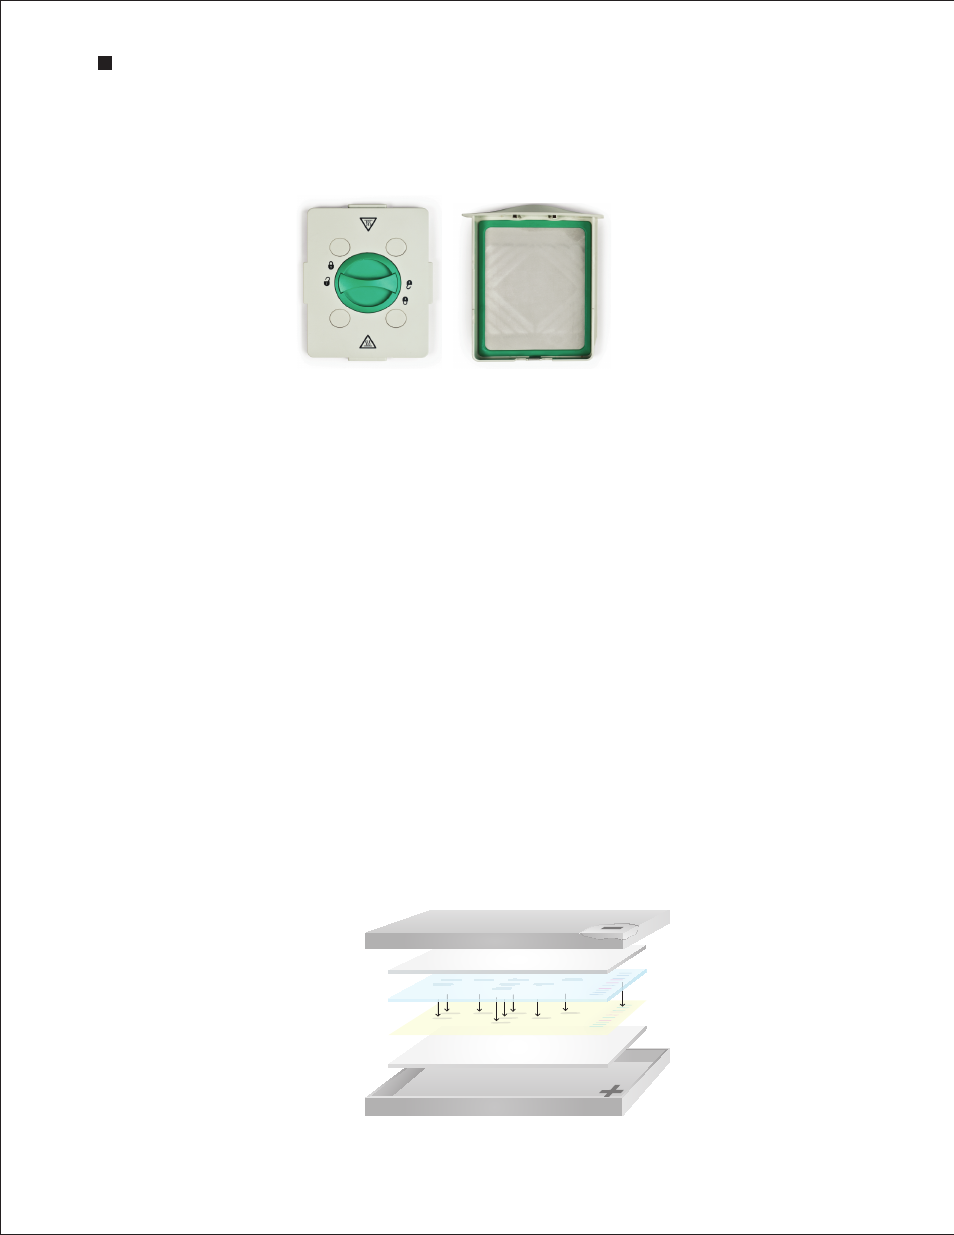
Fig. 7. Open cassette. a. Lid with cathode (–) on the underside. b. Base with anode (+).
b.
a.
Fig. 8. Proper layering of the assembled transfer pack.
Top (
–
) cassette
electrode (cathode)
Top ion reservoir
stack
Blotting membrane
Bottom ion reservoir
stack
Bottom(
+
) cassette
electrode (anode)
Gel
8
Tech Support: 1-800-424-6723 • www.bio-rad.com
Trans-Blot® Turbo™ Blotting System