Monitor shelf: vesa – Amico AHM Monitor Arms (Adjustable Height) User Manual
Page 17
www.amico.com
14
Monitor Shelf: VESA
NOTE: Setting the VESA shelf horizontally can make the mounting procedure easier.
NOTE: An adapter plate for the 5’’ shelf is available
NOTE: If the original monitor bolts are too large, simply enlarge the mounting holes on the VESA Plate to fit.
1. Determine the monitor mounting configuration.
VESA 75 (75 mm x 75 mm M4 thread) or
VESA 100 (100 mm x 100
mm M4 threads)
2. If a VESA 75 configuration is present on the monitor then start by lifting the monitor to match the mounting holes
on the VESA 75 shelf.
Fasten 2 M4 screws
(Figure 1)
by hand through the back of the VESA 75 shelf and into the rear
of the monitor.
Secure the 2 remaining screws
(Figure 1)
through the holes on the back of the VESA 75 shelf and
into the monitor.
Ensure all screws are secured.
Be sure not to force the screws in, as it may strip the head.
The VESA
100 adapter will not be required.
Tighten using a cross pattern.
3. If a VESA 100 configuration is present on the monitor then start by attaching the back of the VESA 100 adapter to
the front of the VESA 75 shelf.
This is done by inserting 4 M4 screws through the holes on the back of the VESA 75
shelf, into the inner threads from the back of the VESA 100 adapter.
Lift the monitor to match the mounting holes
on the VESA 100 adapter.
Secure 4 M4 screws provided by the monitor manufacturer through the back of the VESA
100 adapter and into the monitor.
Ensure all screws are secured; be sure not to force the screws in, as it may strip the
head.
(Figure 2 and 3)
Tighten using a cross pattern.
Section 3: Installation to Monitor and Accessory
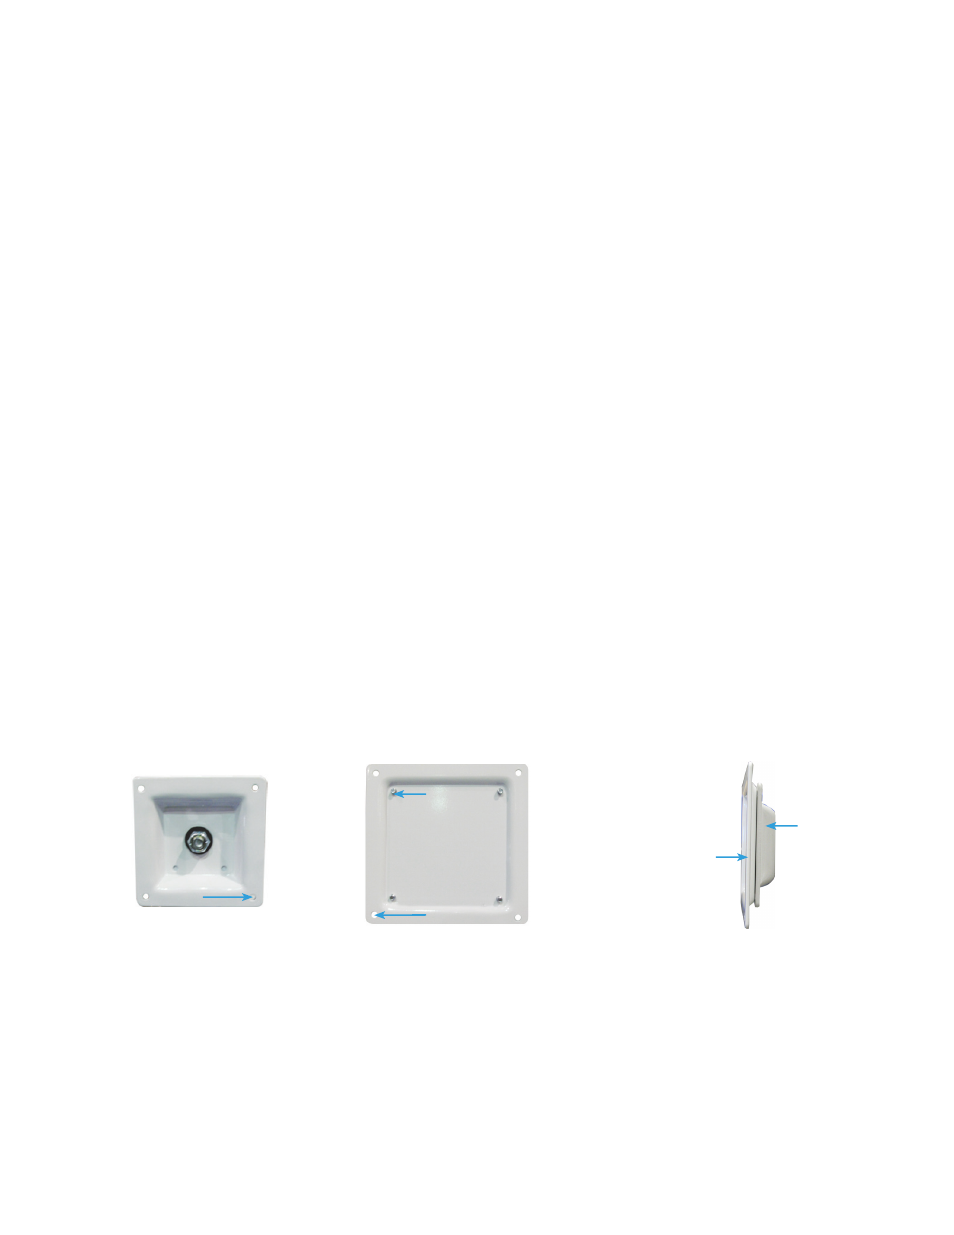
(Figure 1)
Front of the VESA 75 shelf
M4 mounting hole
(Figure 3)
Side of the VESA 75 and VESA 100 together
VESA 100
VESA 75
(Figure 2)
Front of the VESA 100 adapter
M4 mounting hole
M4 inner threads