Hitch & level bar assembly – Great Plains TCN5313 Predelivery Manual User Manual
Page 13
Great Plains Manufacturing, Inc.
Assembly
9
03/17/2014
566-170Q
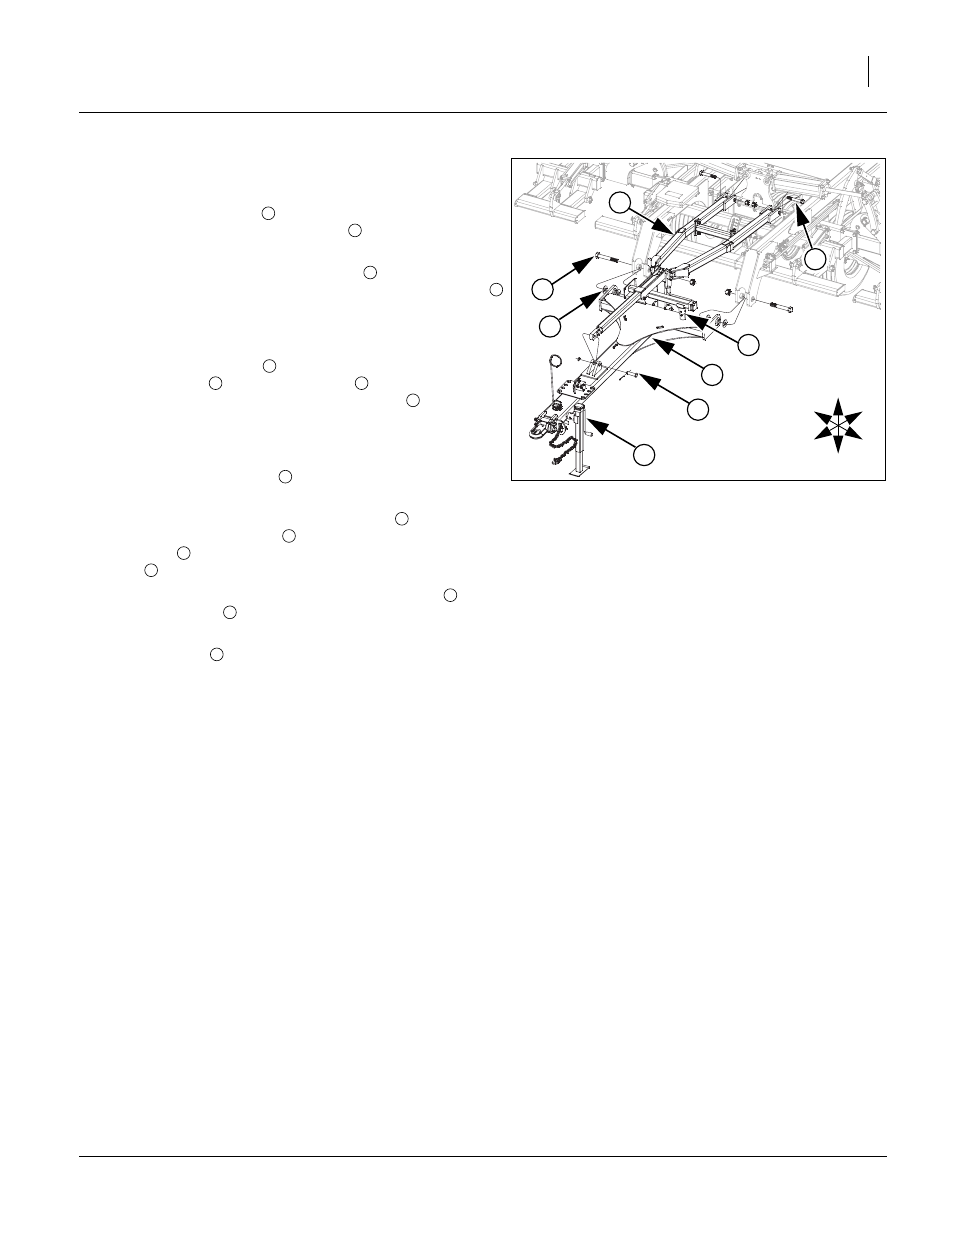
Hitch & Level Bar Assembly
Refer to Figure 7
Note: The hitch assembly
will also come pre-assembled
from the factory with tongue jack
mounted on top rear
of hitch.
28. Remove the 1 1/4 x 8 Gr. 8 hex bolts
from front of
trusses. On folding models slide the level bar assembly
under fold cylinders (as this will be attached to the rear of
hitch as shown) as you move hitch assembly towards the
trusses.
29. Attach hitch assembly
to front of trusses with 1 1/4 x 8
Gr. 8 hex bolts
, 1 1/4 flat washers
and 1 1/4 lock nuts.
Be sure to insert the two 1 1/4 flat washers
(one on
each side of hitch uni-ball) to ensure tight fit. Bolts need to
be tightened securely, but do not torque as the hitch needs
to pivot.
30. Remove the tongue jack
from storage location and
install it on the jack stub at the front of the hitch frame.
31. Now remove the two 1 x 6 Gr. 8 hex bolts
from the rear
of the level bar assembly
. Install the ear of the level bar
assembly
to the level bar links with the 1 x 6 Gr. 8 hex
bolts
and 1 hex lock nuts.
32. Attach the front of the hitch turnbuckle assembly
with 1
x 3 5/8 pin clevis
, 1.50 x 1.0 machine washer and 3/16 x
2 cotter pin shipped in hitch location.
Note: Tongue jack
may be adjusted up or down to get holes
to align up to install pin.
33. Tighten all bolts securely but do not torque as the level bar
assembly needs to pivot.
Note: See hydraulic layout section in Appendix for complete
hose layout and follow the following steps to connect hos-
es.
Figure 7
Hitch & Level Bar
42045
U
D
F
B
L
R
2
6
5
6
3
7
1
4
1
6
3
4
1
3
2
2
6
5
4
4
5
4
7
6