Row unit maintenance, Seed cup clean-out, Opener side wheel maintenance – Great Plains 2525F Operator Manual User Manual
Page 55: Seed cup clean-out opener side wheel maintenance
Maintenance and Lubrication 51
01/23/2012
118-232M
Row Unit Maintenance
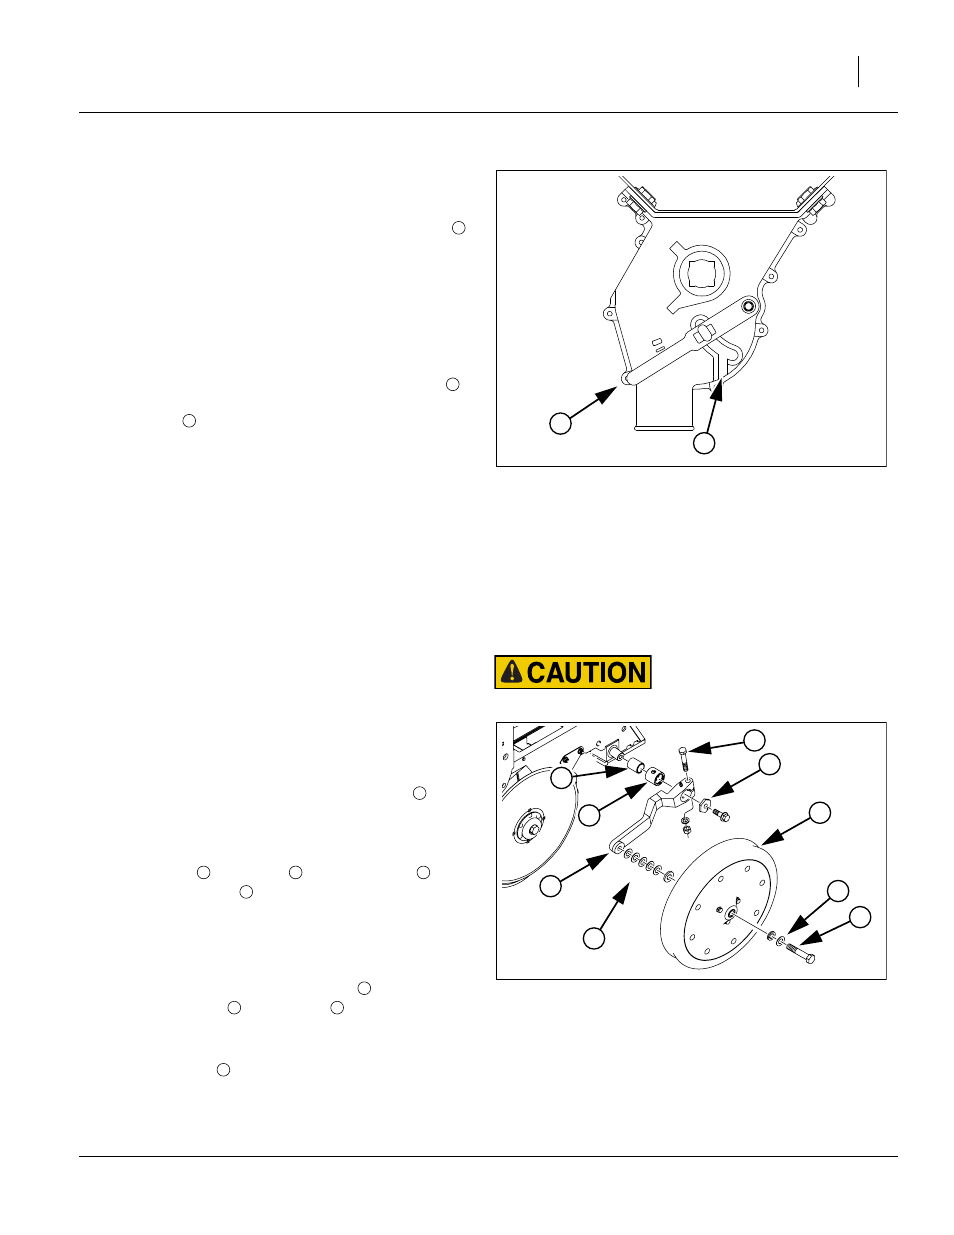
Seed Cup Clean-Out
Refer to Figure 21, which depicts the seed cup door handle
in a normal operating position
.
1.
Set the Seed Rate Handle to zero (0) for the side of
the drill to be cleaned out. This moves the seed cup
sprockets out of the seed path.
2.
Position a tarp or bucket under each row or set of
rows to be cleaned out.
3.
At the seed cup for that row, pull the door handle
out of the operating detent range, and swing it down
to position
.
4.
Open the seed box and use a small brush to sweep
seed toward seed cups set to clean-out. If seed does
not flow freely, inspect seed cup, hose and seed
tubes for obstructions.
5.
When all seed has been removed, set Seed Rate
handle to 100, raise drill, and have an assistant
rotate gauge wheel. Inspect the sprockets at each
seed cup for excess wear or damage.
Opener Side Wheel Maintenance
Lift opener side wheel off the ground. Move tire in
and out to check for end play. Check for roughness in
bearing by rotating wheel. If bearings are rough,
inspect and replace if necessary.
2.
The side wheels are preset at the factory. However,
because of normal wear it may become necessary to
make adjustments so the wheel remains close to the
disk. To prevent plugging, loosen clamp bolt
and
slide arm inward to take up gap between side wheel
and disk blade. If more adjustment is needed, go to
step 3.
3.
Remove bolt
and wheel
. Remove shims
from
the inside of wheel
and place them on the outside
of wheel. Always place removed shims from the
inside to the outside. When installed, wheel should
turn freely and not hit the arm at the curve. Do not
add any more shims than necessary.
4.
Disassemble side gauge wheel arm
from unit.
Remove bushing
from sleeve
and check for
wear. If necessary, replace bushing.
5.
When reinstalling side gauge wheels, align tab on
hex adjustment
with notch in bushing. Replace
bolt and tighten.
6.
Adjust side gauge wheels. See “Side Gauge Wheel
Adjustment” on page 37.
FigureSpacer
Note: It is not necessary to rotate the gauge wheels for
clean-out. With the Seed Rate set to zero, nothing
moves inside the seed cups.
Figure 65
Seed Cup Door Handle
26211
1
2
FigureSpacer
Figure 66
Side Gauge Wheel Shims
21894
Disk edges are sharp. Be careful when working in this area.
{
2
3
8
1
7
6
5
4
1
2
3
4
3
5
6
7
8