Install new parts, Install new pivot mount, Re-mount auger – Great Plains ADC2350B Assembly Instructions User Manual
Page 6: Install new carriers, Re-connect balance springs, Auger closeout
Great Plains Mfg., Inc.
6
Auger Carrier Update
166-255M
03/05/2009
Install New Parts
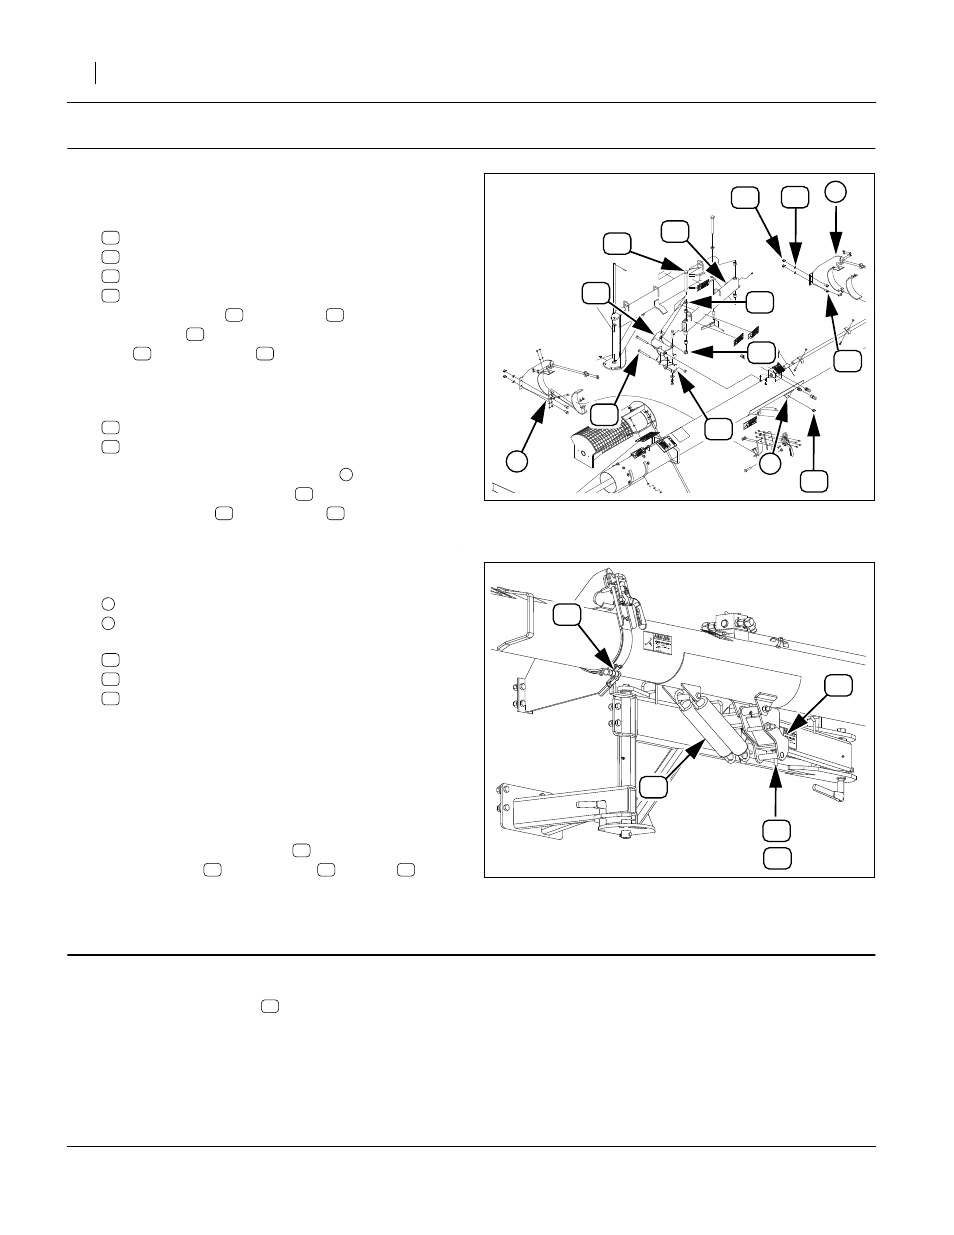
Install New Pivot Mount
Refer to Figure 9
28. Select one each new:
802-469C HHCS 3/4-10X8 GR5 PLT
804-093C
803-025C NUT HEX 3/4-10 PLT NYLOCK
166-190H
20’ AUGER PIVOT MOUNT WELDMENT
Place the washer
pivot mount
, assembled at step 16, on the outer
arm
using lock nut
Re-Mount Auger
29. Select one each new:
802-045C HHCS 1/2-13X5 GR5
803-019C NUT LOCK 1/2-13 PLT
30. Use hoist to align auger pivot lugs
cross-tube of spring anchor
anchor with bolt
and lock nut
Install New Carriers
31. Select one each new:
Rear carrier from step 10 (with stop bolt).
Front carrier from page 4 (without stop bolt)
and four sets new:
802-034C HHCS 1/2-13X1 1/4 GR5
804-015C WASHER LOCK SPRING 1/2 PLT
803-020C NUT HEX 1/2-13 PLT
Mount carriers at locations where old carriers were
removed. Open latches.
Re-Connect Balance Springs
Refer to Figure 10
32. Adjust hoist to allow auger to swing to normal load-
ing position (inlet low).
33. Connect top end of springs
to lower cross-tube
of new anchor
and nut
Auger Closeout
34. Check range of motion of new auger pivot mount.
35. Adjust rear clamp stop
not strike rear tire.
36. Stow auger in new carriers.
37. Adjust new clamps so that handles snap into posi-
tion, but do not crush auger tube.
Figure 9
Install Pivot Mount and Auger
29372
5
6
7
5
Figure 10
Re-Connect Springs
29375