Pre-assemble components, Assemble new auger carrier latches, Assemble new auger carrier rests – Great Plains ADC2350B Assembly Instructions User Manual
Page 3
Great Plains Mfg., Inc.
Installation Instructions
3
03/05/2009
166-255M
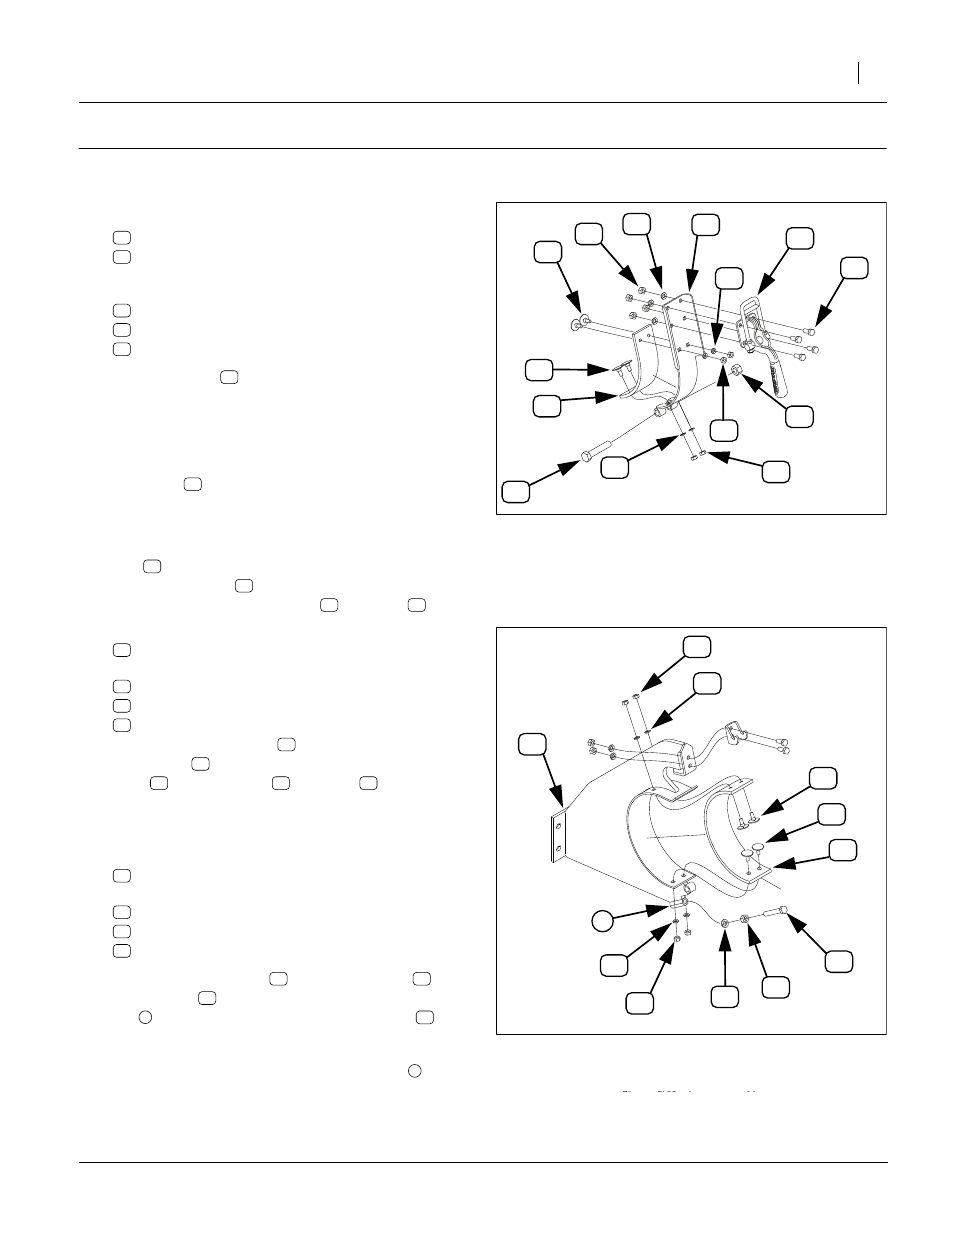
Pre-Assemble Components
Assemble New Auger Carrier Latches
Select two (2) each new:
816-570C 8 INCH AUGER CLAMP PAD
(this is the shorter of the two sizes of EPDM pads)
and eight (8) sets new:
6.
The clamp pad
may have two, four or no holes,
and may or may not have adhesive on one side,
protected by release paper. If four holes are not
present, it is necessary to assembly-drill them.
Position the pad so that it is centered in the latch
weldment
. Mark holes for fractional size
9
⁄
32
in
(letter size K, 7.2mm). Remove pad and punch or
drill holes.
7.
Remove any release paper. Position a clamp
pad
, adhesive side to inside of latch face. Insert
the elevator bolts
and secure with lock washers
and nuts
8.
Select the latch side of two (2) each new:
and eight (8) sets new:
802-007C HHCS 5/16-18X3/4 GR5
804-009C WASHER LOCK SPRING 5/16 PLT
803-008C NUT HEX 5/16-18 PLT
Mount the latch clamps
weldments
, inside the double break, using the
bolts
, lock washers
and nuts
Assemble New Auger Carrier Rests
Select two new:
166-187H AUGER CARRIER PULL BEHIND
and one each new:
802-114C HHCS 3/8-16X2 1/2 GR5
803-014C NUT HEX 3/8-16 PLT
804-013C WASHER LOCK SPRING 3/8 PLT.
10. Loosely thread the nut
fully onto the bolt
, add
lock washer
, and loosely thread fully into coupler
nut
at the bottom of the carrier weldment
.
This carrier is designated the rear carrier, and is the
only one with a stop bolt in the coupler nut
.
Figure 3
Auger Latch
29373
Figure 4
(Rear) Auger Carrier
29373
1
1