Marker carrier assembly – Great Plains 3N-4020 Assembly Instructions User Manual
Page 6
113-777M
2/28/2006
Great Plains Mfg., Inc.
Flat Fold Marker Option
6
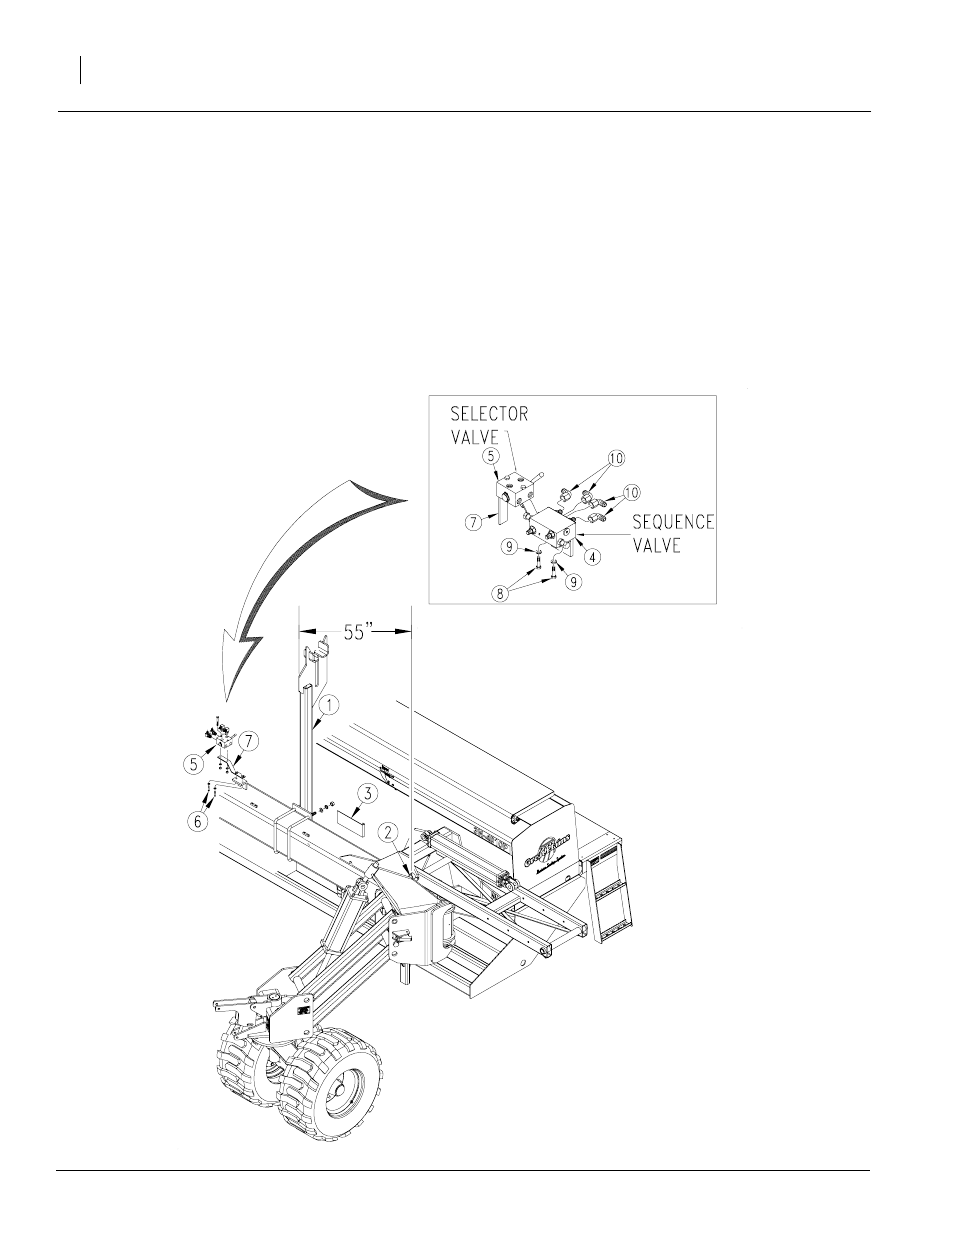
Figure 8
Dual Marker Carrier Installation
Marker Carrier Assembly
Dual Marker
Refer to Figure 8
1.
Attach marker carrier (1) to the backside of
the 10" x 10" square frame using two 3/4" x
10" x 11 1/2" U-bolts, 3/4" flat washers, 3/4"
lock washers and 3/4" nuts.
Note: If you fold the marker to the up position and
it hits the tapered edge of the carrier (1) you can
install a shim (3) behind the mount plate. If the
marker hits the front edge install the shim at the
bottom edge of the 10" x 10" frame. If it hits the
back edge install the shim at the top edge of the
10" x 10" frame.
2.
Position so the center of marker carrier (1)
measures 55" from the center of the hinge pin
(2) and tighten U-bolts.
3.
Mount the marker sequence valve (4) next to
the Veris Drive and lock circuit double selec-
tor valve (5), located on the left-hand frame.
Remove the two selector valve strap bolts (6)
and discard. Place the sequence valve (4) on
top of the selector valve mount strap (7), and
install the 3/8 x 1" bolts (8) and lock washers
(9) from below.
4.
Install four 9/16" x 9/16" JIC elbows (10) to the
backside of the sequence valve (4). Tighten
the elbows so they point away from the center
of the sequence valve (4).
21890