Winch assembly, Winch alignment, End of track (figure 3.12) – Wheatheart Self-Propelled Auger Kit (Competitors Models) User Manual
Page 24: Track stop (figure 3.12), As shown (figure 3.12). t, Figure 3.12 when raising auger
3. A
SSEMBLY
W
HEATHEART
- S
ELF
-P
ROPELLED
A
UGER
K
IT
3.11. W
INCH
A
SSEMBLY
C
OMPETITOR
M
ODELS
24
30766 R0
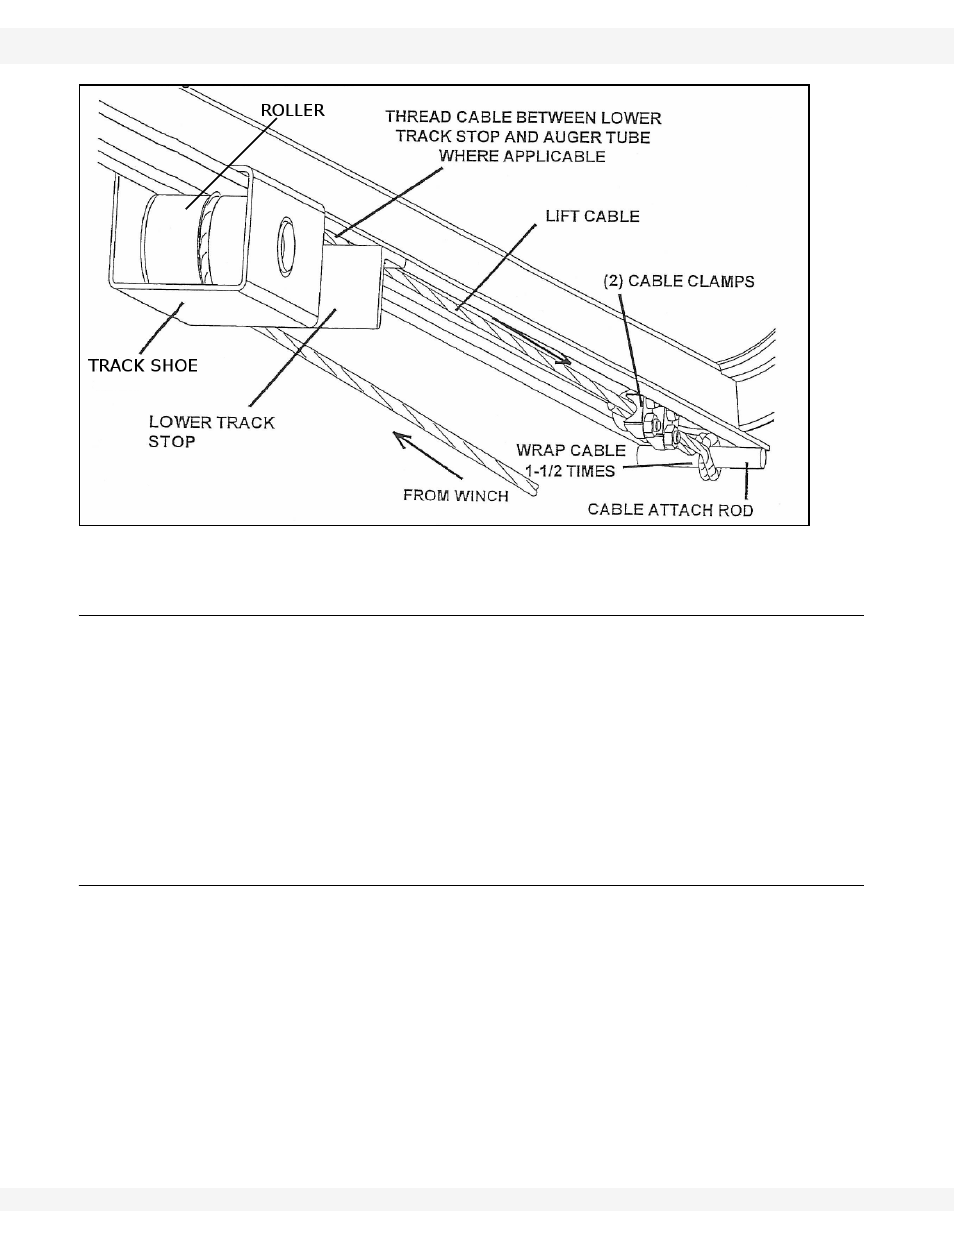
Figure 3.12
3.11. WINCH ASSEMBLY
1. Lower auger completely and remove the hand winch on the lower auger
frame.
2. Place
the
winch on the frame.
Important:
The hydraulic winch position should be adjusted until the drum is 1” away from
the auger tube when in transport position.
3. Attach 2 u-bolts to frame and secure to hydraulic winch. Do not tighten.
4. Angle the winch so it lines up with the cable wrapping around the track roller.
Tighten all nuts.
3.11.1. W
INCH
A
LIGNMENT
To check the alignment of the winch, watch the cable wrapping on the drum as
the auger is raised. Proper alignment is achieved when the cable indexes
properly, meaning that it fills each row on the drum evenly and does not pile up
against one side.
If the cable does not index properly, lower the auger fully until there is slack in the
cable. Loosen the nuts on the u-bolts. Adjust the winch, retighten nuts, and
retest.