Figure 3.10, Braces, Figure 3.10) with 7/16” x 1” bolt – Wheatheart Galvanized Utility Auger User Manual
Page 20
3. A
SSEMBLY
W
HEATHEART
- G
RAIN
A
UGERS
3.10. T
RUSSING
(O
PTIONAL
)
U
TILITY
20
30644 R1
3. Rotate strut assembly to a 45° angle and tighten half ring bolts.
4. Mount the truss attach angles to the truss anchor half rings with two 7/16” x
1" bolts and locknuts each.
5. Locate and mount the half ring assemblies above and below the strut
assembly with 7/16” x 1" bolts and locknuts. Do not tighten at this time.
Note:
The distance for mounting the half ring assemblies is limited by the length of
cable in your kit. Maximum distance for the 30’ kit is approximately 28’. Maximum
for the 40’ kit is 38’ (Figure 3.10).
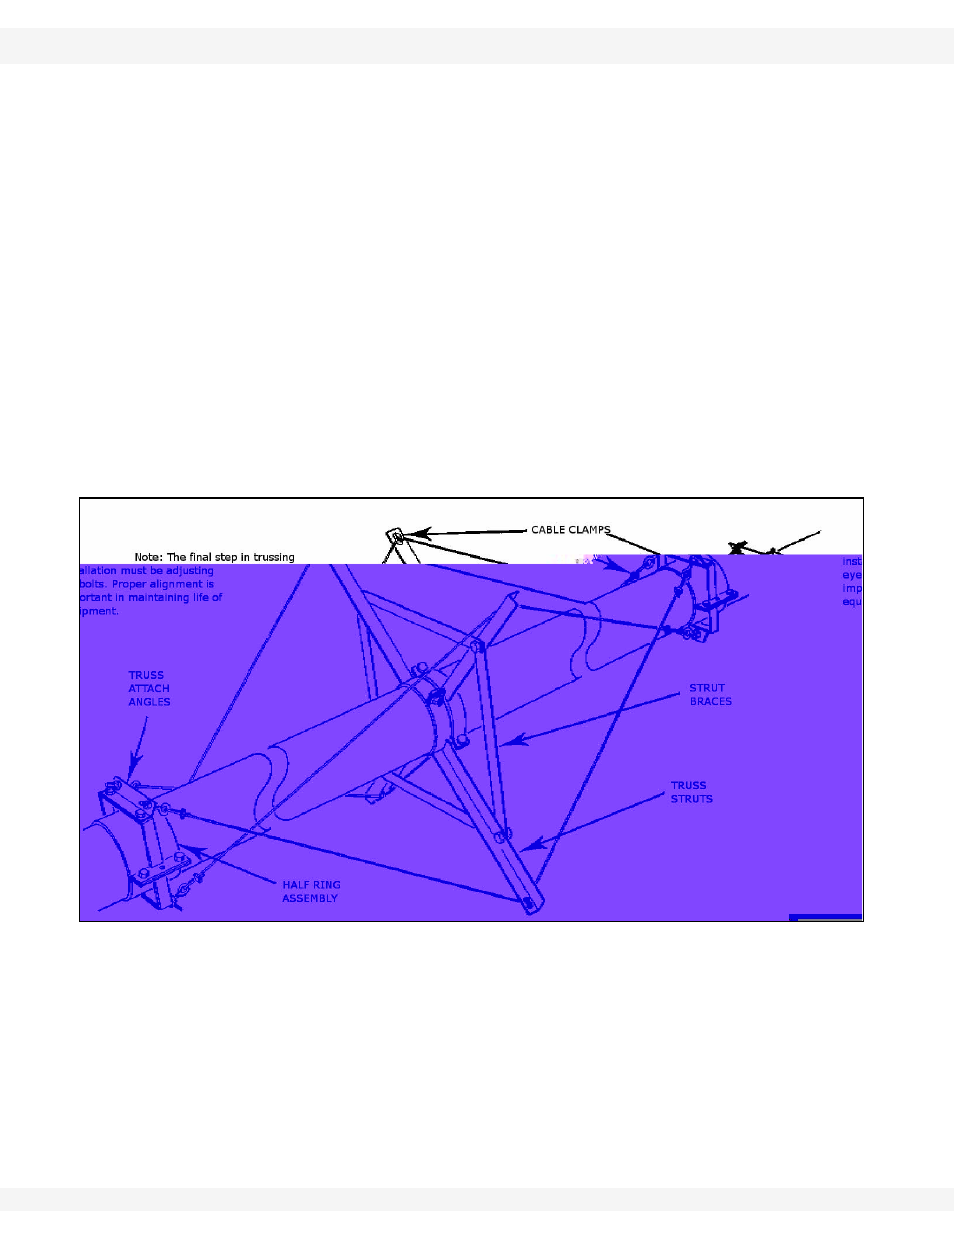
6. Put cable clamps in place on the strut assembly and place the eyebolts into
the truss attach angles.
7. String the cable through the cable clamps, center the cable, and tighten the
cable clamps.
8. Thread the cable through the eyebolts (upper cables to lower eyebolts), pull
snug, and install cable clamps.
9. Once cables are in place, tighten bolts on the half ring assemblies.
10. Tighten eyebolts until sag is eliminated. Proper alignment is important to
maintain the life of the equipment.
Figure 3.10