Clamp-on angle ring, Powerhead, Clamp-on angle ring 3.3. powerhead – Wheatheart Galvanized Utility Auger User Manual
Page 14
3. A
SSEMBLY
W
HEATHEART
- G
RAIN
A
UGERS
3.2. C
LAMP
-O
N
A
NGLE
R
ING
U
TILITY
14
30644 R1
5. For additional tube/flight
sections, repeat steps.
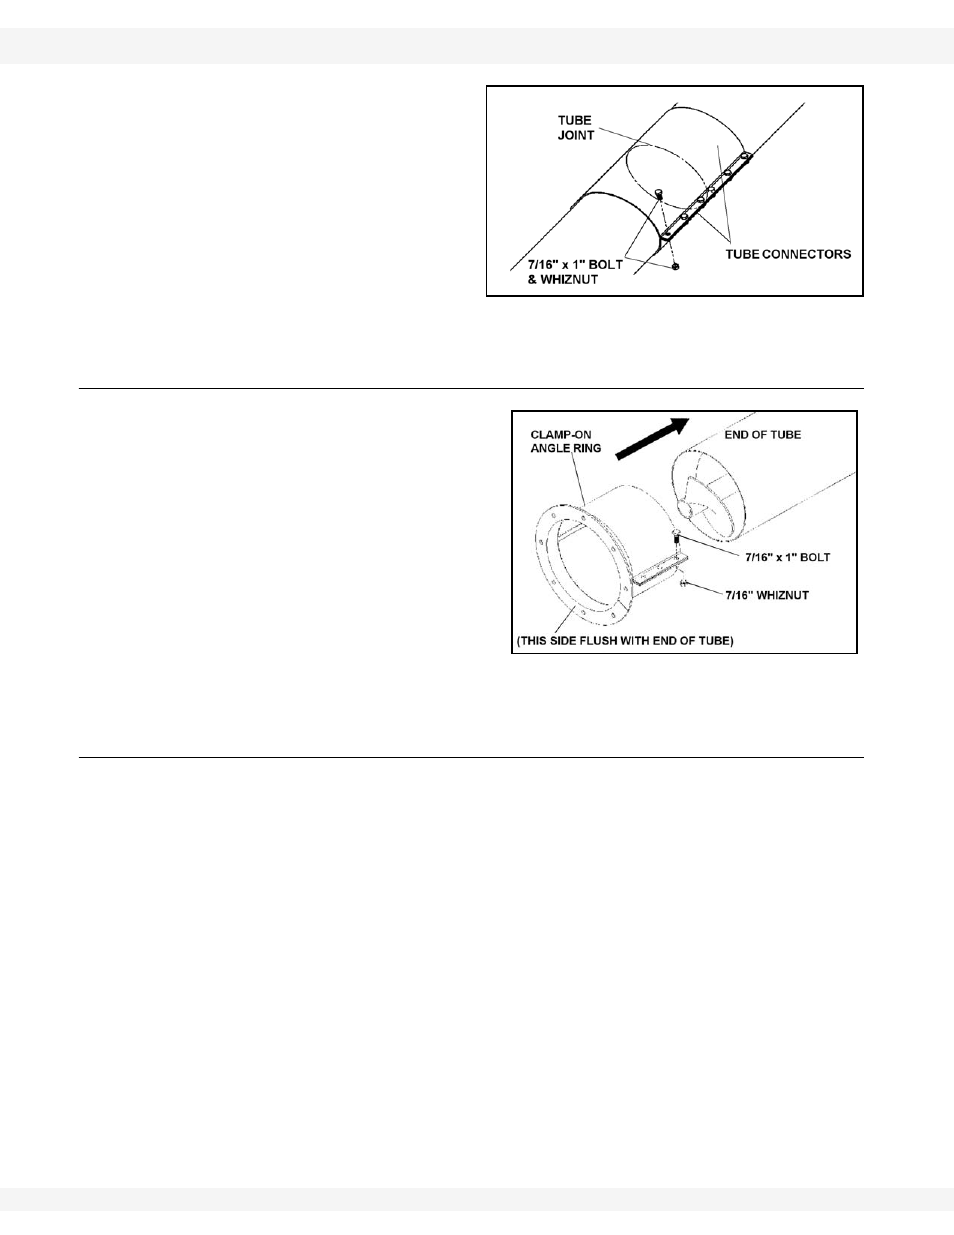
3.2. CLAMP-ON ANGLE RING
1. Slide
clamp-on angle ring onto
the end of the galvanized tube
(Figure 3.3).
2. Slide ring on until the end of the
angle ring is flush with the end
of the tube. Secure angle ring to
the tube using six 7/16” x 1"
bolts and whiznuts; tighten bolts
and nuts securely.
3. Secure second clamp-on angle
ring on opposite end of
galvanized tube following steps
1 and 2.
3.3. POWERHEAD
See Figure 3.4.
1. Pull flighting out of the galvanized tube enough to obtain access to the 2
holes at the end of the flighting pipe.
2. On powerhead, remove bearing collar from the flighting shaft. Slide
powerhead flighting out of tube and attach to the flighting of galvanized tube.
Ensure that the 2 flightings overlap. Use two 7/16” x 2-1/4” (for 8") or two 1/2”
x 2-3/4” (for 10") bolts and locknuts and tighten securely.
3. Re-install flighting onto powerhead tube and replace bearing collar onto
flighting stub shaft.
4. Connect the 2 angle flanges together using eight 7/16” x 1" bolts and
locknuts. Tighten securely.
Figure 3.2
Figure 3.3