Power connection, Chapter 2: slx300 setup, Slx300 screens in the dealer setup program – ClearOne SLX300 SpeakerLinX User Manual
Page 7: Adding an slx300 to a project
Chapter 2: SLX300 Setup 3
Chapter 2: SLX300 Setup
The SLX300 is setup for use in a commercial or residential network using the StreamNet Dealer
Setup program and the StreamNet Dealer Setup manual. StreamNet Dealer Setup is a PC-based
program that allows you to configure devices so that they can communicate across a StreamNet
network. Phases of the software setup include:
• Adding or creating a new project or opening an existing project
• Finding the new device
• Matching the new Anthology physical hardware device to the hardware setup in the project
• Configuring the device with system-specific information
• Saving the project
• Sending the configuration files to the system
The steps involved in these processes are detailed in the DigiLinX Dealer Setup manual available
for viewing or download at www.netstreams.com.
SLX300 SCREENS IN THE DEALER SETUP PROGRAM
When you start Dealer Setup program, the SLX300 will be automatically detected like any other
DigiLinX device. Verify the configuration information on the tabs for the device as shown in the
following screen examples:
a
ddinG
an
SLX300
to
a
p
roJeCt
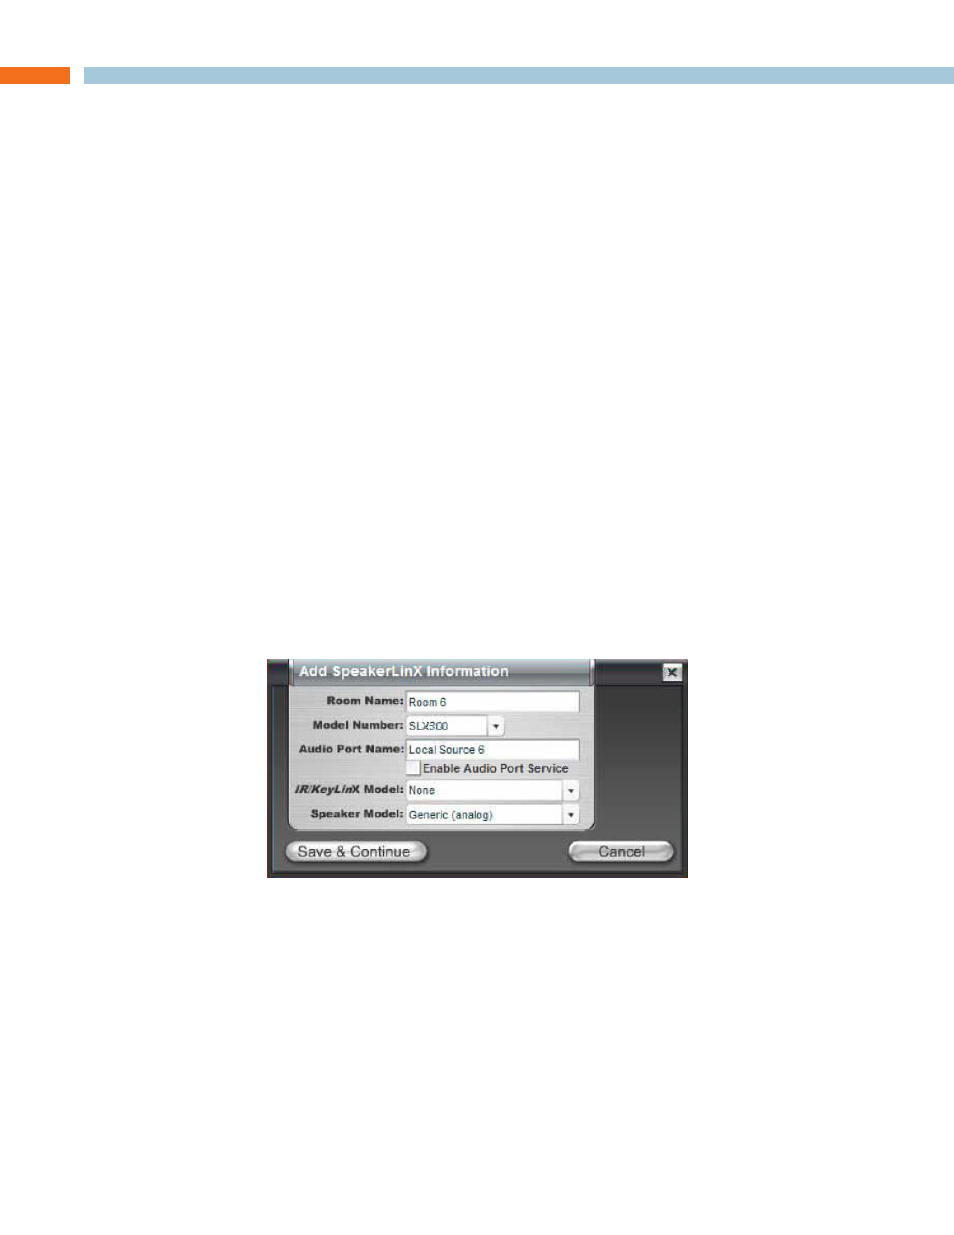
1. Enter the following information:
Room Name - Room or Zone name for this device.
Model Number - Select from the drop-down list (using the down arrow key) to select the
correct model number for this device.
Audio Port Name - If you are installing an Audio Port in that room, you can name the source
input connected to that Audio Port (such as MP3 Player).
Enable Audio Port Service - Enable the Audio Port service only if you intend to install
an Audio Port in that room. The Audio Port connects to the RJ45 jack labeled EIM on the
SpeakerLinX.