Installation instructions step 1, Preparation, Step 2 – Quoizel KY5009IB Kyle User Manual
Page 2: Step 3
2 OF 5
STYLE NUMBER: KY5009IB
INSTALLATION INSTRUCTIONS
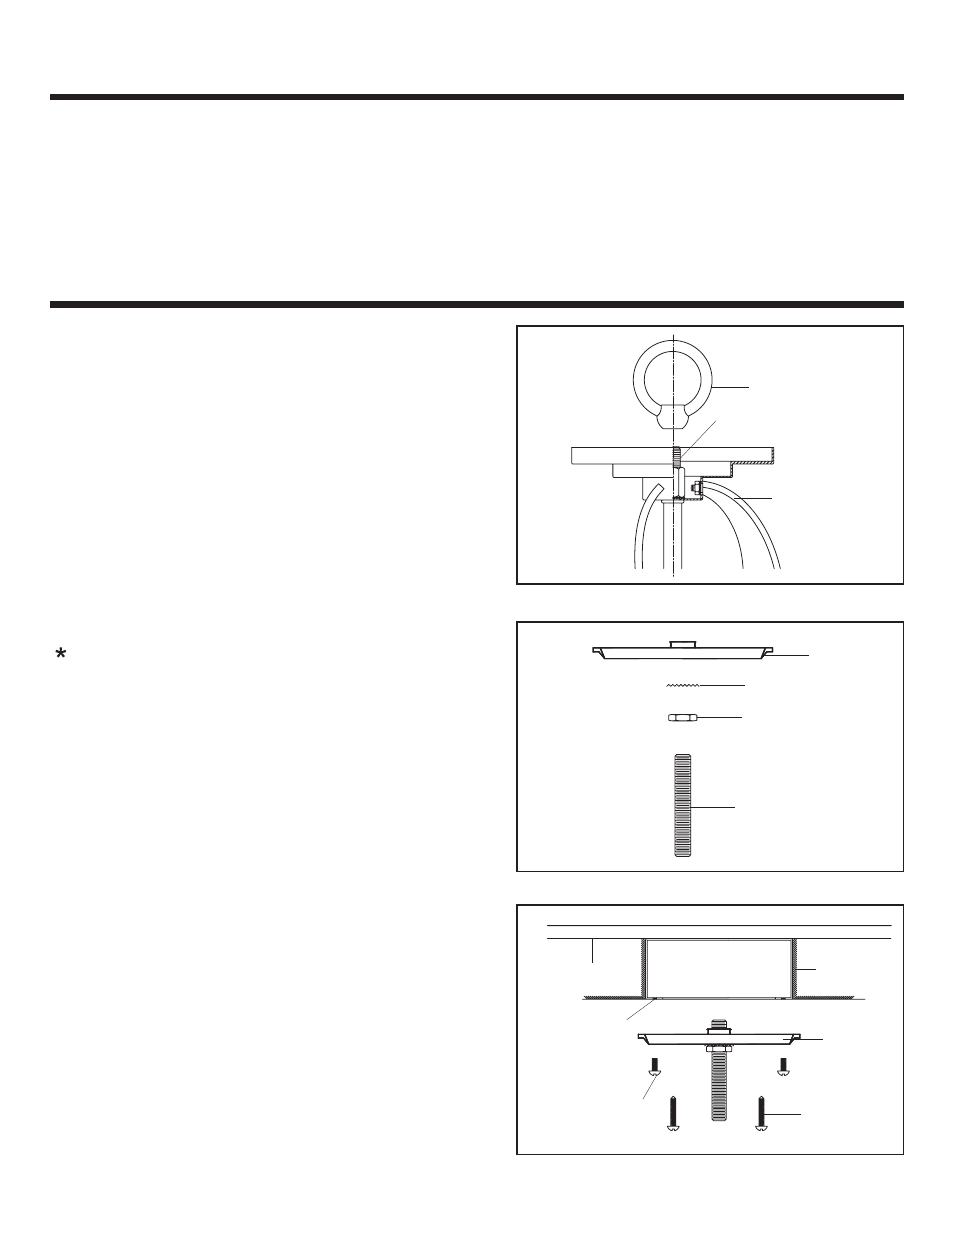
STEP 1:
a. Thread the Fixture Loop onto the Nipple in the top
center of the Fixture Assembly. Hand-tighten until
snug.
● Before beginning installation of product, make sure all parts are present. Compare parts with package contents
list and diagram above. If any part is missing or damaged, do not attempt to assemble, install or operate the
product. Contact customer service for replacement part.
● Estimated Assembly Time: 30 - 45 minutes
● Tool Required for Assembly (not included): Flathead screwdriver, Phillips screwdriver, Pliers, Electrical tape,
Wire cutter, Safety glasses and (9) 100W A19 medium base bulbs
● Helpful Tools (not included): Wire strippers.
.
PREPARATION
Fixture Loop
Nipple
Fixture Assembly
Crossbar
Lock Washer
Hex Nut (1/4 IPS Nipple)
1 4 IPS Nipple
/
STEP 2:
a. Thread one Hex Nut (1/4 IPS Nipple) onto top end of
the Nipple.
b. Place one Lock Washer over the top end of the Nipple
and then thread the Nipple into the center hole of the
Crossbar. Hand-tighten until snug.
c. Using pliers, thread the Hex Nut (1/4 IPS Nipple)
against the Crossbar and hand-tighten until snug.
Pliers is required on this step.
STEP 3:
a. Drill a 5/8” diameter clearance hole on the top inside
center of the Outlet Box and through the Structural
Support Member.
b. Place Crossbar onto the Outlet Box and line up
Mounting Holes with a set of holes on Crossbar.
c. Thread Outlet Box Screws into the Mounting Holes on
the Outlet Box and tighten until snug to secure the
Crossbar.
d. Using portable screwdriver, thread Mounting Screws
into the Structural or Bridging Member and tighten until
snug.
Crossbar
Outlet Box
Outlet Box Screw
not supplied
(
)
Mounting
Screw
Structural or
Bridging Member
Mounting Hole