Installation instructions, Step 7, Step 8 – Quoizel DH5009AN Duchess User Manual
Page 4
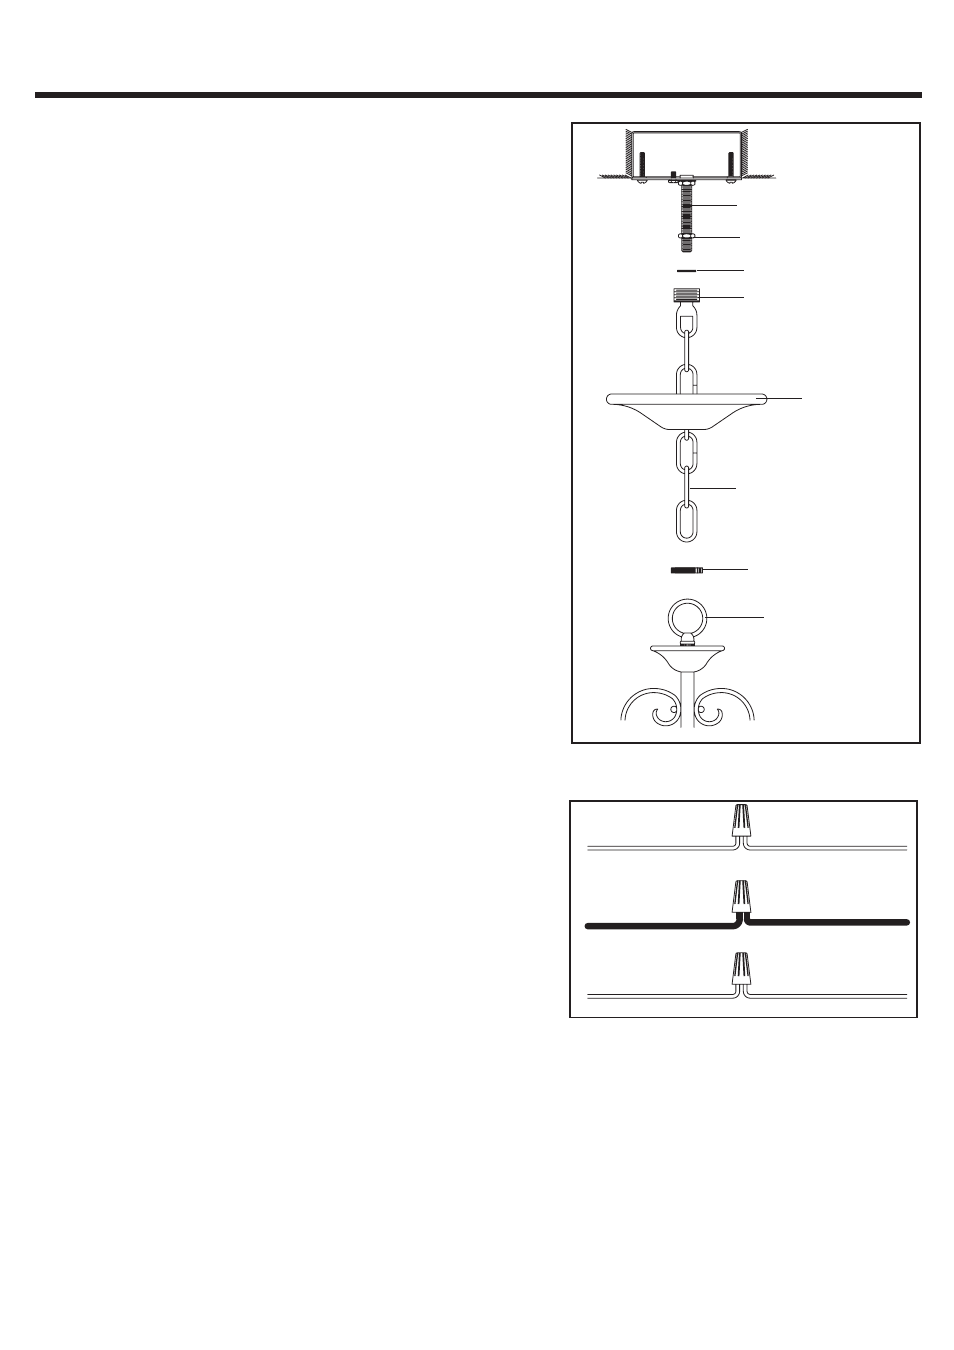
INSTALLATION INSTRUCTIONS
4 OF 5
Nipple
Lock Washer
Canopy Chain Loop
Ceiling Canopy
Fixture Chain
Canopy Lock Ring
Hex Nut
Fixture Loop
STEP 7
:
a
Adjust the Fixture Chain to your desired length by
removing the links if needed
Please note that depends on chain material
thickness
you might be required to use chain pliers to
spread links open
b
Pull the supply wires through the Fixture Chain
alternating links
And then pull the wires through the
following components in turn
Canopy Lock Ring
Ceiling Canopy
Canopy Chain
Loop
Lock Washer
and Nipple
c Place Lock Washer over the end of the Nipple and
thread the Canopy Chain Loop onto the end of the
Nipple
d
Using pliers
thread the Hex Nut against the Canopy
Chain Loop and tighten until snug
e
Attach one end of the Fixture Chain onto the Fixture
Loop and attach the another end of the chain onto the
Canopy Chain Loop
f
Refer to Step 8
Wire Connections to connect wires
g
Push the Ceiling Canopy upward over the Outlet Box
h
Thread the Canopy Lock Ring onto the Canopy Chain
Loop and tighten until snug to secure the Ceiling
Canopy
.
.
*
,
.
.
.
:
,
,
,
,
.
.
.
.
,
.
.
.
.
-
.
.
.
.
.
WHITE OR RIBBED
BLACK OR RED WIRE
(
)
FROM HOUSE
GROUND WIRE
GROUND WIRE
FROM HOUSE
FROM FIXTURE
WHITE OR RIBBED
FROM FIXTURE
FROM HOUSE
FROM FIXTURE
BLACK OR SMOOTH
STEP 8
:
*
(
)
.
.
.
(
)
(
)
.
(
)
(
).
.
.
Use Wire Connectors not supplied to connect the
wires
a
Connect the House Ground Wire to the Fixture Ground
Wire.
b
Connect the House White
or Ribbed
Wire to the
Fixture Supply Wire White or Ribbed Side .
c Connect the House Black or Red
Wire to the Fixture
Supply Wire Black or Smooth Side
d Wrap each connection with approved electrical tape
and carefully stuff all of the connected wires into the
Outlet Box
STYLE NUMBER DH5009AN, DH5009PN
: