Operation – Triton TA1200BS User Manual
Page 7
6
GB
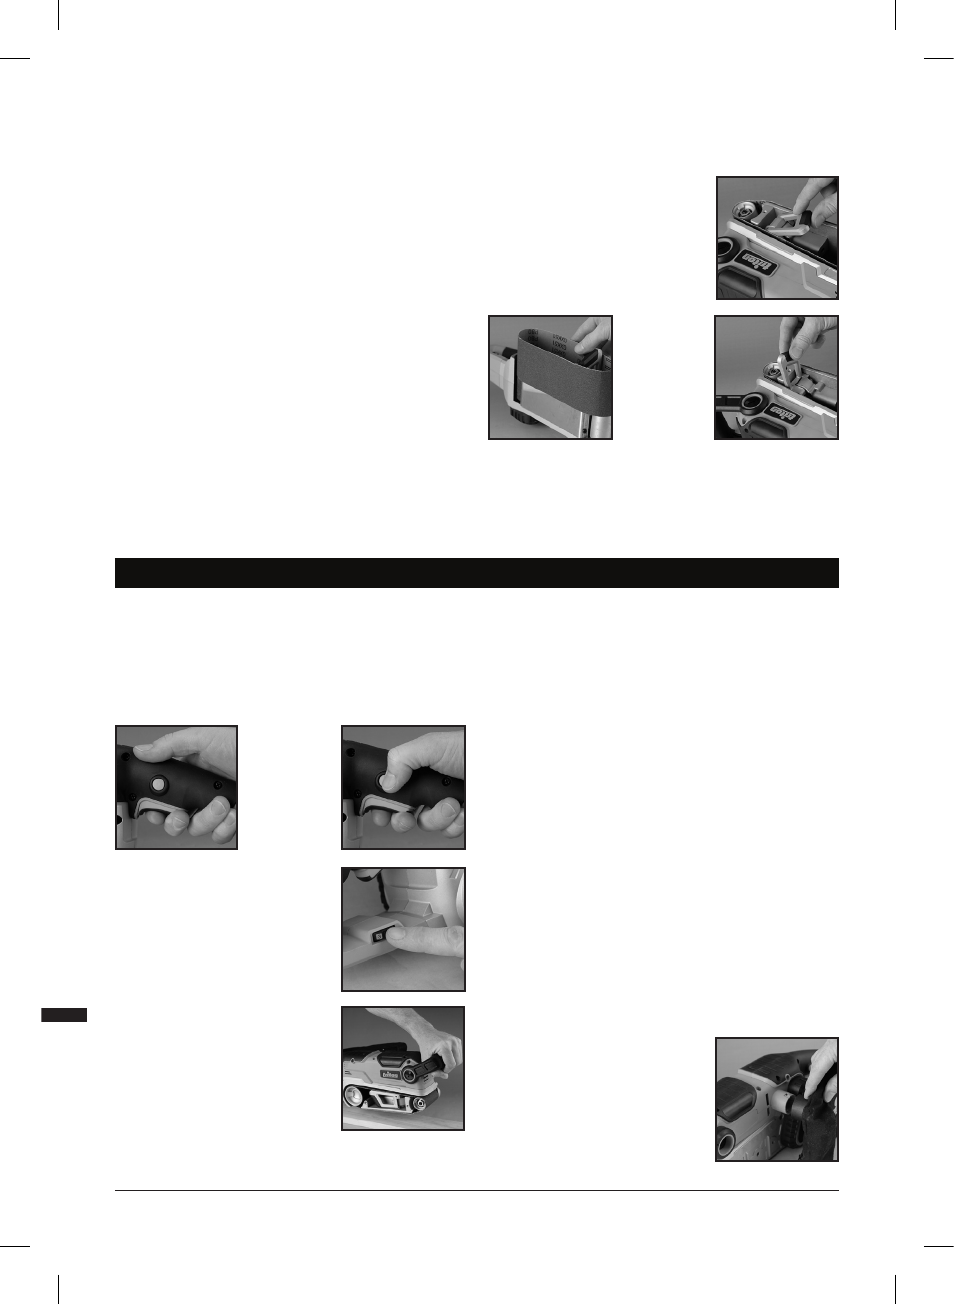
ATTACHING A SANDING BELT
WARNING: Always disconnect from the power supply before carrying out any
inspection, maintenance or cleaning.
1. Turn the Belt Tension Lever (12) to release the tension on the belt and slide
off the old belt
2. Check the replacement belt is well jointed and is not frayed at the edges
3. Slip the new belt into position, making sure the rotation arrow on the inside
of the belt is pointing in the same direction as the arrow on the side of the
sander
4. Turn the Belt Tension Lever (12) to increase the tension on the belt
5. Plug the sander into a power point and, maintaining a firm grip on the
sander, squeeze the On/OffTrigger (9) and allow the belt to rotate for a
short period
SWITCHING ON AND OFF
Note: The power ON neon will illuminate when power is available.
1. Squeeze the On/Off Trigger Switch (9) to start the sander
2. Squeeze the On/Off Trigger Switch and press the Lock-On Button (3), to
‘lock’ the sander on
3. Squeeze the On/Off Trigger Switch again and release to switch the sander
off
ADJUSTING THE SPEED
• The speed can be adjusted to suit the
material that requires sanding
• To adjust the speed, move the Variable
Speed Control Knob (14) until the correct
speed is attained
SANDING
WARNING: Always wear eye protection, an
adequate dust mask, hearing protection and
suitable gloves, when working with this tool.
Note: Always use clamps to secure your
workpiece to the workbench wherever possible.
WARNING: Do not use this sander for sanding
magnesium.
Note: Always ensure the belt is in good
condition.
Before Use / Operation
6. Whilst the belt is running, adjust the Tracking Adjustment Knob (6) to
align the belt to the centre of the Drive Roller (13). Repeat until the belt is
correctly aligned (only slight rotation of the knob is required to track the
belt), then squeeze the trigger for a few seconds to allow the belt to adjust.
Run the sander for a minute or so to ensure
correct alignment is achieved before using
the sander on a workpiece
WARNING: Do not continue to use the sander if
the sanding belt is worn or damaged.
WARNING: Do not use the same sanding belt
for wood and metal. Metal particles become
embedded in the belt and will scour a wooden
surface.
ADJUSTING THE FRONT HANDLE
1. Pull down the Handle Lock (7) then push or pull the handle into the desired
position
2. Push the handle lock back into the lock position
OPERATION
1. Connect the tool to the power supply
2. Squeeze the On/Off Trigger Switch (9) and allow the belt to reach the
desired speed before lowering the belt on to the surface of the workpiece
3. Press the Lock-On Button (3) if you require continuous operation
4. Lower the unit onto the surface of the workpiece and apply slight pressure
5. Sand in the direction of the grain, in parallel, overlapping strokes
6. To remove paint or smooth very rough wood, sand across the grain at 45°
in two directions, and then finish in the direction of the grain
7. Lift the sander off the workpiece before switching off the power
8. Remember to keep hands away from the moving belt, as it will continue to
run for a short time after the machine is switched off
Note: For optimum dust removal, empty the dust bag when it is no more than
half full.
WARNING: Do not use the dust bag when sanding metal. The hot metal
particles could cause residual wood dust or the bag itself to catch fire. A
vacuum cleaner adaptor can be used to connect a household vacuum cleaner
or workshop dust extraction system to the sander. The adaptor fits into the dust
extraction port (2).
EMPTYING THE DUST BAG (IF FITTED)
WARNING: Always switch off and disconnect from the power supply before
detaching the dust extraction system.
1. To remove dust bag, rotate outwards to disengage the bayonet, then pull
off
2. Open the bag, empty and refit (see ‘Connecting the dust extraction system’)
Note: If the sanding dust contains harmful
substances, such as particles from old paint,
varnish, surface coatings etc, always dispose of
according to laws and regulations.
WARNING: For optimum dust removal, empty
the dust bag when it is no more than half full.
Note: Always clean the tool THOROUGHLY when
switching from sanding wood to sanding metal
and vice versa.
330125_Z1MANPRO1_14/04/14.indd 6
27/08/2014 11:02