Prepare to install front suspension – Trail Master Suspension TM102N GM 1500 4WD/2WD SUSPENSION 4 LIFT KIT User Manual
Page 4
4
TM102N
Revised
2.4.14
Prepare to Install Front
Suspension
1. Place the vehicle in neutral. Place your floor
jack under the frame and raise the vehicle.
Place jack stands under the frame rails and
lower the frame onto the stands. Remove the
jack and place the vehicle back in gear, set the
emergency brake, and place blocks both in
front and behind the rear wheels.
2. Remove the front wheels from the vehicle.
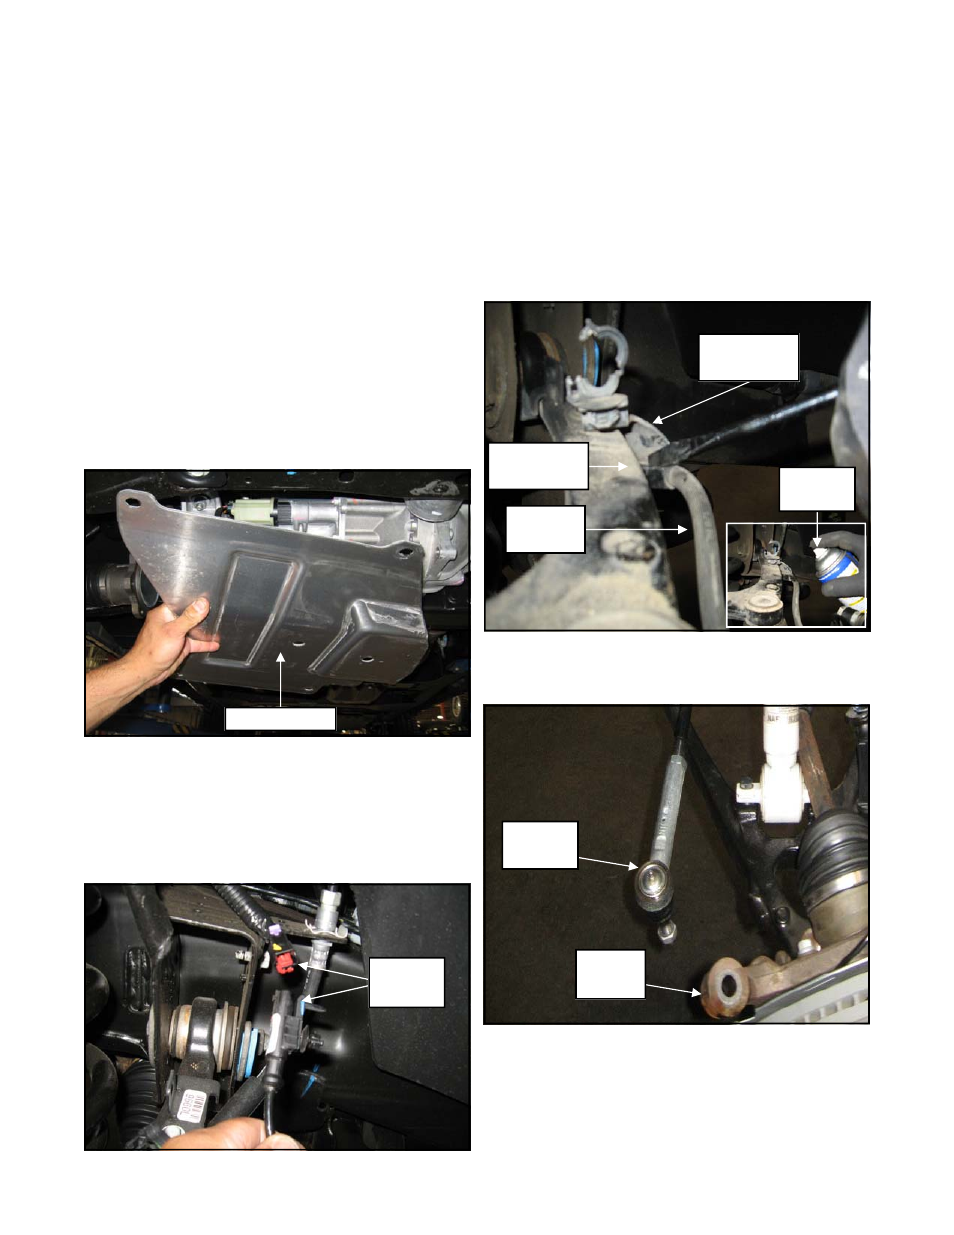
3. Unbolt and remove the OE lower skid plate
from the vehicle. Save the hardware for rein-
stallation.
4. Work on one side of the vehicle at a time.
5. Unclip the ABS line from the bracket on the
top of the control arm pocket. Unplug the
ABS wiring connector.
NOTE: Be careful not to damage the
ABS line during removal.
8. Remove the ABS line from the OE upper con-
trol arm. Leave bracket bolted to arm.
9. Using a flat blade screw driver carefully open
the upper control arm brake line retaining
bracket. Carefully, remove the rubber brake line
from the bracket. NOTE: Spraying the brake
line with lubricant will aid in it’s removal. Be
very careful to not damage the rubber line in
any way during it’s removal from the bracket.
10. Remove the tie rod end nut. Using the proper
tool, carefully separate the outer tie rod end
from the OE knuckle.
11. Unbolt the sway bar end links from the sway
bar. Save the links and hardware for reinstal-
lation.
OE Skid Plate
OE
Knuckle
OE Tie
Rod End
ABS Line
Clip
OE Brake
Line Bracket
OE Control
Arm
OE Brake
Line
Spray
Lubricant