Warning – SONIQ AWM1701 User Manual
Page 3
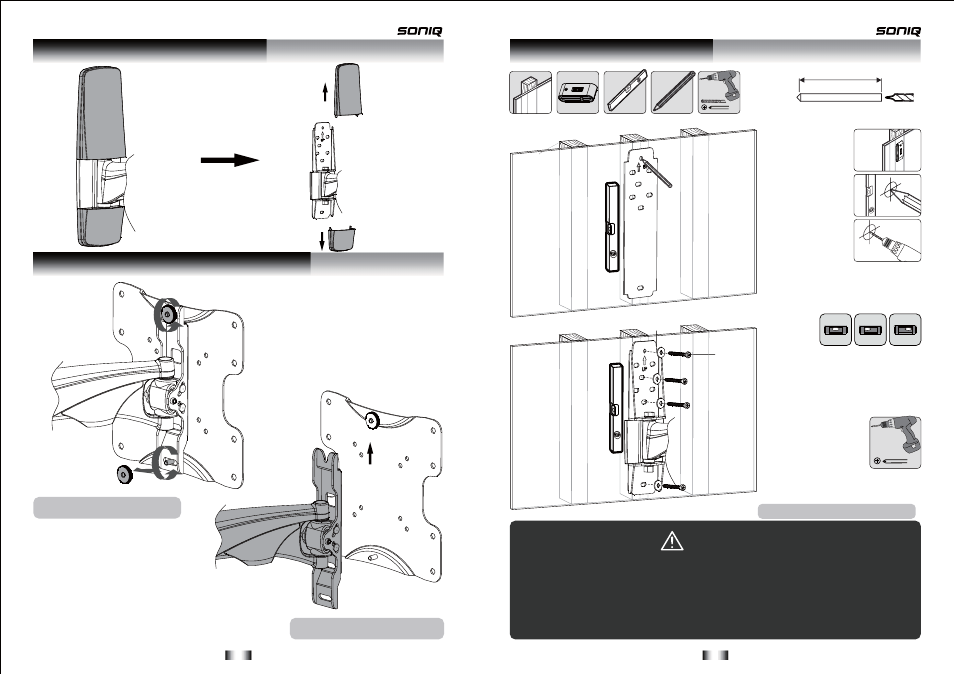
W-A
W-C
WARNING
• Make sure that mounting screws are anchored into the center of the studs. Use of a stud finder
is highly recommended.
• Installers are responsible to provide hardware for other types of mounting situations.
• Installer must verify that the supporting surface will safely support the combined load of the
equipment and all attached hardware and components.
3a. Wood Stud Wall Mounting:
55mm/2.2"
ø 4.5mm
ø 3/16"
2
1
Drill pilot holes
3
Screw the wall
mount onto
the wall
X
X
√
with the up arrow of the plate upward
1. Removing the Decorative Covers
2. Disassemble VESA Plate from Wall Mount
Loosen the upper thumbscrew,
Remove the lower thumbscrew
Remove VESA plate
-3-
-4-
See also other documents in the category SONIQ For Home:
- ABT100 (2 pages)
- AHW100 (2 pages)
- ANB300 (7 pages)
- AWM1521 (6 pages)
- AWM1701 Giftbox (1 page)
- AWM2220 (1 page)
- AWM2301 (6 pages)
- AWM3001 (3 pages)
- AWM3003 (1 page)
- AWM3201 (6 pages)
- B100 (20 pages)
- B500 (17 pages)
- B501 (20 pages)
- CBE100 (1 page)
- CSA10 (1 page)
- CSA20 (3 pages)
- CSA30 (3 pages)
- CSA31 (3 pages)
- CSA32 (6 pages)
- CSA50 (3 pages)
- CWK100 (1 page)
- CWR150NS (90 pages)
- CWR300ND (101 pages)
- D100 (34 pages)
- D101 (21 pages)
- D150 (36 pages)
- D301 (22 pages)
- DVP1000 (41 pages)
- DVP500 (22 pages)
- DVP720 (23 pages)
- DVR150 (54 pages)
- DVR200 (33 pages)
- E16Z11B (37 pages)
- E19Z10A (58 pages)
- E22Z10A (34 pages)
- E23Z13A REV AC (21 pages)
- E26Z11B (45 pages)
- E32S12A (25 pages)
- E32W13A (17 pages)
- E32W13B (2 pages)
- E32Z10A (35 pages)
- E40S12A (25 pages)
- E40V14B (26 pages)
- E40W13A-AU(general function similar to E32W13A) (2 pages)