Sky-Watcher AZ EQ6 User Manual
Page 13
13
Fig. 3.2a
Fig. 3.2b
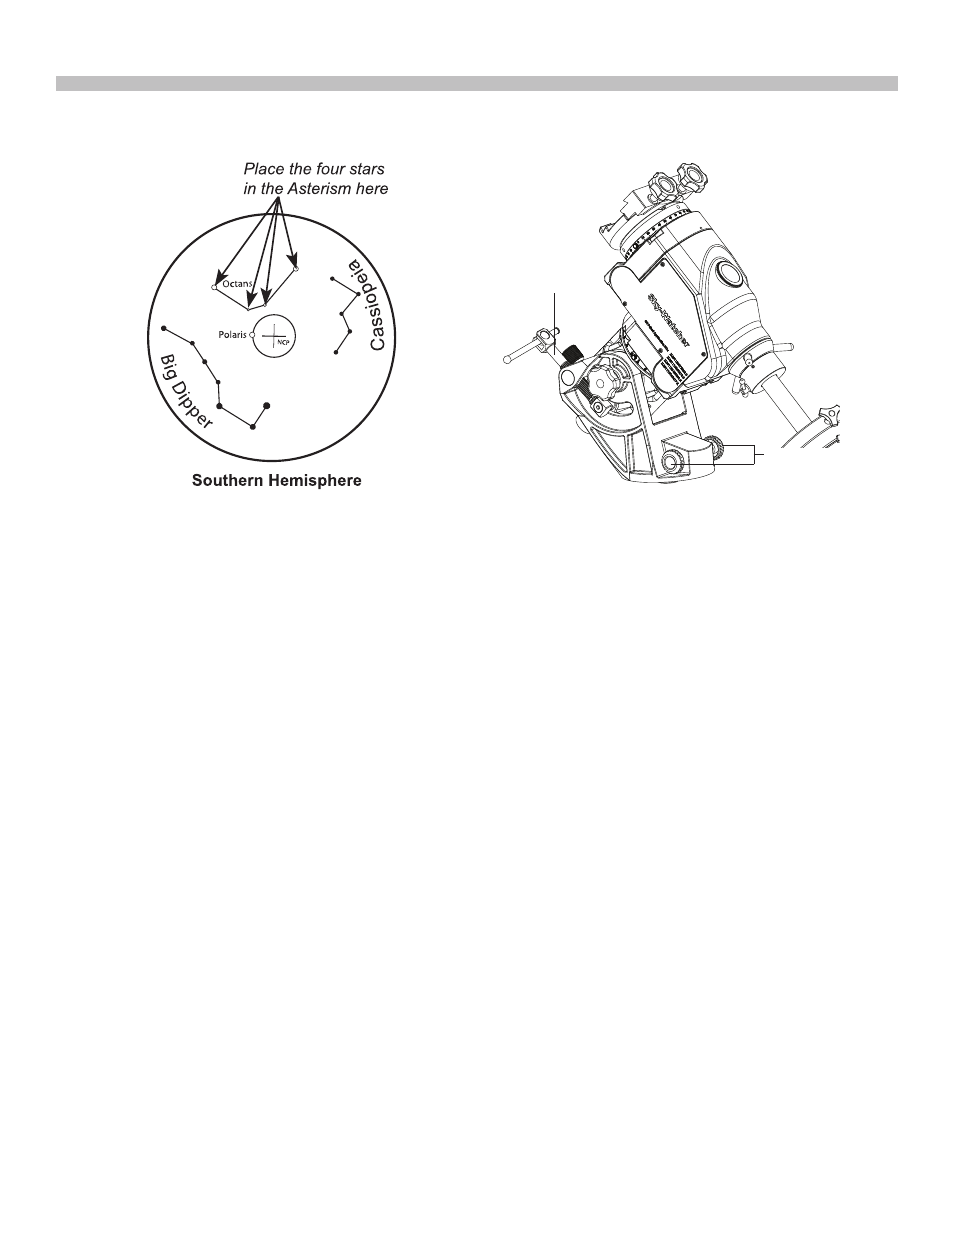
3.2 Alignment
Once the mount is powered up and the polar scope is illuminated, the pattern in the above
figure
(Fig. 3.2a)
should be visible in the field of view (FOV) of the polar scope. If the image
appears blurred, rotate the knurled ring of the polar scope’s eyepiece to focus.
PART III: POLAR ALIGNMENT
1. For observing in Northern Hemisphere: Find the Polaris (The brightest star near the
North Celestial Pole) in the polar scope; then use the jackscrew and the two azimuth ad-
justment knobs to move the Polaris to the proper position in the FOV of the polar scope.
(Refer to the upcoming section “The Orientation of Polaris in Polar Scope”).
2. For observing in Southern Hemisphere: In the FOV of the polar scope, locate the 4 dim
stars (Around Magnitude 5 to 6) which form the pattern like the “Octans” drawing in the
polar scope
(refer to Fig. 3.2a)
. Loosen the R.A. clutch and rotate the R.A. axis to align the
orientation of the “Octans” drawing to the 4 stars. Then use the jack screw and the azimuth
adjustment knobs to move the 4 stars to the 4 small circles of the “Octans” drawing.
Jackscrew
Azimuth
adjustment
knobs