Installing stands (cont’d) – Revel Gem User Manual
Page 8
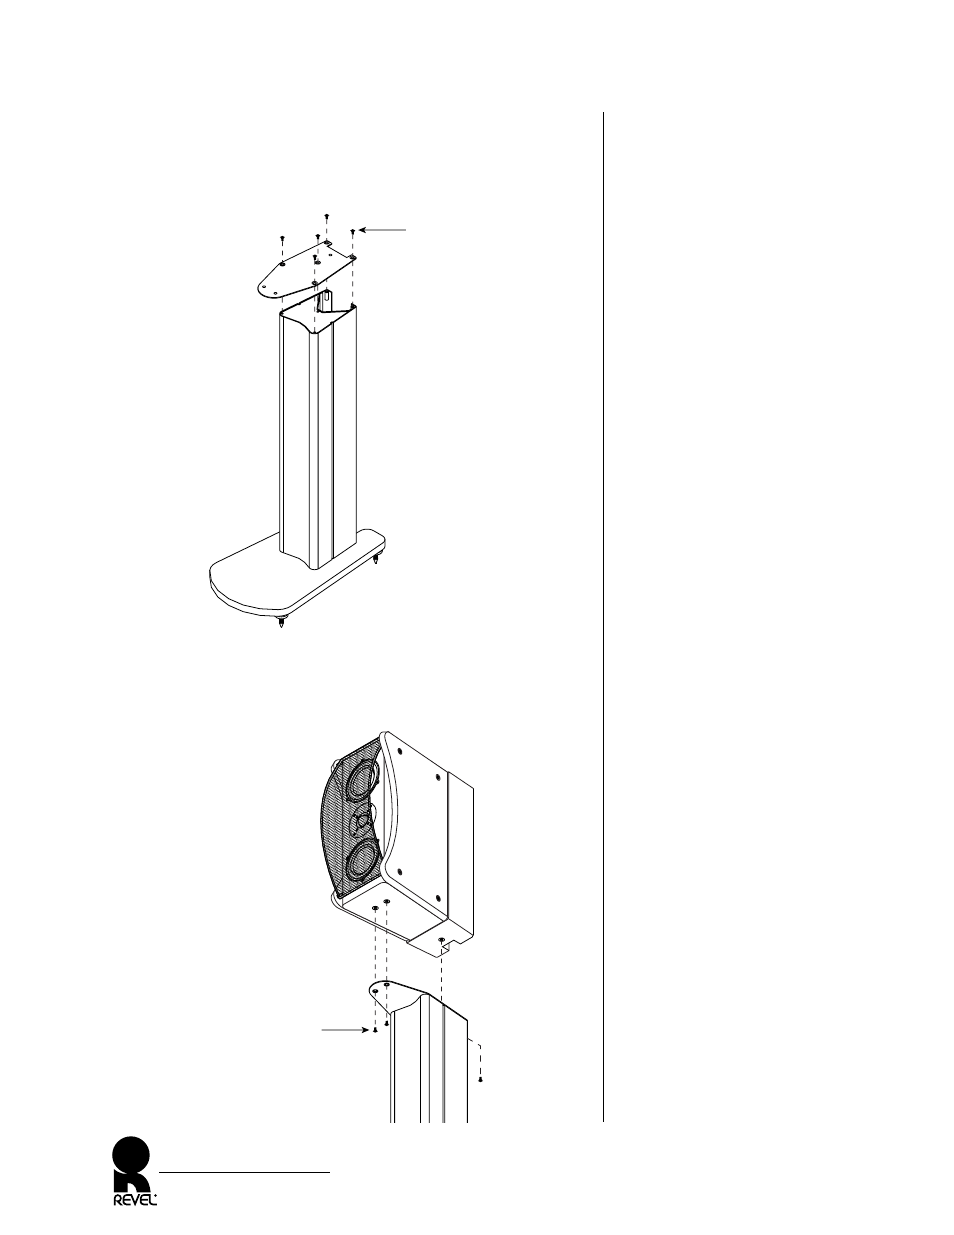
Figure 6. Installing the top plate.
Figure 7. Fastening the REVEL
ULTIMA GEM loudspeaker to
the assembled stand.
INSTALLING STANDS (CONT’D)
4. Place the stand in its upright position and install the top plate
with five short screws, as shown in Figure 6.
5. Fasten a loudspeaker to the stand with three short screws, as
shown in Figure 7. Read the Placement section before making
final placement and spike adjustments. Repeat steps 1 through 5
for the other stand.
REVEL ULTIMA GEM
Owner’s Manual
8
(5) Short Screws
(Start All Screws
Before Tightening)
Top Plate
REVEL ULTIMA GEM
(3) Short Screws
(Start All Screws
Before Tightening)
See also other documents in the category Revel Acoustics:
- C363 (8 pages)
- C540 (7 pages)
- W970 (9 pages)
- LCR8 (9 pages)
- M8 (8 pages)
- C10 (9 pages)
- M10 (12 pages)
- B110 (11 pages)
- S12 (24 pages)
- S206 (10 pages)
- C205 (10 pages)
- Voice 2 (34 pages)
- M12 (18 pages)
- Gem 2 (32 pages)
- M105 (8 pages)
- F12 (22 pages)
- F206 (13 pages)
- Studio 2 (30 pages)
- C360DT (9 pages)
- C760L (9 pages)
- IC80 (14 pages)
- IC15 (8 pages)
- W890 (9 pages)
- I20 (28 pages)
- IW90 (12 pages)
- B12 (28 pages)
- Sub 30 (32 pages)
- B15a (28 pages)
- S30 (24 pages)
- Embrace (24 pages)
- C32 (24 pages)
- C50 (24 pages)
- C30 (24 pages)
- Voice (19 pages)
- M22 (20 pages)
- M20 (20 pages)
- F30 (20 pages)
- Studio (24 pages)