Wall-mounting instructions – Revel S12 User Manual
Page 15
15
REVEL Concerta S12
Owner’s Manual
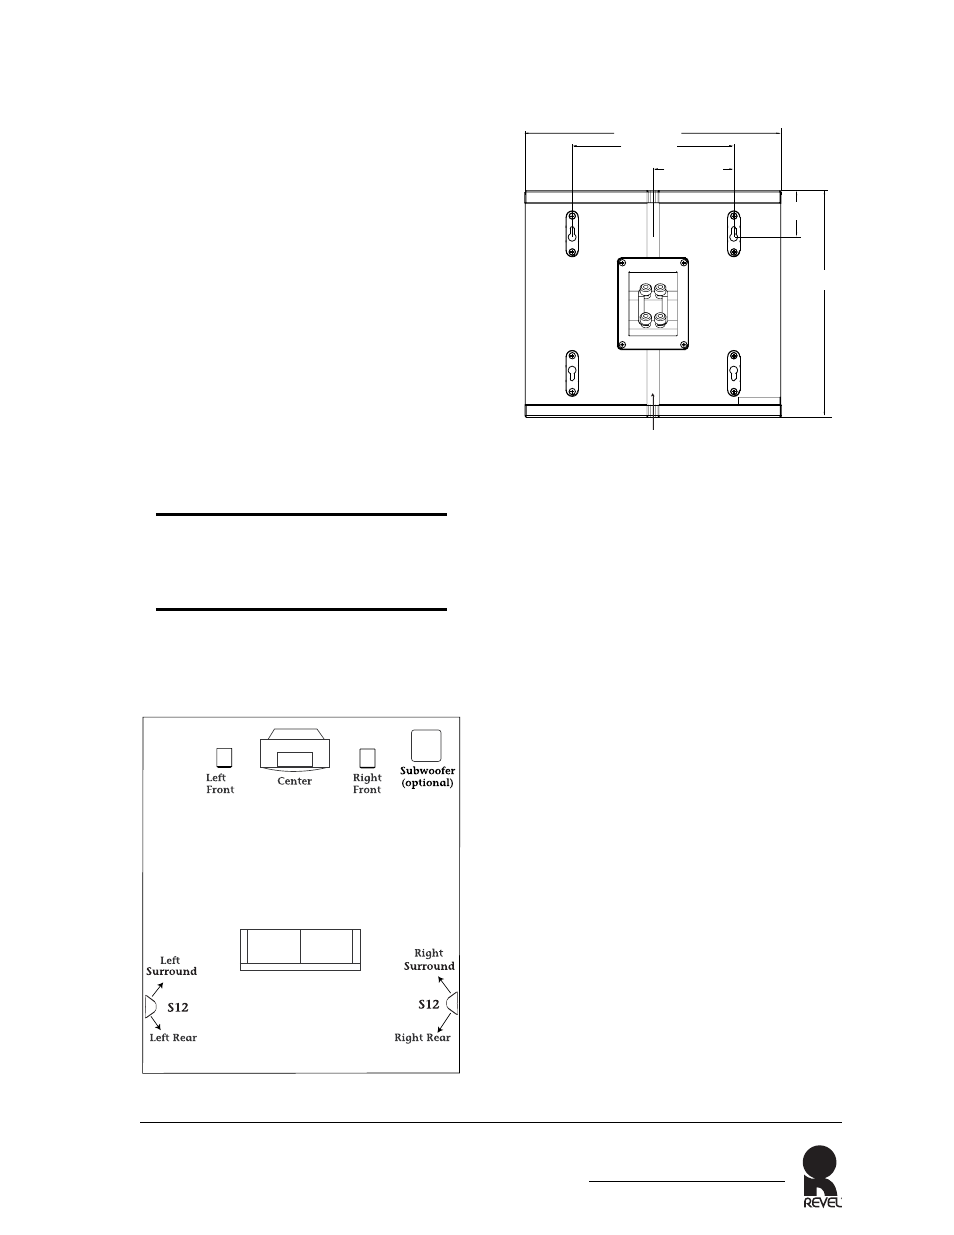
Side and Rear Discrete Channels
The S12 also allows you to use a single S12
to function as both side and rear (discrete)
channels in a 7-channel surround system.
The bulleted items below indicate impor-
tant placement considerations for use of a
single S12 functioning as side and rear
channels in a 7-channel installation.
•
Mount the S12s on the side wall(s) fac-
ing the opposite wall as shown in
Figure 15 (below). Invert the S12 placed
on the right wall.
•
The S12s should be placed behind the
primary listening location, at an angle
from 5 to 30 degrees. If there are multi-
ple rows of seating, place them directly
behind the last row of seats.
•
Set to Bipole. Use of the other disper-
sion modes for this configuration
would not allow for proper operation.
Note
For this configuration, if the S12s are
located very close to the rear walls, place
the two S12s on the rear wall.
WALL-MOUNTING
INSTRUCTIONS
The S12 is designed for easy wall-
mounting. The S12 features four rear key-
holes, as shown in Figure 16 (above),
which allow for either left- or right-side
wall placement (either up-right or invert-
ed). The following tools are required for the
installation:
•
(2) 1.5-inch (38mm) #8 wood screws
•
Screwdriver
•
Wall template (included)
•
Pencil.
To mount the S12:
1. Locate wall stud. (If a stud is not avail-
able, use an appropriate wall anchor).
2. Position the supplied wall-mount
template on the wall in the desired
speaker location. Use a pencil to make
two markings per speaker.
3. Drive wood screws into the wall using
the markings placed in step 2 as a
guide. Leave a 3/16-inch (5mm) space
between the wall and screwhead.
8-3/8" (213mm)
13.25" (336.6mm)
2-7/16"
(62mm)
11.75"
(298.5mm)
Wire Channel
4-3/16" (107mm)
Figure 16: Wall Mounting Keyholes
Figure 15: Two Discrete Channels Side Placement for
7-Channel System