Glyph GT 062 3TB Addendum User Manual
Page 4
9. Power off the GT 062 3TB, unplug the FireWire cable, plug the cable back in, then power it back on again.
This is important to force Mac OS to “forget” any current drive information.
10. If you get the Disk Insertion dialog box, this time click Initialize which will open Disk Utility. If not, open
Disk Utility from your System Volume > Applications Folder > Utilities Folder, and format the new volumes.
Mac OS X formatting instructions can be found in the GT 062 manual.
Instructions for creating a RAID 0 or Concatenated (Spanning) disk using Disk Utility in OS X
Caution: This procedure will destroy any data currently on the drive. Before formatting a drive, save any important
data it contains.
1. Configure your GT 062 3TB in JBOD mode using Glyph Manager as per previous directions.
2. Open Disk Utility:
-Double click on your internal hard drive mounted on the desktop
-Open Applications Folder > Utilities Folder > double click on Disk Utility
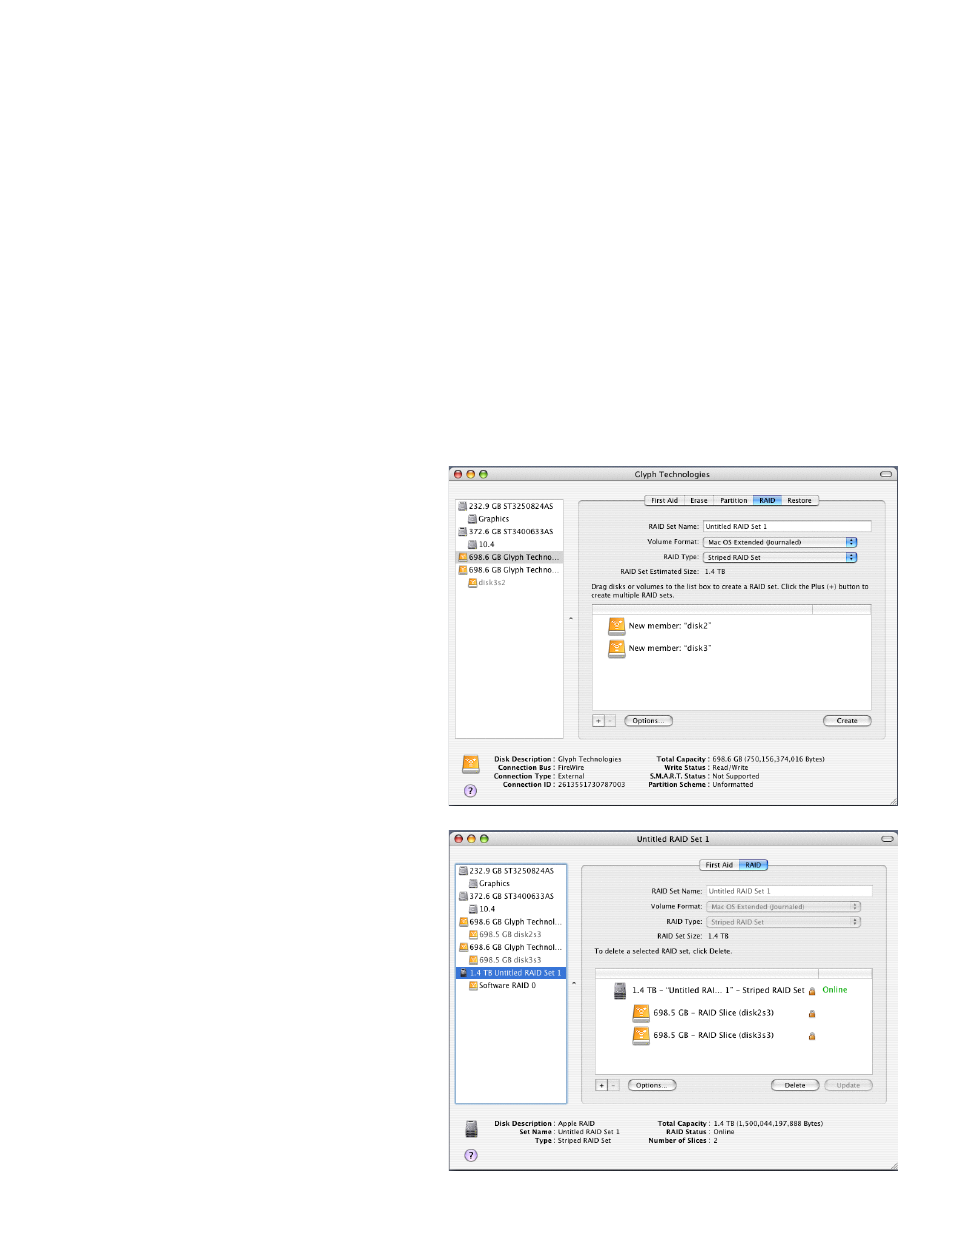
5. Once the RAID has finished being created,
your drive should mount on the desktop and
Disk Utility should show information like the
example on the right.
NOTE: RAID 0 and Concatenated disks (Span-
ning) created with Disk Utility are not supported
with Pro Tools.
3. Select the RAID tab in Disk Utility.
4. Drag your two GT 062 JBOD drives from the list
on the left into the list box on the right. Select a
Striped RAID set under “RAID Type”, and give it
a name under “RAID Set Name”. Select Mac OS
Extended (Journaled) under “Volume Format”
5. Click the “Create” button.