Ogue – ExpoImaging Rogue Gels for the Rogue Grid User Manual
Page 2
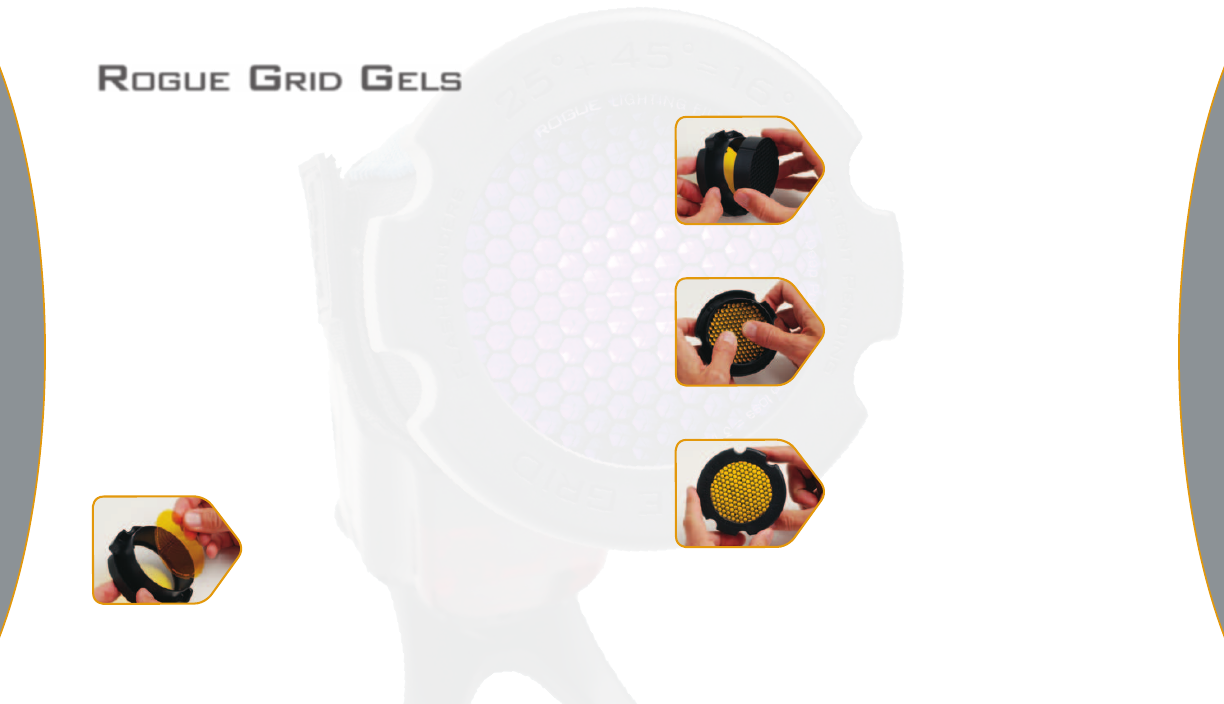
2.
Insert Grid(s) Into Grid Bezel
Insert one, or both of the honeycomb
grids into the bezel. Align the grooves
in the grid with the ridges on the
inside of the bezel.
3.
Push Grid(s) into Grid Bezel
Push the grid into the bezel until it
is flush with the front against the
Rogue Gel.
4.
Ready To Use
The gelled Rogue Grid is now ready
to use. Multiple Rogue Gels can be
stacked to combine effects.
More information can be found online at
expoimaging.com
The f/stop loss values printed on our Rogue Gels were
measured using a Sekonic light meter in a controlled test.
These values compare the metered exposure of the bare
flash with the metered exposure using the Rogue Gels placed
over the flash head.
Tip: Your flash will automatically compensate for any f/stop
loss when shooting with the flash set to TTL mode.
Rogue Gels are processed with paper between each Gel to
help protect them during the manufacturing process. The
paper can be removed after purchase.
Filter Insertion Instructions
r
ogue
g
rid
g
eLs
© ExpoImaging, Inc., 2011
1.
Insert Gel Into Grid Bezel
To insert a Rogue Grid Gel into your
Rogue Grid bezel, simply align the
indentations on the gel with the
ridges on the inside of the bezel.