Watts RD-300-F User Manual
Watts Accessories for water
RD-100-F / RD-300-F
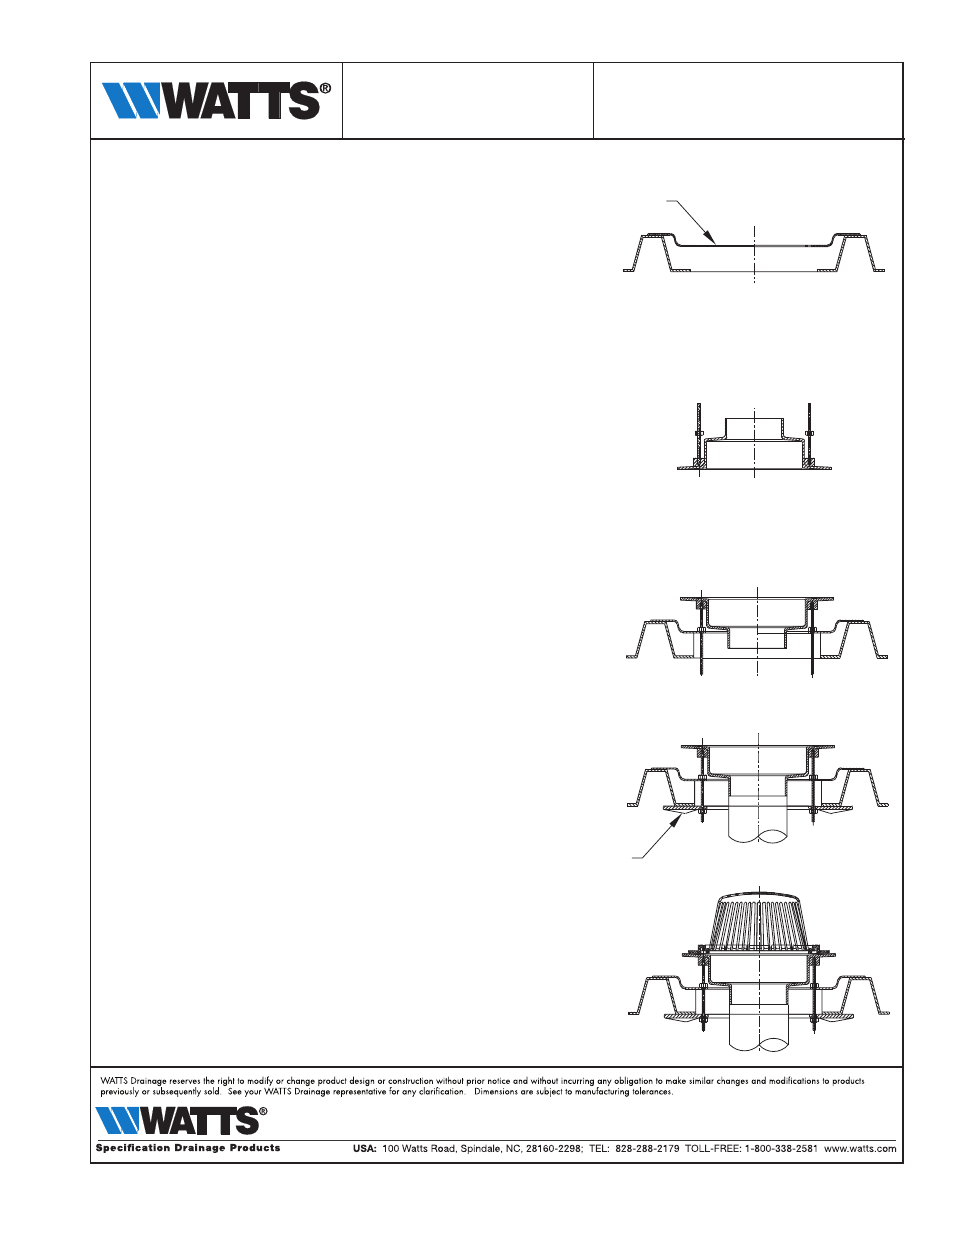
INSTALLATION
Installation Instructions RD-100-F / RD-300-F Roof Drains
Adj. Extension Flange
Installation Instructions
1) Create an opening in the roof deck:
14" for RD-100 Series
18-1/2" for RD-300 Series.
2) Place "F" flange over the opening. The flange may be
fastened to the roof deck if desired.
3) Invert the roof drain body, and turn 8" all-thread rod
into bottom lugs.
4) Thread hex nuts on to all-thread rod. Set nuts to desired
height for suspension of drain above roof deck, flush with
roofing insulation. Drop flat washers over studs.
Note: If drain is to be set flush with roof
deck (tapered insulation), do not use hex nuts and
washers - drain body will fully recess into "F" flange
for flush-with-deck installation.
5) Turn drain upright and lower onto "F" flange, aligning
all-thread rod with "F" flange holes.
6) From underside of roof, align "D" underdeck clamp holes
with all-thread rod. Raise "D" underdeck clamp against
underside of roof deck, and secure with hex nuts and
washers.
7) Install upper flashing clamp and dome as required to suit
finished roofing system.
Step 1,2
Step 3,4
Step 5
Step 6
Step 7
Flange (-F)
Underdeck
Clamp (-D)
IS-WD-RD-F 0335
EDP# 1916099
RD-100-F/RD-300-F-Installation