Installation – Watts PWFCTTM User Manual
Page 2
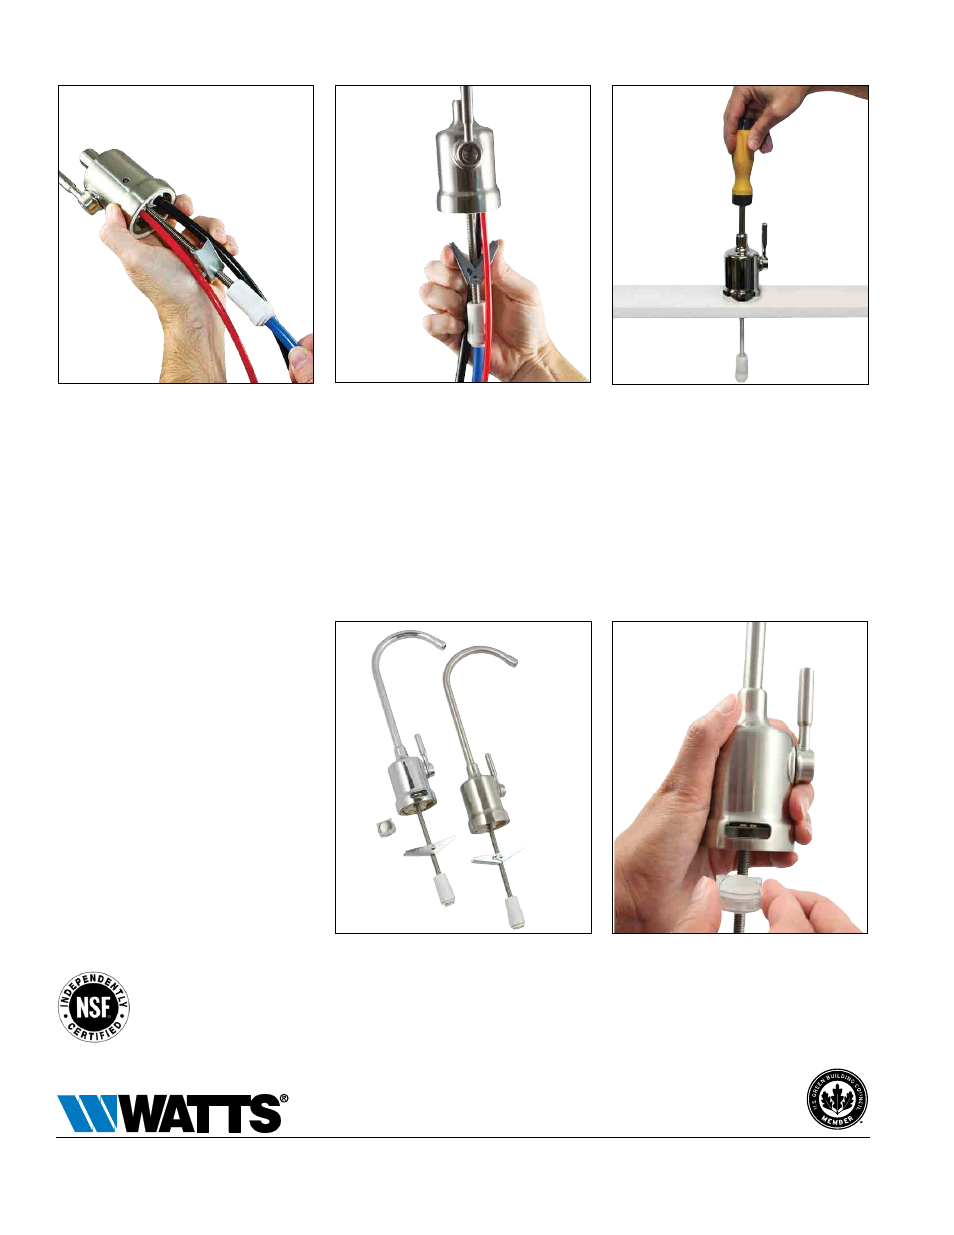
Two Faucet Types
Monitor and Standard
Faucet with battery operated
Filter change monitor
Certified by NSF International
against NSF/ANSI Standard 42
for material requirements.
Installation
Install Tubing
Watts top mount faucets come with quick
connect fittings for both air gap and non-
air gap installations. To start the installa-
tion process, install tubing for feed water
and air gap connections, if an air gap is to
be used.
Install Faucet
A. Place the O-ring (provided) around the
hole, drilled in the counter top.
B. Working from the top, push tubing
through the hole in the counter top;
C. Squeeze the wings of the toggle bolt
so it drops through the hole in the
counter top.
Secure Faucet To Counter Top
Finally, remove spout from faucet, and
tighten the Phillips head screw inside the
faucet with a Phillips head screwdriver.
The top mount faucet installation is now
complete, without the need to crawl
below the sink!
Monitor faucets eliminate
guesswork and remind
customers when cartridge
replacements are necessary
to provide top water
quality assurance!
How they work:
• Monitors track time and estimate gal-
lons based on time.
• LED flashes red after six months or
after it estimates 2,000 gallons of water
have been used by the system.
• Each time cartridges are replaced a
new battery is recommended.
• New battery will reset the monitor and
LED indicator is again blue.
Battery Replacement: WTMFBAT
ES-WQ-PWFCTTM 1225
© 2012 Watts
USA: Tel. (800) 224-1299 • www.watts.com
Canada: Tel. (888) 208-8927 • www.watts.ca
A Watts Water Technologies Company