Reference illustrations, Installation tip – Watts PWSCAB30K User Manual
Page 4
4
Figure 4
Figure 5
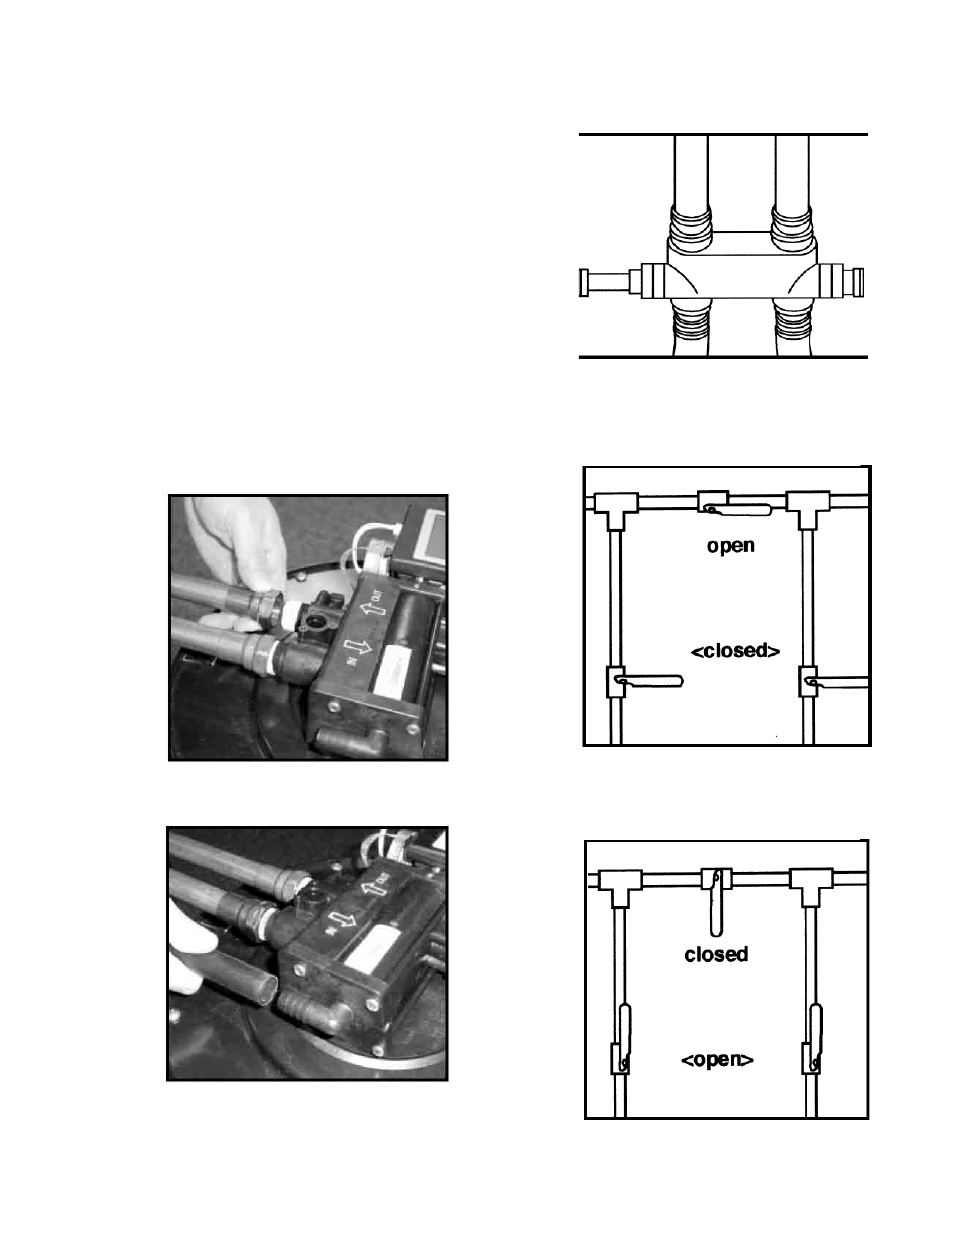
Figure 6
In Bypass Position
In Service Position
Reference Illustrations
Installation Tip
When preparing the male threaded fittings of the I/O adapter,
follow the guidelines to avoid damage to the plastic pipe
threads.
1. For best results, use
1
⁄
2
" wide Teflon
®
tape and wrap the threads
three times with each consecutive wrap on top of the previous
wrap. To prevent tearing of the tape, use Teflon
®
paste on the first
two threads only. This lubricates the tape and fills the small void
areas that may exist between the threads. When the joint is com-
plete, there will be a small bead of sealant at the fitting interface
indicating a properly joined connection.
2. When preparing copper fittings, it is always advisable to use a
union where there is a threaded connection to facilitate repairing a
potential leak in one of your soldered joints.
3. To prevent heat damage to the plastic pipe threads of the adapter,
prepare the copper tail assemblies ahead of time so they can cool
down before final assembly. The copper tube length should be a
minimum of 4
1
⁄
2
" long. To prevent cross threading, turn the fitting
counterclockwise until you feel the threads engage, then tighten.
Do not overtighten the fittings.
CAUTION NOTE: To avoid damage, do not allow heat from the
torch to be transferred to the plastic valve component.
Figure 2
Plumbing Connections
Copper, brass, plastic or other fittings may be used. DO NOT over-
tighten fittings.
Connecting Drain Line
Caution: The drain line must not be kinked, crimped or re-
stricted in any way. The drain line
1
⁄
2
" inside diameter cannot be
reduced in size.
Figure 3
for service or bypass
Teflon
®
is a registered trademark of E.I. Dupont de Nemours & Company.