Dulce Systems PRO FC g2 User Manual
Page 7
Page 13
PRO FC
g2
Installation and User’s Manual
4.2.
Disk Module Installation
Remove the front bezel. Install each marked Disk Module into the slot indicated.
Pull the Lock Pin to the right and insert drive tray fully, release Lock Pin to
secure.
DO NOT ship the PRO FC with the Disk Modules installed, the Disk
Modules MUST be packaged separately in a single or multi-pack to
properly protect them during shipment.
Rail mounted
to rack.
Slider
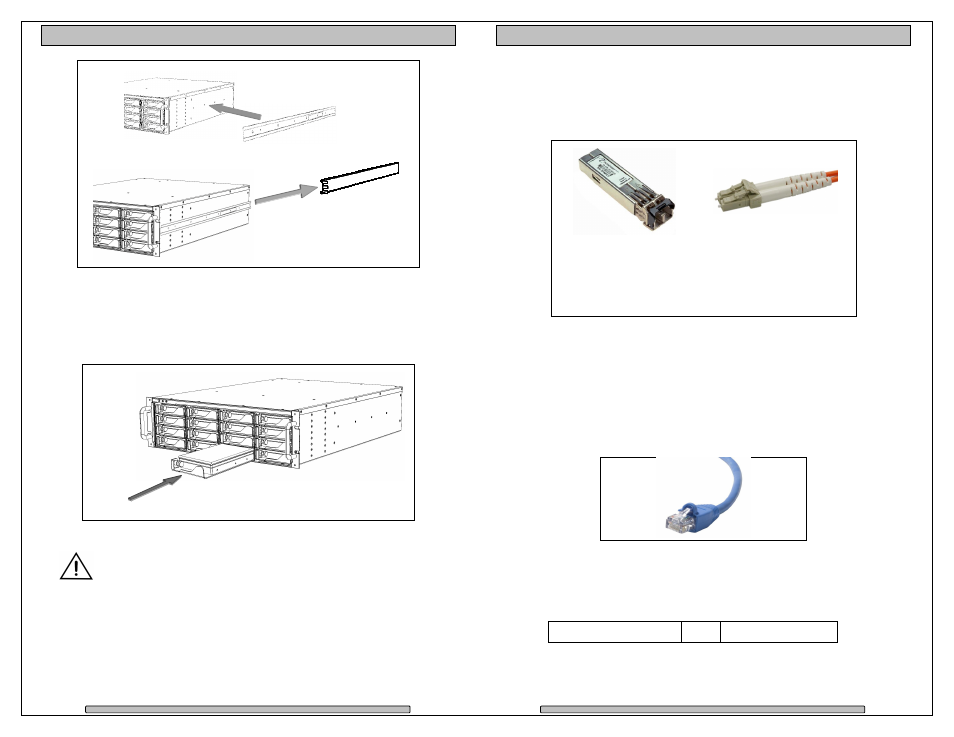
Page 14
PRO FC
g2
Installation and User’s Manual
4.3.
FC Cable Installation
Install the SFP into one of the FC ports in the rear of the PRO FC, then install the
LC to LC optical Fibre Channel Cable in to the SFP, connect the other end to
your FC HBA in the computer or the FC switch.
4.4.
Drivers
Drivers are not needed to operate the PRO FC. But the Fibre Channel adapter
the PRO FC connects to will need drivers, please refer to the requirements of the
adapter.
4.5.
Ethernet Configuration
The PRO FC uses the built-in Ethernet port for RAID management, connect the
PRO FC to your existing network.
The PRO FC will use the network DHCP for automatic IP Address assignment if
this is enabled on your network, otherwise the PRO FC defaults to the static IP
address below. After connection is made, the default static IP Address can be
changed at RAID Manager > Administration > IP Connection.
Auto Assign (DHCP)
or
169.254.32.10
LC to LC cable -
Remove the protective
tip covering. Insert into
SFP.
SFP -
Remove the
protective covering.
Insert into FC port
label up.