Bendix Commercial Vehicle Systems AD-IS EVERFLOW User Manual
Page 11
11
ASSEMBLY
1. Lubricate the smaller o-ring and check valve body with
a heavy-duty lithium grease.
2. Install this o-ring on the check valve body by sliding the
o-ring over the set of four tapered guide lands. The
o-ring groove holds the o-ring in its correct location.
3. At the other end of the check valve body, the spring is
installed over the set of four straight guide lands. When
the spring has been pushed to the correct location, the
check valve body is designed to hold the end of the
spring in position: be sure that the spring is not loose
before continuing with this installation.
4. Install the assembled check valve body/o-ring/spring
in the delivery port so that the o-ring rests on its seat
and the free end of the spring is visible.
5. Grease the adapter and the remaining larger o-ring and
install it onto the fitting.
6. Position the governor gasket, then insert the governor
mounting bolts through the governor and tighten (to
125 in-lbs). Note: Do not replace with a standard
compressor/governor gasket.
7. Re-attach the air line to the governor.
8. Before placing the vehicle back into service, check
to see that the system pressure now builds to full
operational pressure.
TESTING THE EVERFLOW
®
ASSEMBLY AIR DRYERS
Before placing the vehicle in service, perform the following
tests:
1. Close all reservoir drain valves.
2. Build up system pressure to governor cut-out and note
that one of the AD-IS
®
EverFlow
®
Assembly air dryers
purges with an audible burst of air, followed immediately
by approximately 30 seconds of air flowing out of the
purge valve.
3. Apply and release the service brakes several times to
reduce system air pressure to governor cut-in. Note
that the system once again builds to full pressure and
is followed by a purge at the other AD-IS EverFlow
assembly air dryer exhaust.
4. It is recommended that the total air system be tested for
leakage to ensure that the AD-IS EverFlow assembly
air dryers will not cycle excessively.
See Bendix publication BW5057 “Air Brake Handbook.”
TROUBLESHOOTING THE AD-IS
®
EVERFLOW
®
ASSEMBLY
Consult the Bendix
®
AD-IS
®
air dryer service data sheet,
SD-08-2418, for air dryer maintenance and service
information.
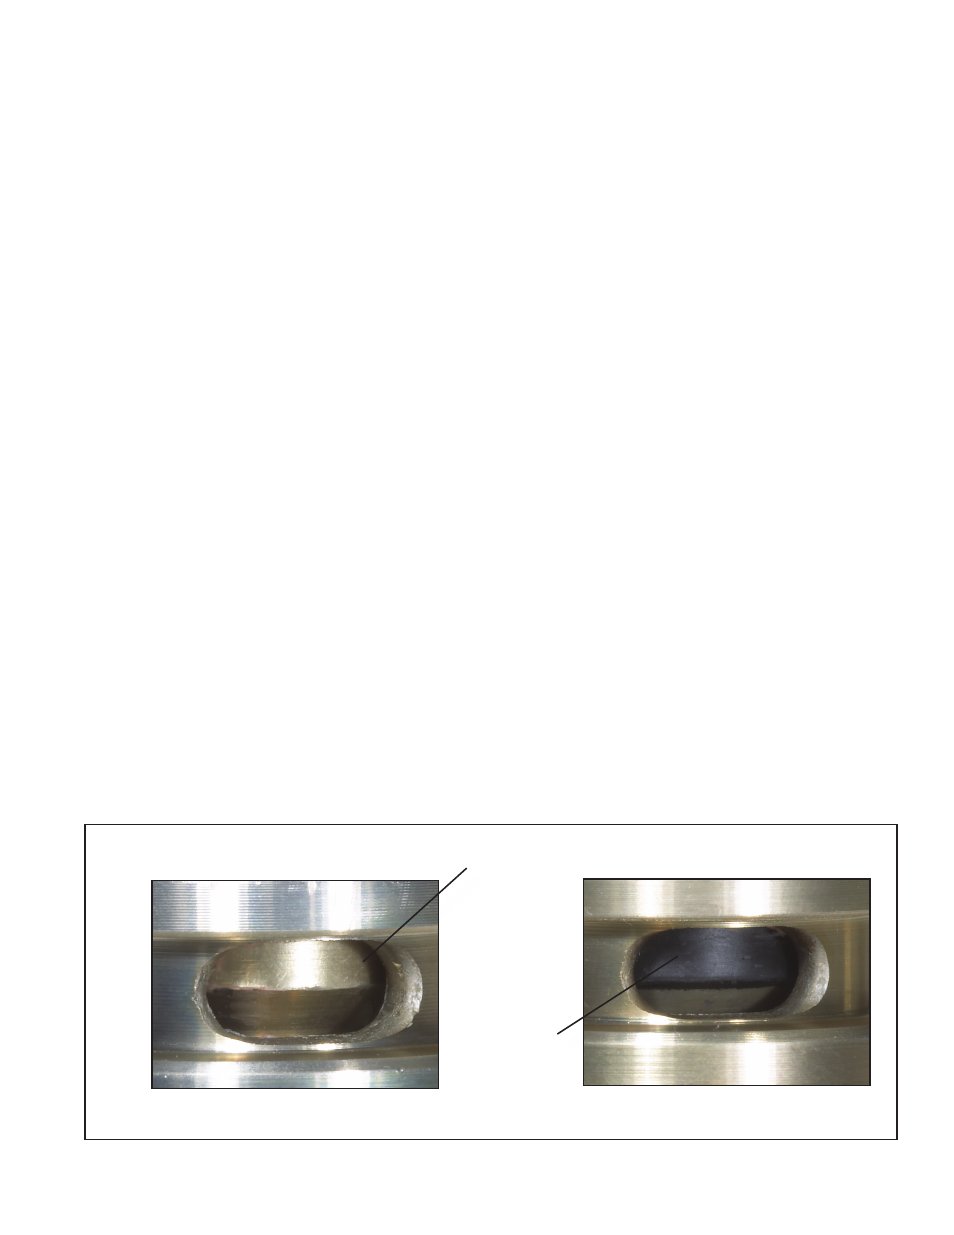
1. Excessive dryer purging in the loaded cycle.
• The purge valves in both dryers must have soft-seat
turbo cut-off valves. See Figure 7. Remove the purge
valve an examine the upper window, replace with soft
seat purge valve.
METAL
BLACK
RUBBER
FIGURE 7-
IDENTIFICATION OF HARD AND SOFT SEAT PURGE VALVES
HARD SEAT
SOFT SEAT