Fig. 3, Fig. 3a fig. 3b – Bell'O WAVS99163-Nov13 User Manual
Page 7
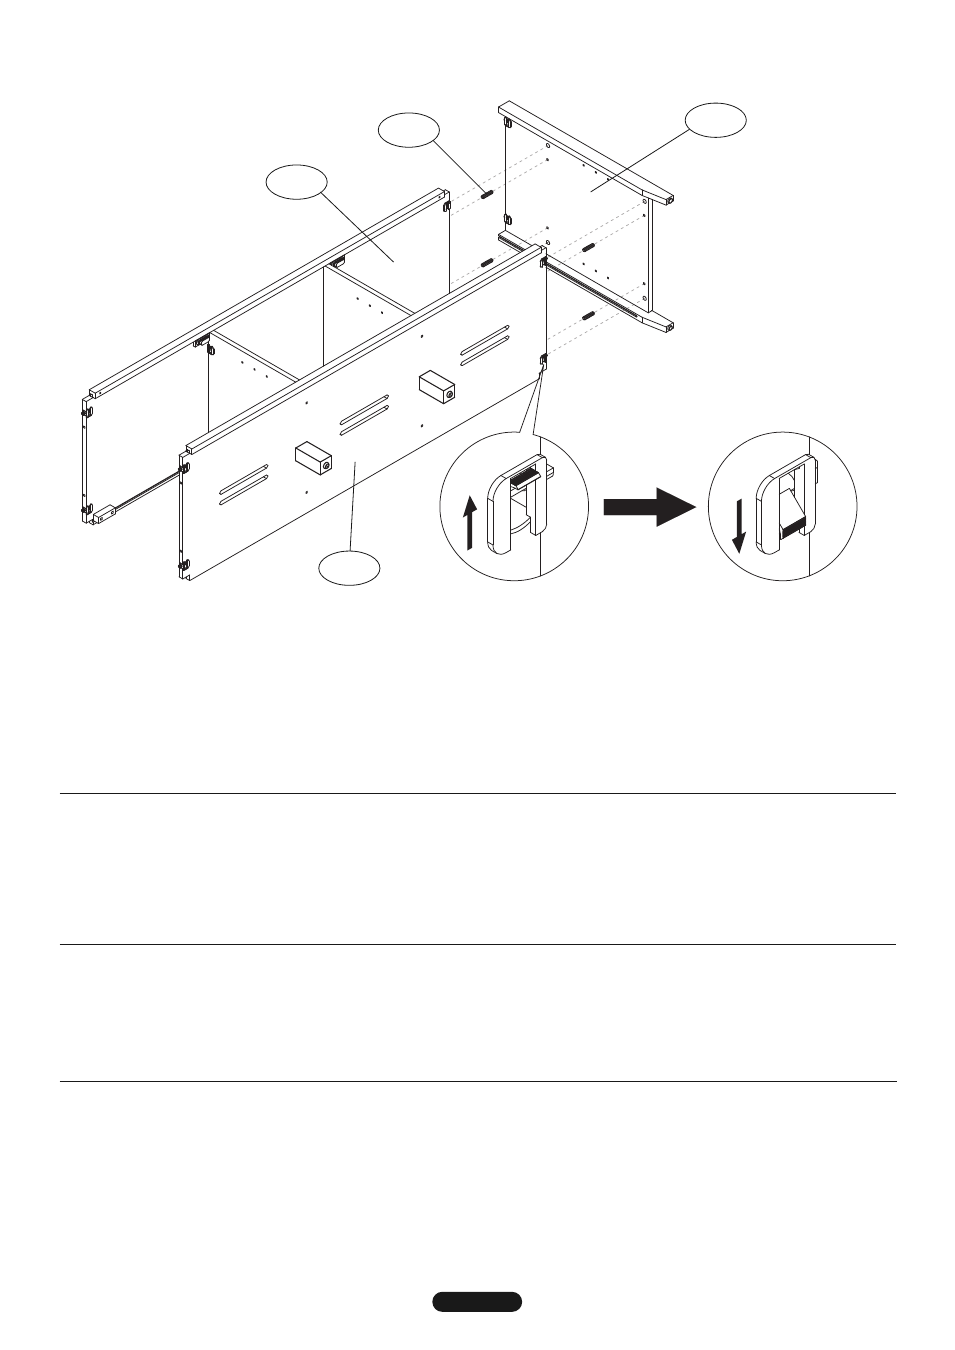
fig. 3
fig. 3A
fig. 3b
JD19
JD7
JD3
JD2
4. AttAch the right side Panel (JD7) as shown above. use four Wood Dowels (JD19) as shown.
5. secure the side Panel (JD7) by flipping the Locking Mechanisms on the underside of the Bottom shelf (JD3), and the Locking
Mechanisms on the underside of the Middle Interior shelf (JD2) as shown in Figs 3A and 3B.
4. AttAcher le panneau latéral droit (JD7) comme sur l’illustration ci-dessus. utiliser quatre chevilles en bois (JD19) comme sur
l’illustration ci-dessus.
5. fIxer le panneau latéral (JD7) en basculant les mécanismes de verrouillage sur le dessous du panneau inférieur (JD3) et les
mécanismes de verrouillage sur le dessous du plateau intérieur du milieu (JD2) comme sur les Fig. 3A et 3B.
4. fIJe el panel lateral derecho (JD7) tal como se muestra arriba. utilice cuatro clavijas de madera (JD19), tal como se muestra,.
5. AseGure el panel lateral (JD7) girando los mecanismos de bloqueo del lado de abajo del estante inferior (JD3) y los
mecanismos de bloqueo del lado de abajo del estante interior central (JD2), tal como se muestra en las figuras 3A y 3B.
4. ПРИКРЕПИТЕ панель правильной позиции (JD7), как показано на рисунке выше. Используйте четыре
деревянных шипа (JD19), как показано на рисунке.
5. ЗАКРЕПИТЕ панель правильной позиции (JD7), защелкнув фиксирующих механизма на нижней поверхности нижней
полки (JD3), а также фиксирующих механизма на нижней поверхности средней внутренней полки (JD2), как
показано на Рис. 3А и 3В.
7