Fig. 7 – Bell'O WAVS99163-Nov13 User Manual
Page 11
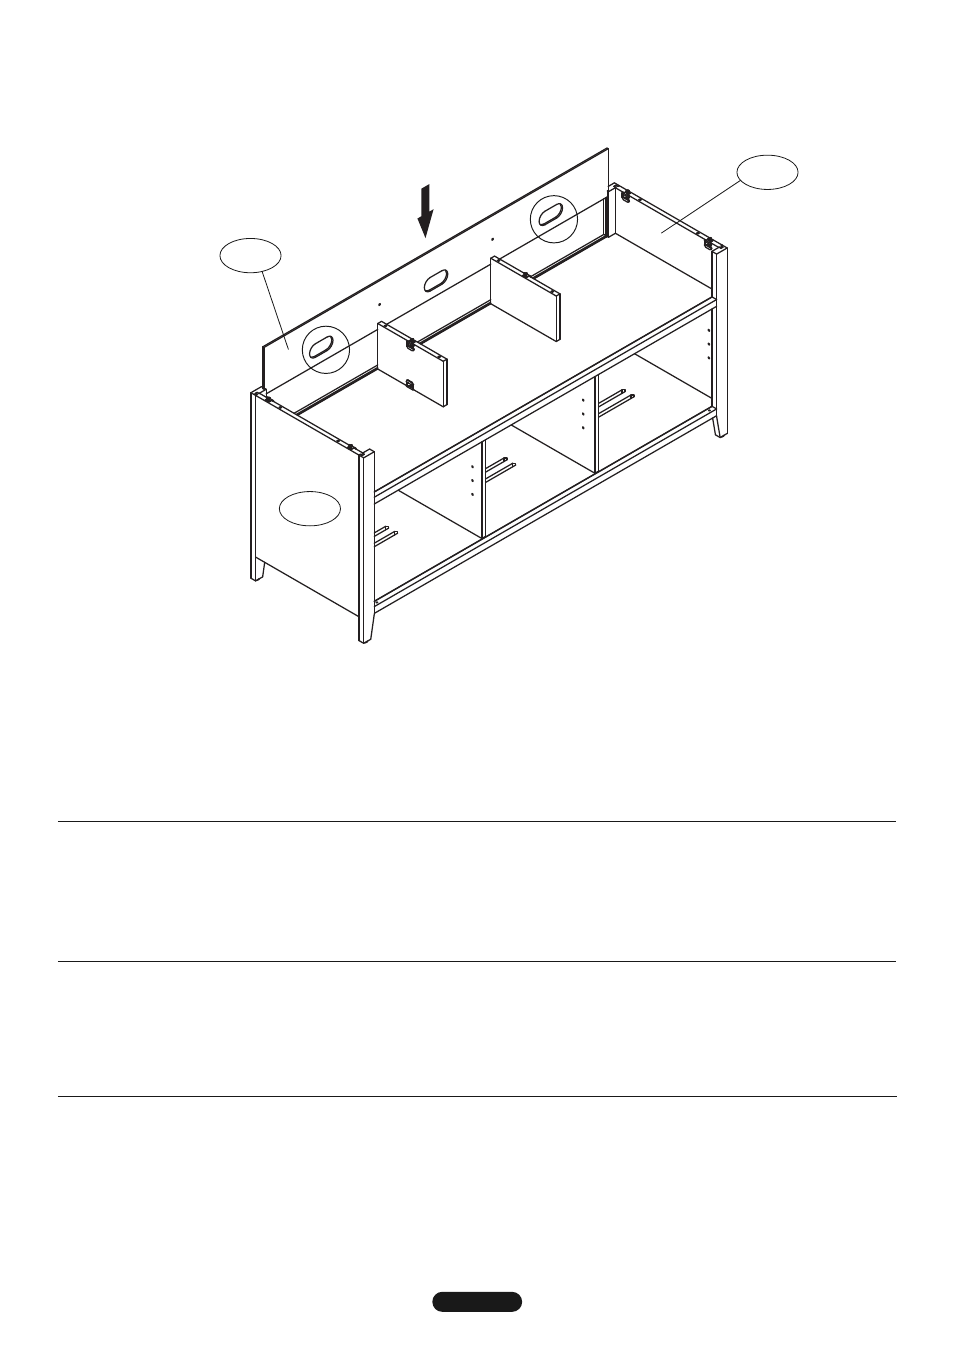
fig. 7
JD6
JD7
JD4
10. slIDe the upper Back Panel (JD4) down into the grooves in the Left and right side Panels (JD6, JD7) as shown.
NOTE (!): Make sure you position the Upper Back Panel with the Cable Management holes DOwN.
!
!
10. enfIler le panneau arrière supérieur (JD4) vers le bas dans les rainures des panneaux latéraux gauche et droit
(JD6, JD7) comme sur l’illustration. REMARQUE (!) : Veiller à bien placer le panneau arrière supérieur avec les trous
passe-fil en BAS.
10. DeslIce el panel trasero superior (JD4) en las ranuras de los paneles laterales izquierdo y derecho (JD6, JD7), tal como se
muestra. NOTA (¡!): Asegúrese de ubicar el panel trasero superior con los orificios de administración de cables hACIA
ABAJO.
10. Верхнюю заднюю панель (JD4) ВДВИНЬТЕ вниз в канавки на левой и правой боковых панелях (JD6, JD7), как
показано на рисунке. ПРИМЕЧАНИЕ (!). Убедитесь, что вы установили верхнюю заднюю панель так, чтобы
отверстия системы укладки кабелей находились ВНИЗУ.
11