Fig. 2, Fig. 2a fig. 2b – Bell'O WAVS99163-Nov13 User Manual
Page 6
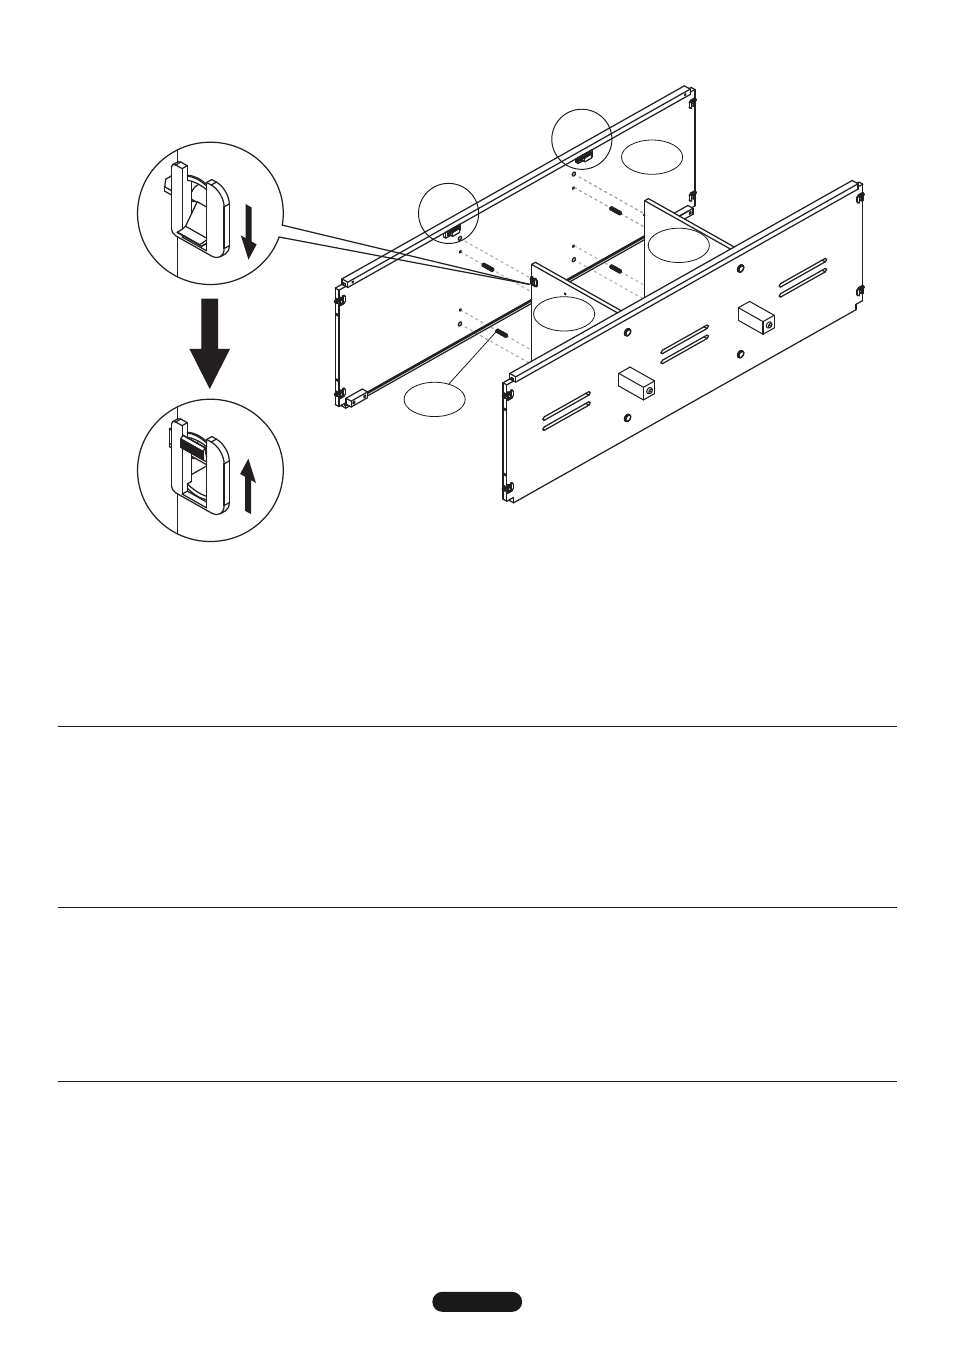
fig. 2
fig. 2A
fig. 2b
JD2
JD9
JD10
JD19
3. AttAch the Middle Interior shelf (JD2) to the Center Divider Panels (JD9, JD10) using four Wood Dowels (JD19) as shown
above. secure the Middle Interior shelf to the Divider Panels by flipping the four Locking Mechanisms in the Divider Panels as
shown in Figs 2A and 2B. NOTE (!) : you MAy need to flip the Locking Mechanisms first to correctly position the Locking
Posts in order to get the Interior Shelf to fit properly onto the Divider Panels.
NOTE (!): Note the position of the magnets on the Middle Interior Shelf (JD2) - make sure the Interior Shelf is positioned as
shown above.
!
3. AttAcher le plateau intérieur du milieu (JD2) aux cloisons centrales (JD9, JD10) à l’aide de quatre chevilles en bois (JD19)
comme sur l’illustration ci-dessus. fIxer le plateau intérieur du milieu aux cloisons en basculant les quatre mécanismes de
verrouillage des cloisons comme sur les Fig. 2A et 2B. REMARQUE (!) : Il PEUT être nécessaire de basculer les
mécanismes de verrouillage une première fois pour mettre les taquets de verrouillage en position correcte afin de
pouvoir engager le plateau intérieur comme il se doit sur les cloisons centrales.
REMARQUE (!) : Noter la position des aimants sur le plateau intérieur du milieu (JD2) - s’assurer que le plateau intérieur
est placé comme sur l’illustration ci-dessus.
3. fIJe el estante interior central (JD2) a los paneles divisores centrales (JD9, JD10) utilizando cuatro clavijas de madera (JD19),
tal como se muestra arriba. AseGure el estante interior central a los paneles divisores girando los cuatro mecanismos de
bloqueo en los paneles divisores, tal como se muestra en las figuras 2A y 2B. NOTA (¡!): ES POSIBLE que tenga que girar los
mecanismos de bloqueo primero para ubicar correctamente los soportes de bloqueo y lograr que el estante interior
calce correctamente en los paneles divisores.
NOTA (¡!): Tenga en cuenta la posición de los imanes del estante interior central (JD2) y asegúrese de que el estante
interior esté ubicado tal como se muestra arriba.
3. ПРИКРЕПИТЕ среднюю внутреннюю полку (JD2) к центральным разделительным панелям (JD9, JD10), используя
четыре деревянных шипа (JD19), как показано на рисунке выше. ЗАКРЕПИТЕ среднюю внутреннюю полку на
разделительных панелях, защелкнув четыре фиксирующих механизма на разделительных панелях, как показано на
Рис. 2А и 2В. ПРИМЕЧАНИЕ (!). МОЖЕТ СЛУЧИТЬСЯ, что вам понадобится сначала «перевернуть»
фиксирующие механизмы для правильной установки фиксирующих держателей, чтобы внутренняя полка
надлежащим образом вошла в разделительные панели.
ПРИМЕЧАНИЕ (!). Обратите внимание на положение магнитов на средней внутренней полке (JD2) –
проверьте, чтобы внутренняя полка была установлена в точности как показано на рисунке выше.
!
!
!
6