Fig. 9 – Bell'O WAVS99163-Nov13 User Manual
Page 13
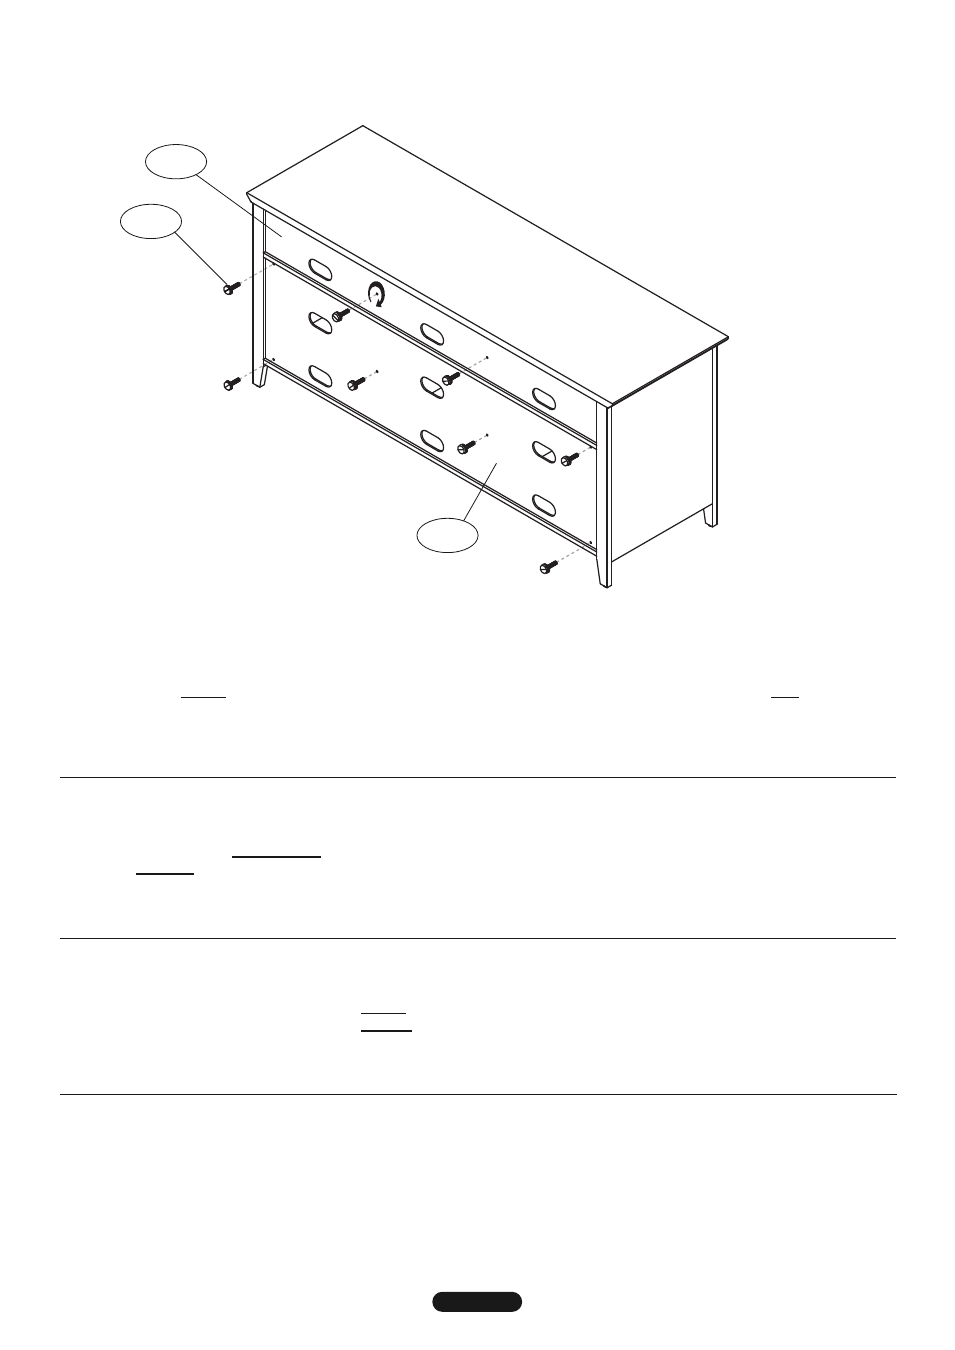
fig. 9
JD20
JD4
JD5
13. secure the upper and Lower Back Panels (JD4, JD5) to the cabinet assembly using eight short Thumbscrews (JD20) as
shown above. NOTE: To ensure that all the Thumbscrews are properly aligned with each hole, insert ALL the
Thumbscrews only half way before attempting to fully tighten. once all are in place, tIGhten each Thumbscrew
completely by hand (be careful not to overtighten!).
13. fIxer les panneaux arrière supérieur et inférieur (JD4, JD5) au meuble à l’aide de huit vis à main courtes (JD20) comme sur
l’illustration ci-dessus.
REMARQUE: Pour vous assurer que toutes les vis à main sont bien alignés avec chaque trou,
insérer TOUTES les vis seulement à mi-chemin avant d'essayer de serrer. serrer chaque vis à main complètement à la
main (sans forcer!)
.
13. AseGure los paneles traseros superior e inferior (JD4, JD5) al gabinete ensamblado utilizando ocho tornillos de mano
cortos (JD20), tal como se muestra arriba.
NOTA: Para asegurarse de que todos los tornillos de mano estén alineados
correctamente con cada
orificio
, inserte TODOS los tornillos sólo hasta la mitad antes de intentar apretar.
AprIete cada tornillo por completo con la mano (tenga cuidado de no apretarlos demasiado)
.
13. ЗАКРЕПИТЕ верхнюю и нижнюю задние панели (JD4, JD5) на собранной тумбочке, используя восемь коротких
винтов с головкой для закручивания вручную (JD20), как показано на рисунке выше. ПРИМЕЧАНИЕ: Для того,
чтобы все с накатанной головкой должным образом согласованы с каждого отверстия, вставить все с
накатанной головкой только половина пути, прежде чем пытаться полностью затяните. После того как
все на месте, затяните каждый винт с накатанной головкой полностью вручную (будьте осторожны,
чтобы не перетянуть!).
13