Fig. 3-8, Fig. 3-9 – Bell'O TP4501 User Manual
Page 21
21
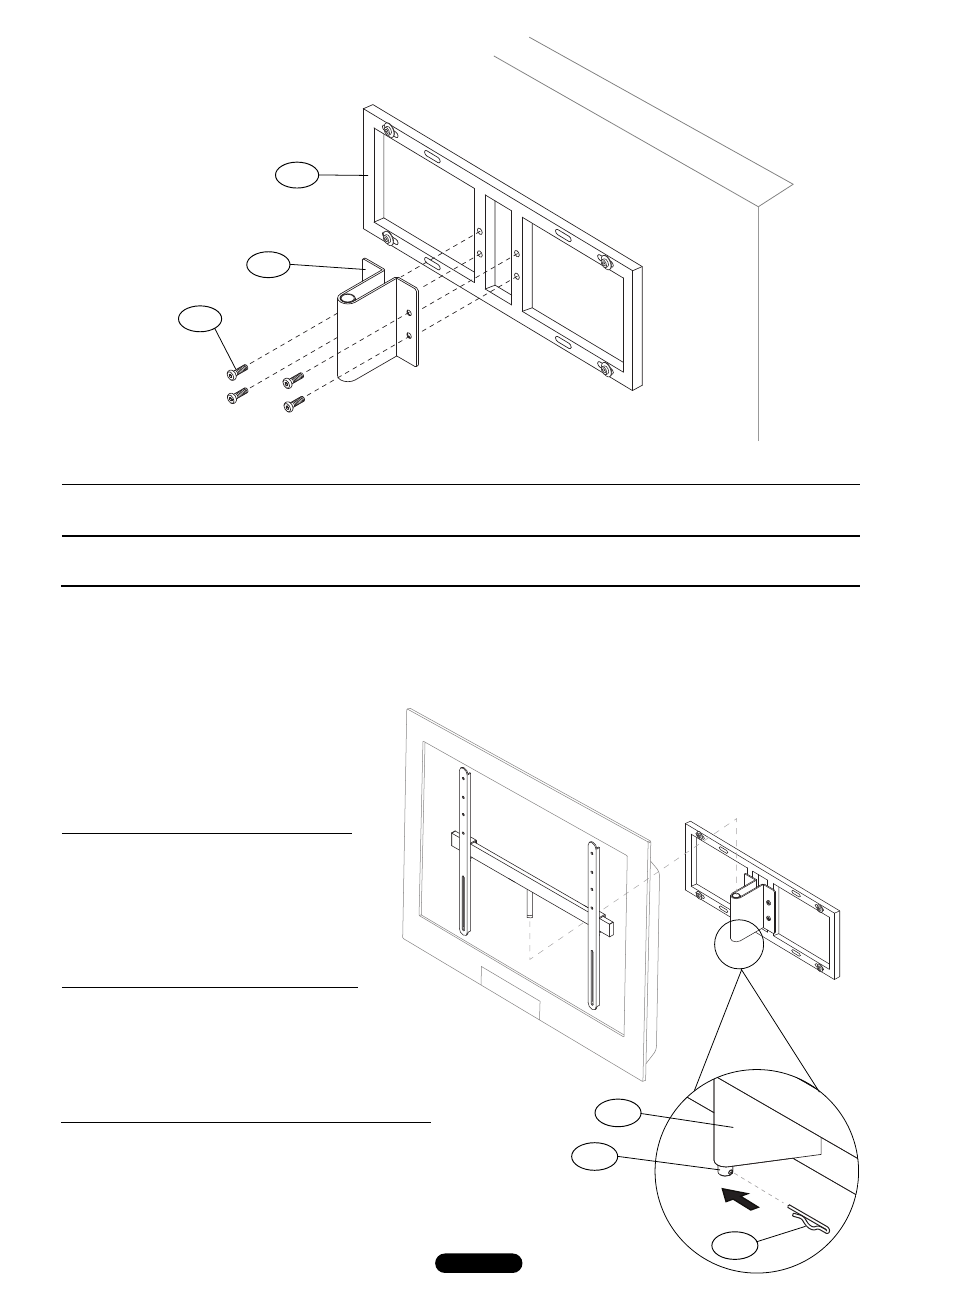
Fig. 3-8
3-8. AttAch the Mounting Bracket (MF) to the Wall Plate (MM) with four 15mm Bolts (M1). tIGhten Fully.
3-8. FIJe el soporte de montaje (MF) a la placa de pared (MM) con cuatro pernos de 15mm (M1). AJÚstelos Por comPleto.
3-8. FIxer le support de fixation (MF) sur la plaque murale (MM) avec quatre boulons de 15mm (M1). serrer comPlÈtement.
Fig. 3-9
3-9. with the help of an assistant, carefully
PlAce the Post of the Swivel Bar (MG)
down into the tube in the Mounting
Bracket (MF), and secure with the Post
Locking Clip (M5) as shown.
3-9. avec l’aide d’une autre personne,
enFIler avec précaution la tige de la
barre pivotante (MG) dans le tube du
support de fixation (MF) et la FIxer
avec la goupille de blocage (M5) comme
sur l’illustration.
3-9. con la ayuda de otra persona, coloQue
con cuidado el sostén de la barra giratoria
(MG) en el tubo del soporte de montaje (MF)
y FÍJelo con el sujetador de fijación del
sostén (M5) tal como se muestra.
mm
mF
m1
mG
mF
m5
3-8. ПРИКРЕПИТЕ монтажный кронштейн (MF) к настенной плате (MM) с четырех 15 миллиметровых болтов (M1).
ПОЛНОСТЬЮ ЗАТЯНИТЕ БОЛТЫ.
3-9. Вместе с помощником аккуратно ВСТАВЬТЕ штырь
шарнирной планки (MG) в трубку монтажного
кронштейна (MF) и ЗАКРЕПИТЕ с помощью зажима
(M5), как показано на рисунке.