Bell'O TP4501 User Manual
Page 20
20
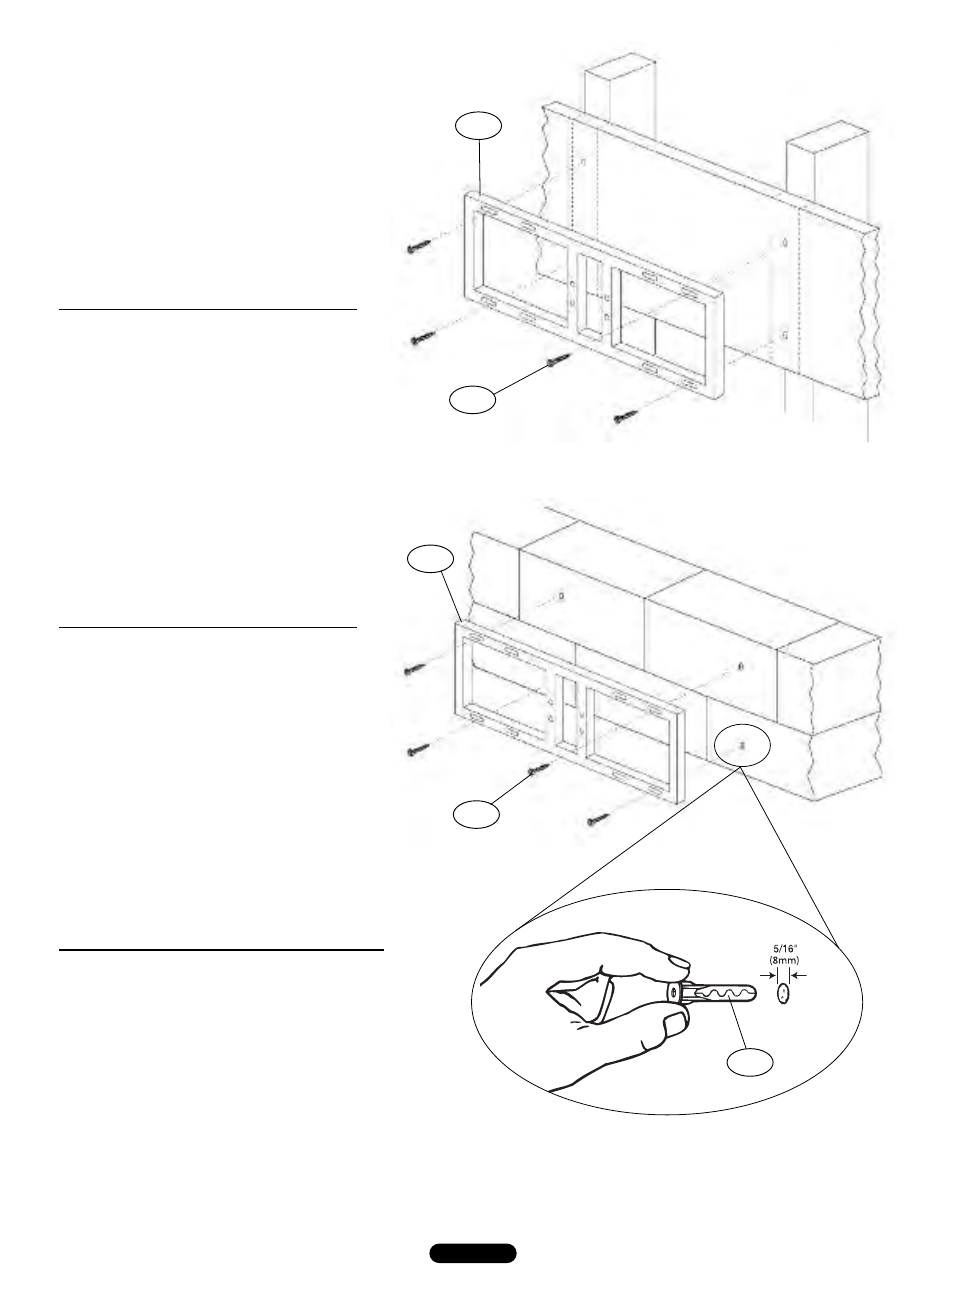
3-5. remove the Installation Template.
3-6. If mounting into concrete, Insert four
TOGGLER
®
brand Wall Anchors (M10)
into the drilled holes. [FIGURE 3-7]
3-7. PlAce the Wall Plate (MM) over the holes
and screw in the Lag Bolts (M11) about
half way. Use a level to make sure the
Wall Plate is level and make any necessary
adjustments. Once straight, tIGhten all of
the Lag Bolts completely (Do not over
tIGhten!)
3-5. enlever le gabarit de pose.
3-6. Pour une pose sur de la béton,
enFoncer quatre des chevilles
d'ancrage de la marque TOGGLER
®
(M10) dans les trous. [FIGURE 3-7]
3-7. Poser la plaque murale (MM) sur les
trous et visser les tire-fond (M11) à
moitié environ. Utiliser un nIveAu pour
vérifier que la plaque murale est de
niveau et effectuer tout ajustement
nécessaire. Une fois la plaque de
niveau, serrer complètement les
quatre tire-fond (ne PAs Forcer !).
3-5. QuIte la plantilla de instalación.
3-6. Para instalaciones en concreto, coloQue
cuatro de los anclajes marca TOGGLER
®
(M10) en los agujeros taladrados.
[GRAFICO 3-7]
3-7. colóQuelA placa (MM) sobre los orificios
y atornille los tirafondos (M11) hasta la mitad.
Utilice un nIvel para asegurarse de que la
placa de pared esté nivelada y haga los
ajustes necesarios. Una vez que esté
derecha, AJuste todos los tirafondos por
completo (no los AJuste DemAsIADo).
Fig. 3-5
Fig. 3-6
Fig. 3-7
TOGGLER
®
brand ALLIGATOR
®
SOLID-WALL ANCHORS are patented under one or more of US
Patent numbers 5,161,296 and 5,938,385; and foreign counterparts thereof and of 4,752,170.
Other patents pending.
TOGGLER and ALLIGATOR are worldwide registered trademarks of Mechanical Plastics Corp.
m11
m11
m10
mm
mm
3-5. СНИМИТЕ шаблон для установки.
3-6. При креплении к бетонным стенам ВСТАВЬТЕ
четыре анкера марки TOGGLER
®
(M10) в
просверленные отверстия [РИСУНОК 3-7].
3-7. ПРИЛОЖИТЕ настенную плату (MM) к отверстиям
и ВВИНТИТЕ шурупы с головками под ключ (M11)
примерно наполовину. Используя УРОВЕНЬ,
убедитесь, что настенная плата установлена
горизонтально, и сделайте необходимую подгонку.
Когда она установлена правильно, полностью
ЗАТЯНИТЕ все шурупы (НЕ ЗАТЯГИВАЙТЕ
ШУРУПЫ СЛИШКОМ ТУГО!)