Assembly, Components, Mounting the camera – Autocue Starter Series iPad Teleprompter Package User Manual
Page 2
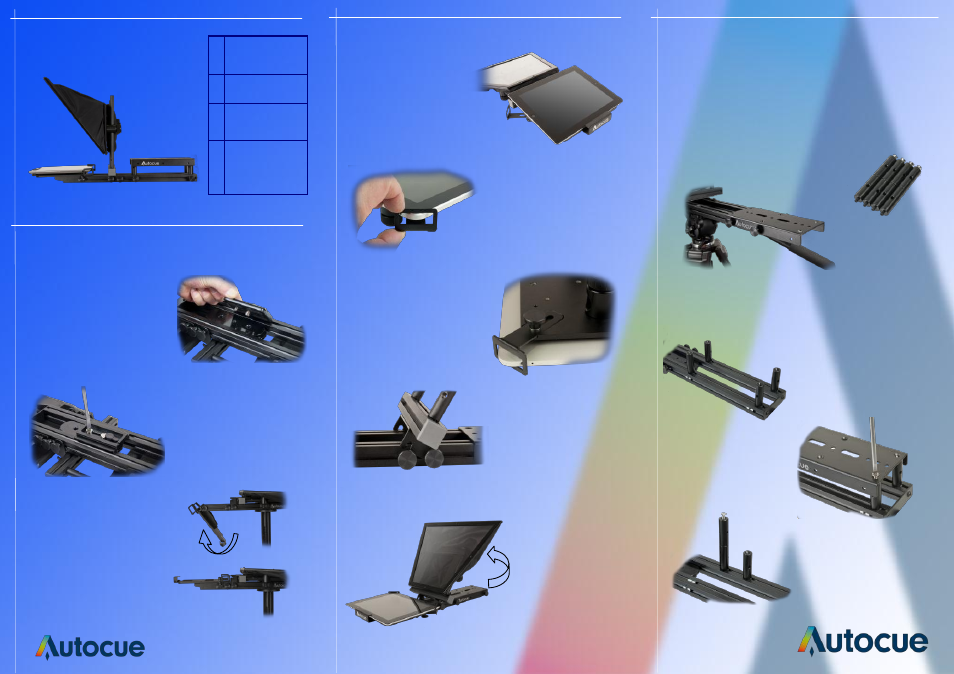
Assembly
1. Fix the hot shoe from your
tripod to the underside of the
mounting plate. Slide the hot
shoe to the approximate
position and tighten the
screws.
Components
A
Hood and
Glass
B
iPad Holder
C
Camera
Mounting Plate
D
Hood
Adjustment
Clamps
D
C
A
B
2. Mount the unit on
the tripod.
Mounting the Camera
2. For smaller cameras the camera plate will need to
be raised. Remove the four thumb screws and lift off
the plate.
3. Install four camera
plate pillars of the
appropriate height.
4. Re-fix the camera
plate using the four
screws provided.
Pillar combinations
To achieve the maximum
height, combine two pillars.
5. Hold in place by
positioning the clamps
over the corners of the
iPad.
1. For larger cameras the mounting plate may
need extending. Loosen the four thumb screws on
the camera plate and remove the rear two, the
plate will now slide out. Replace the two rear
screws and tighten them to secure
the plate.
B
Pillar Kit
4. Position your iPad
between the clamps
of the iPad holder.
6. Tighten the
thumb screws
(A)
on
the underside of the
mounting to secure
the iPad.
3. Loosen the thumb
screws at the side of
the iPad holder. Unfold
the holder and slide
into position.
8. Lift the hood into
position and
retighten to secure
in place.
7. Loosen the
thumb screws
(B)
on the hood
assembly.
A