Ninja-2 connections, Connecting the ninja-2 and powering up – Atomos Ninja 2 User Manual
Page 10
Turning ON power to the Ninja-2
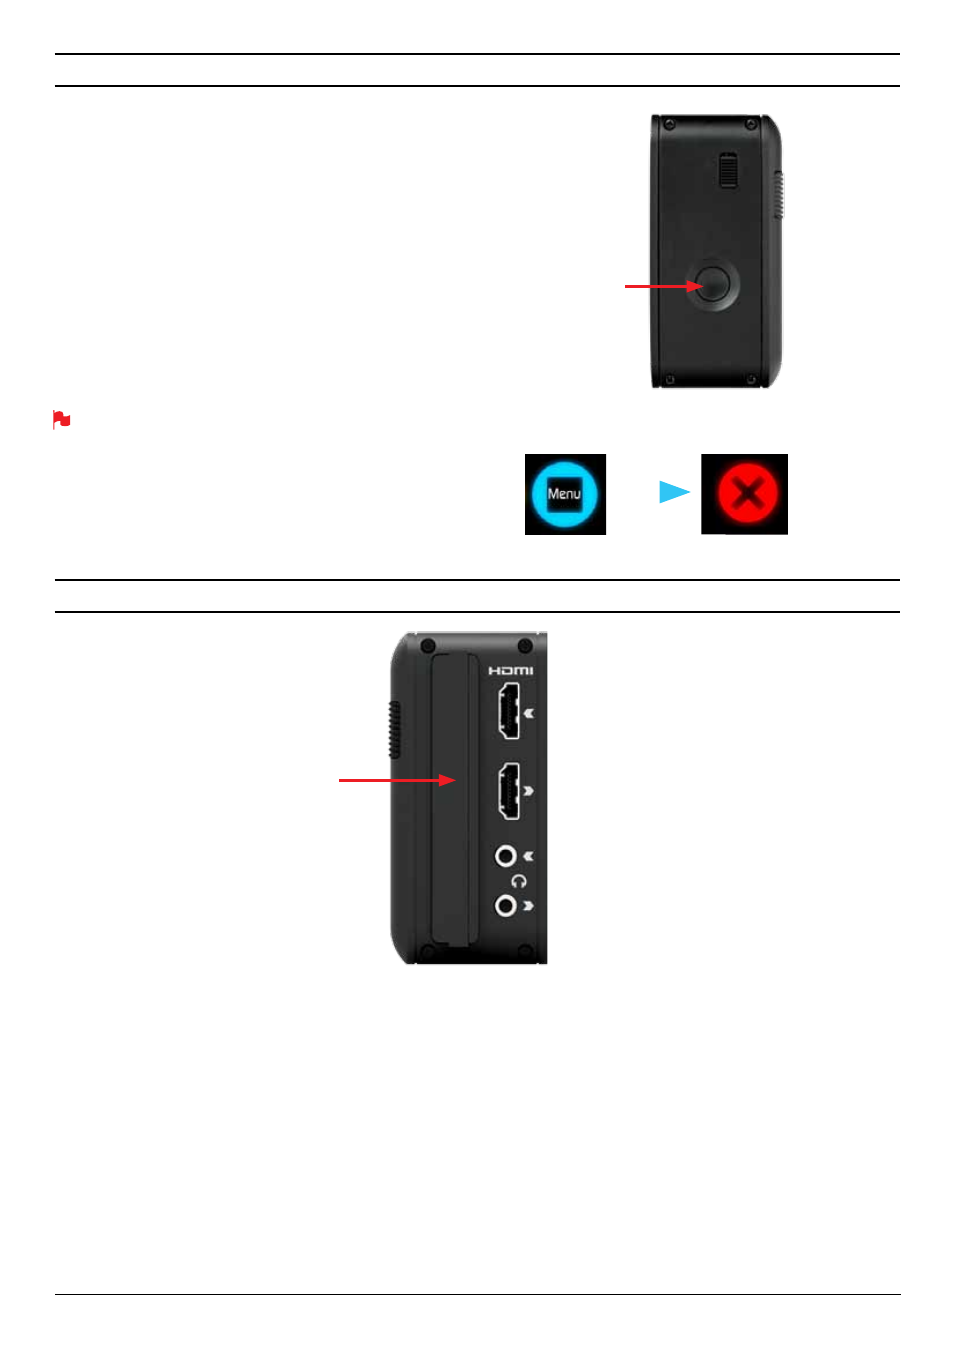
The start button is located on the right hand side of the unit (as you
look at the screen). Momentarily press the circular button on the right
side of the Ninja-2 as you look at the screen to power up the unit. After
a couple of seconds you will see the Atomos logo, and then the Ninja-2
Home Screen.
Turning OFF power to the Ninja-2
To turn the unit off,
touch
menu
on the home screen, and then
press
the red
Power off
icon for 4 seconds the icon will go white when
touched to indicate activation of the button. The unit will then power off.
You can also do a forced power down by
depressing the on/off button
for four seconds.
Four seconds can seem like a long time! We’ve made it this way to
make absolutely certain that the Ninja-2 can’t be turned off accidentally.
HDMI in:
The video input to the Ninja-2 is HDMI. This is the signal that
is recorded to the Ninja-2’s storage media.
HDMI out:
This is for connection to an external monitor or other device
with an HDMI input.
Audio:
The Ninja-2 can record 2 channels of digital audio embedded in
the HDMI signal. There is a 3.5mm Stereo Line-in socket for recording
audio in sync with incoming video. Depending on your set-up, you may
find that this gives you better results than the microphone on the camera.
You can switch between Analogue Audio Line In and HDMI as your audio
sources in the user interface, where you can also adjust the analogue
audio input level.
There is also a 3.5mm output that doubles as a Line Out or Headphone
Out, which has it’s own independent level control in the user interface.
5. Ninja-2 connections
ON
+ forced
power
down
Turning OFF power via touchscreen (preferred)
power off
menu
Master Caddy Slot
Simple, locking
HDD/ SSD
system.
HDMI In
HDMI out
>Record loop through
>PLAYOUT
Stereo line in
Stereo line out/Headphone
4. Connecting the Ninja-2 and powering up
Atomos Ninja-2 – User Manual Edition 3: May 2013 8