Make audio and video connections to ki pro mini, Powering ki pro mini, Formatting media – AJA Ki Pro Mini User Manual
Page 3
1
3
Ki Pro Quick Start Guide— Make audio and video connections to Ki Pro Mini
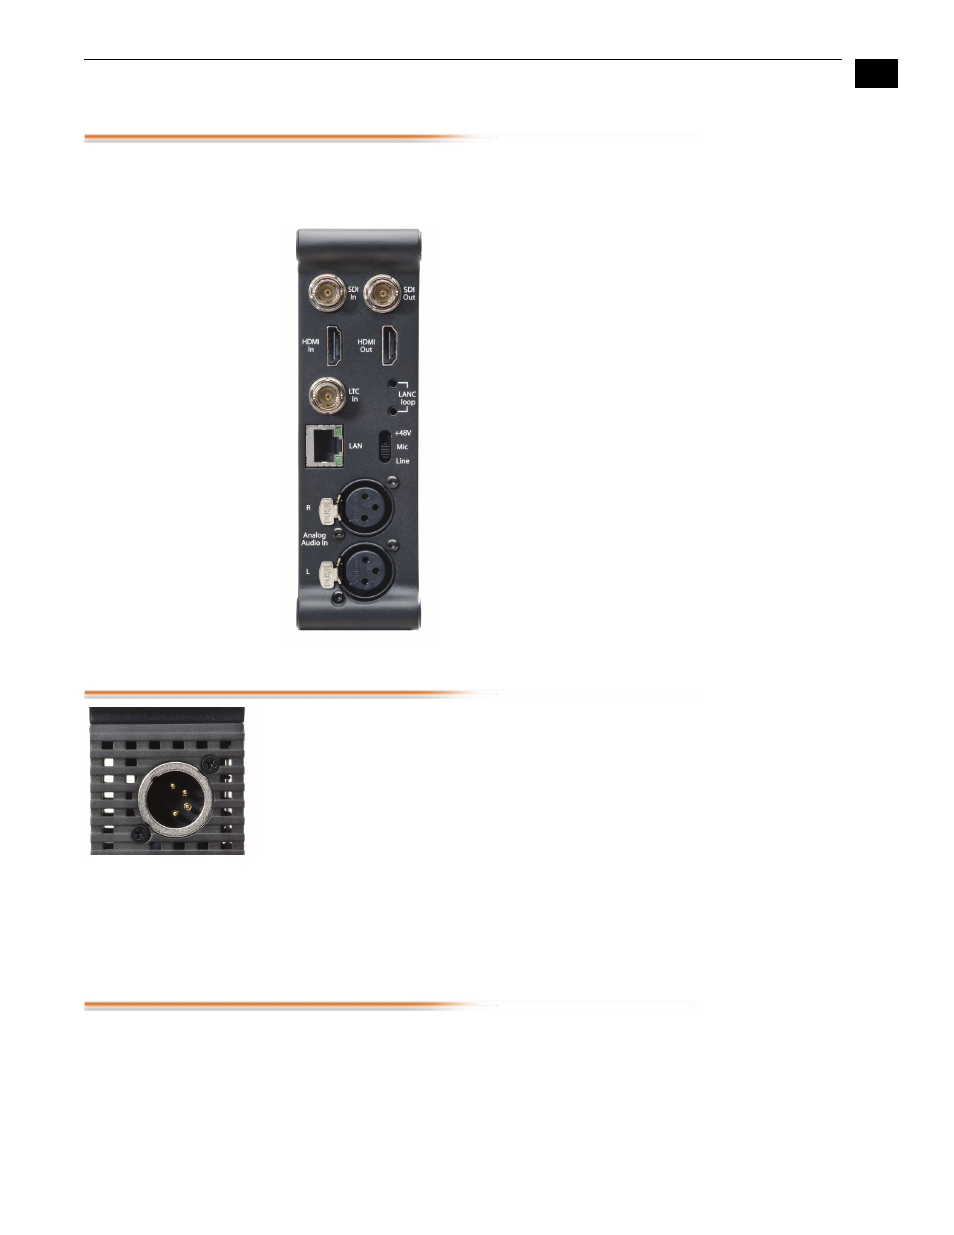
Make audio and video connections to Ki Pro Mini
Cameras with SDI outputs can provide audio, video - and in some cases - timecode with
one single cable connection to Ki Pro Mini. If your camera has an SDI output, this will
likely be the simplest way to connect to Ki Pro Mini.
If you have a camcorder with an HDMI output, it can also
provide audio and video - but not timecode - with one single
cable to Ki Pro Mini.
Audio sources can be SDI embedded, HDMI embedded or
Analog audio. Note: You can only select SDI audio if you are
using SDI video and you can only select HDMI audio if you are
using HDMI video. You should also be aware that the audio
input control knobs located below the VU meters on Ki Pro
Mini only work on analog audio sources; embedded audio
levels cannot be changed via Ki Pro Mini. Adjust digital audio
signals at the source.
Ki Pro Mini can accept external timecode from two different
sources: the LTC input or the embedded SDI timecode, RP188
(if present in the SDI signal). If your camera does not have a
timecode output, you can also choose to generate your own
timecode value using Ki Pro Mini.
Powering Ki Pro Mini
Ki Pro Mini can be powered by the provided AC adapter or by a wide range of batteries.
Note: Be sure to use battery sources that fall within Ki Pro Mini's voltage range; batteries
that provide less than 12 volts will not provide sufficient power and batteries that
exceed 18 volts are in excess.
Note:
In the event of sudden power loss, recordings that are in progress will not be
written properly to the media. Note that there is a "Low Battery" warning prompt that
users should take note of and stop recordings in progress if at all possible before
battery failure. Ki Pro Mini can sometimes manage to close the file before the battery
stops providing sufficient power, but this is not always possible due to the nature of
batteries and the duration of some recordings. It is best to be mindful of remaining
battery life. The use of batteries with metering or remaining power indications is highly
recommended. For very long recordings, it is advisable to use the supplied AC power
supply instead of battery power.
Formatting Media
If you power up Ki Pro Mini with a new CF card inserted, it is likely that a warning
prompt will appear: "Warning Media Unformatted". This prompt appears since the card
needs to be formatted using Ki Pro Mini before it can be used. To format a CF card,
simply press the MEDIA button. Once pressed, Ki Pro Mini displays the menu
parameters for media settings. You can navigate through the selections using the
SELECT up/down arrows and change settings using the ADJUST up/down arrows.
Using the SELECT up/down arrows, navigate to the MEDIA menu parameter 16.1
Format Media. Use the ADJUST up button to select FORMAT. Press the ADJUST up
arrow button again. Ki Pro Mini will instruct you to hold the ADJUST up button for 2
seconds.