5 re-calibrate iris – 3D Robotics Original IRIS User Manual
Page 6
5
5 Re-calibrate
Iris
Now that you’ve re-positioned
Pixhawk, re-calibrate the compass
and accelerometer for the new
configuration.
1 Power on transmitter, and connect
telemetry radio to computer using
the micro-USB cable.
2 Connect battery to Iris. Do not
press the safety button!
3 Connect to Mission Planner or
APM Planner by selecting the
available COM port and setting the
rate to 57600.
4 Select Initial Setup and Mandatory
Hardware.
5 Perform compass and
accelerometer calibrations.
Do not complete the setup wizard.
Only the two calibrations specified
here are required. If the wizard
appears, close it, and select Initial
Setup and Mandatory Hardware to
view individual calibrations.
The update is now complete!
For customer support, contact us at [email protected] or call our support line at
+1 (858) 225-1414 Monday through Friday, from 8 am to 5 pm, PST.
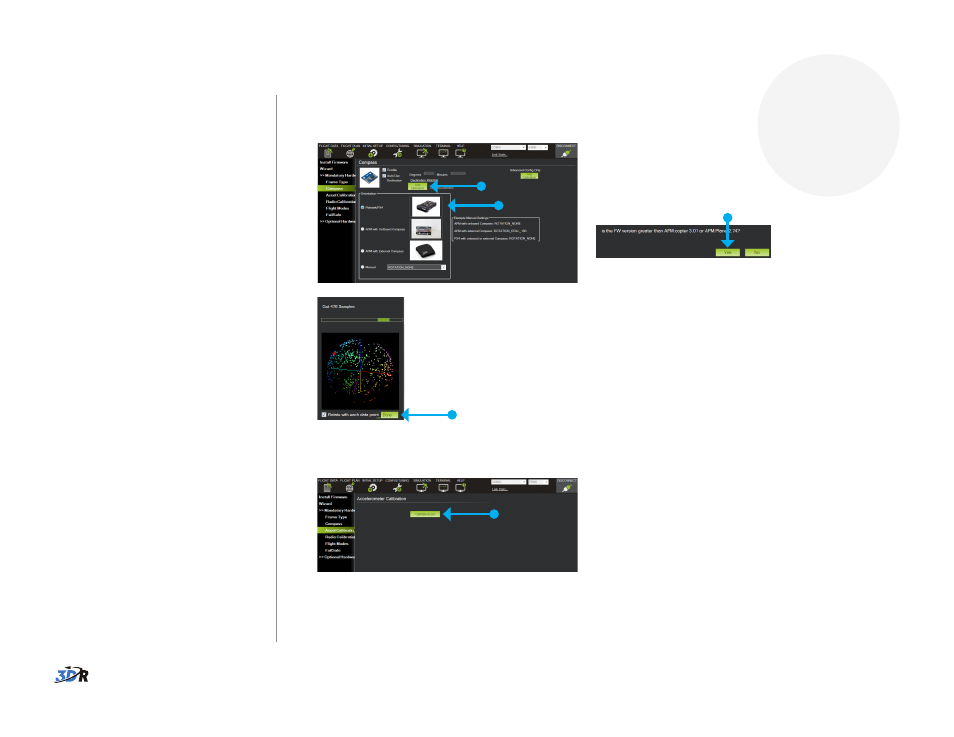
Connect to Mission Planner/APM Planner, select Initial Setup and Mandatory
Hardware, and follow the prompts to perform the following calibrations:
1 Compass
2 Accelerometer
View calibration
video tutorials at
Select Pixhawk.
If prompted for firmware version over 3.01, select Yes.
Select Live Calibration.
Move Iris around all axes.
Select Done after collecting data points for all positions.
Select Calibrate Accel, and
follow the prompts.