Assembly, Et up the, Ifter – Wood’s Powr-Grip VL2MAN User Manual
Page 6
Rev 1.0/12-12
4
VL2MAN: #35159
ASSEMBLY
T
O
S
ET UP THE
L
IFTER
1) Open the shipping container and remove all materials for restraining or protecting the vacuum
lifter. Save the container for use whenever the lifter is transported.
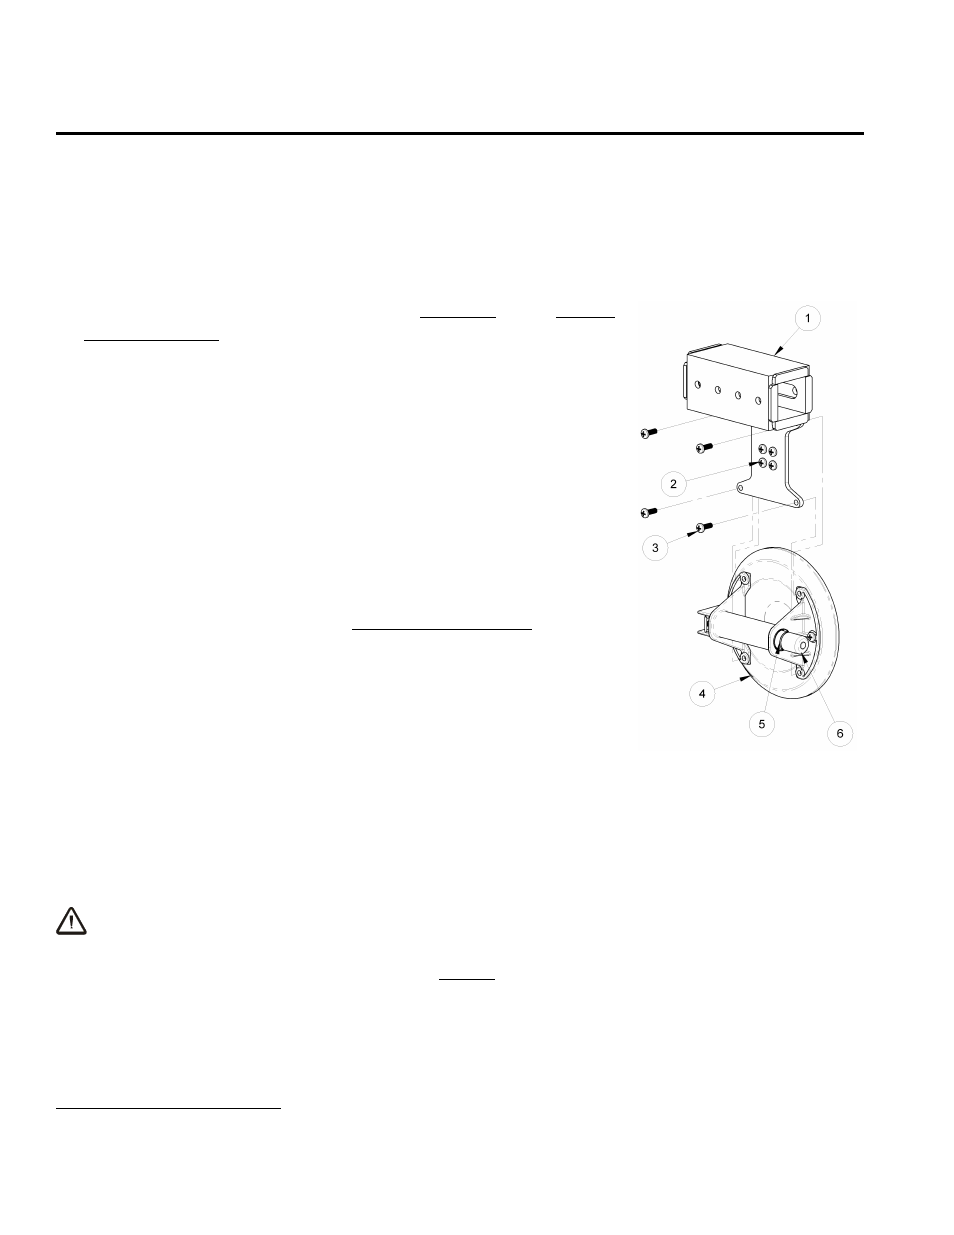
2) When necessary, attach each Powr-Grip hand cup to the sliding
hand cup mount, as follows (see illustration):
4
Remove the four screws from the corners of the hand cup’s
handle base.
Remove the four longer screws from the center of the cup
mount. Insert the four hand cup screws into the center of the
cup mount for safe-keeping; then tighten the screws securely.
Maneuver the hand cup over the cup mount as shown in the
illustration.
Insert the longer screws through the cup mount and into the
hand cup; then tighten the screws securely. Now the lifter is
operational.
3) If the lifter is equipped with the adjustable center arm, install or
remove this option as needed to support anticipated load
dimensions (see T
O
I
NSTALL OR
R
EMOVE THE
O
PTIONAL
C
ENTER
A
RM
to
follow).
4) Suspend the lifter from a crane as follows: Select hoisting
equipment (crane and hoist, when applicable) rated to carry the
maximum load weight plus the lifter weight (see
SPECIFICATIONS: Maximum Load Capacity and Lifter Weight).
Note: Any application of the lifter must conform to all
statutory or regulatory standards that relate to the hoisting
equipment when used in its geographical location (eg,
relevant OSHA standards in the USA).
WARNING: Hoisting equipment hook must be fitted with restraining latch to
prevent lift eye from slipping off under any circumstances.
Attach the hoisting equipment hook to the lift eye, and use the hoisting equipment to raise
the lifter. Now the lifter is operational.
5) Perform Operational and Load Tests for the lifter as directed in MAINTENANCE: T
ESTING
S
CHEDULE
.
4
Other hand cups may reduce load capacity or be incompatible.
1 SLIDING HAND CUP MOUNT
2 HAND CUP SCREWS
3 LONGER SCREWS
4 VACUUM PAD
5 RED-LINE VACUUM INDICATOR
6 PLUNGER