Desk mounting wall mounting the spectrum plus, Telephone (continued) – Telematrix DC550 User Manual
Page 14
14
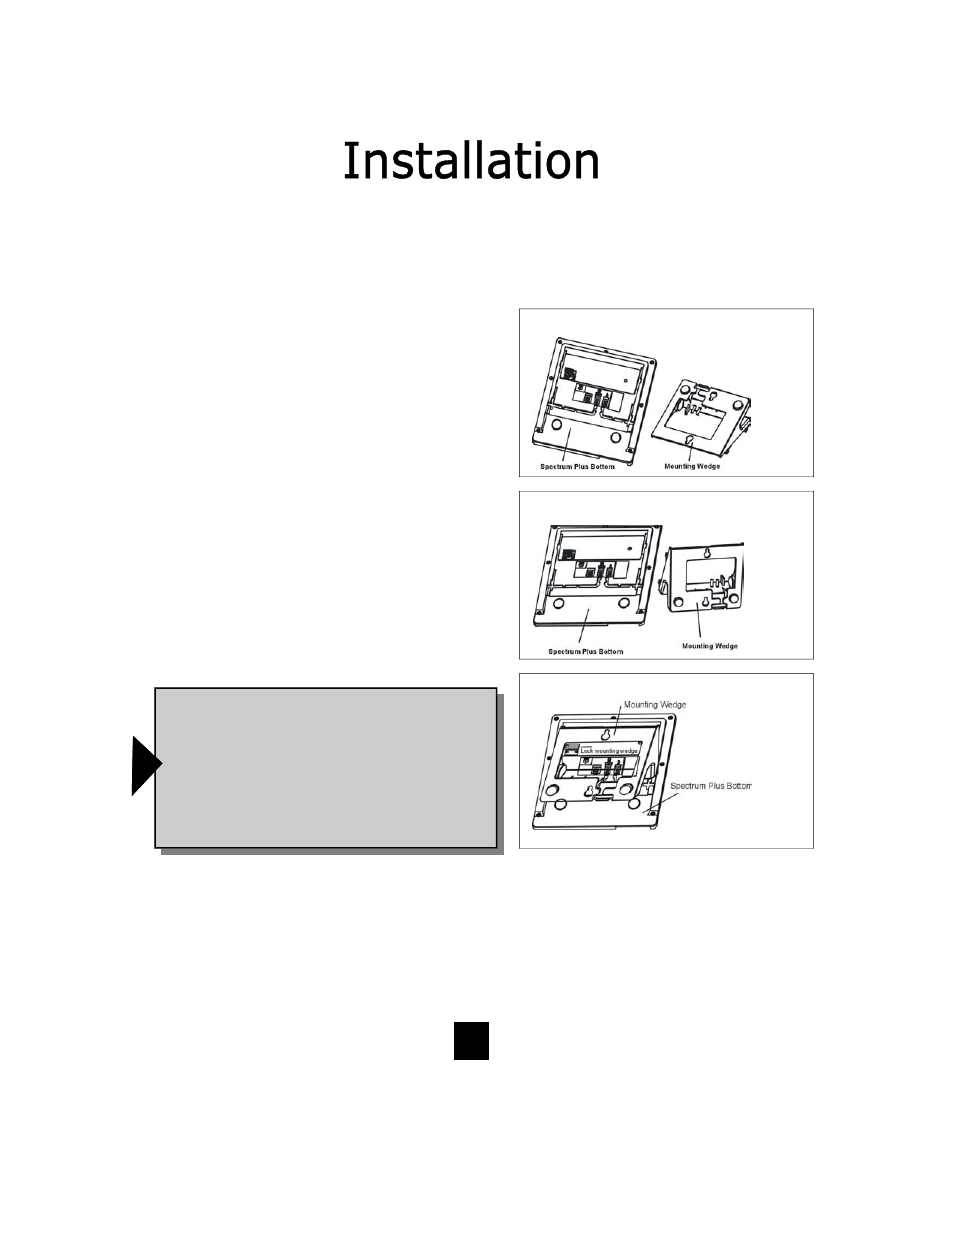
2. T he S pectrum PLUS
TM
h as pr ovisions f or a
mounting w edge th at mu st be correctly
positioned. T his w edge allows the telephone to
be viewed at a c orrect angle w hen the phone is
wall mo unted. Remo ve t he w edge f rom t he
phone base (figure 2).
3. Secure the line cord, coil cord and any wiring
in place prior to installing the wall mount wedge.
The w all mou nt bas e has ex tra large w iring
channels a nd s train r elief poles f or c ontaining
the wi res i n a n eat an d orderly way. Wrap t he
wires around the strain relief poles and then se-
cure the wires through the channel.
4. To wall mount, place the narrow edge at th e
top edge of the phone base and slide the wedge
upward into place (figure 3).
5. Loc k th e w all mou nt i nto pos ition by s liding
the locking button to the right (figure 4).
Note: A 6-inch line cord is provided for when
the telephone is to be wall mounted. Connect
one end of the line cord to the phone jack and
the other end to the wall jack. Be sure to con-
nect the power cord and line cords before plac-
ing mounting wedge on the bottom base. An
optional coaxial power supply can be used in
place of the supplied power supply. See your
local distributor for information.
!
To install the wedge for d esk mounting, be s ure the loc k mec hanism is pos itioned to th e
left, clear of the locking arm. Place the wedge in the slots, wide end toward top of phone
base unit, and slide the wedge upward into position. Lock the wedge into place.
Desk Mounting
Wall Mounting the Spectrum PLUS
TM
Telephone (continued)
figure 2
Replace Mounting Wedge
Figure 3
Replace Mounting Wedge
figure 4
Lock Mounting Wedge