General use, Rolling flat joints – TapeTech 12TT Monster Mesh Taper User Manual
Page 3
Page 3 of 4 ©2001 Ames Taping Tool Systems
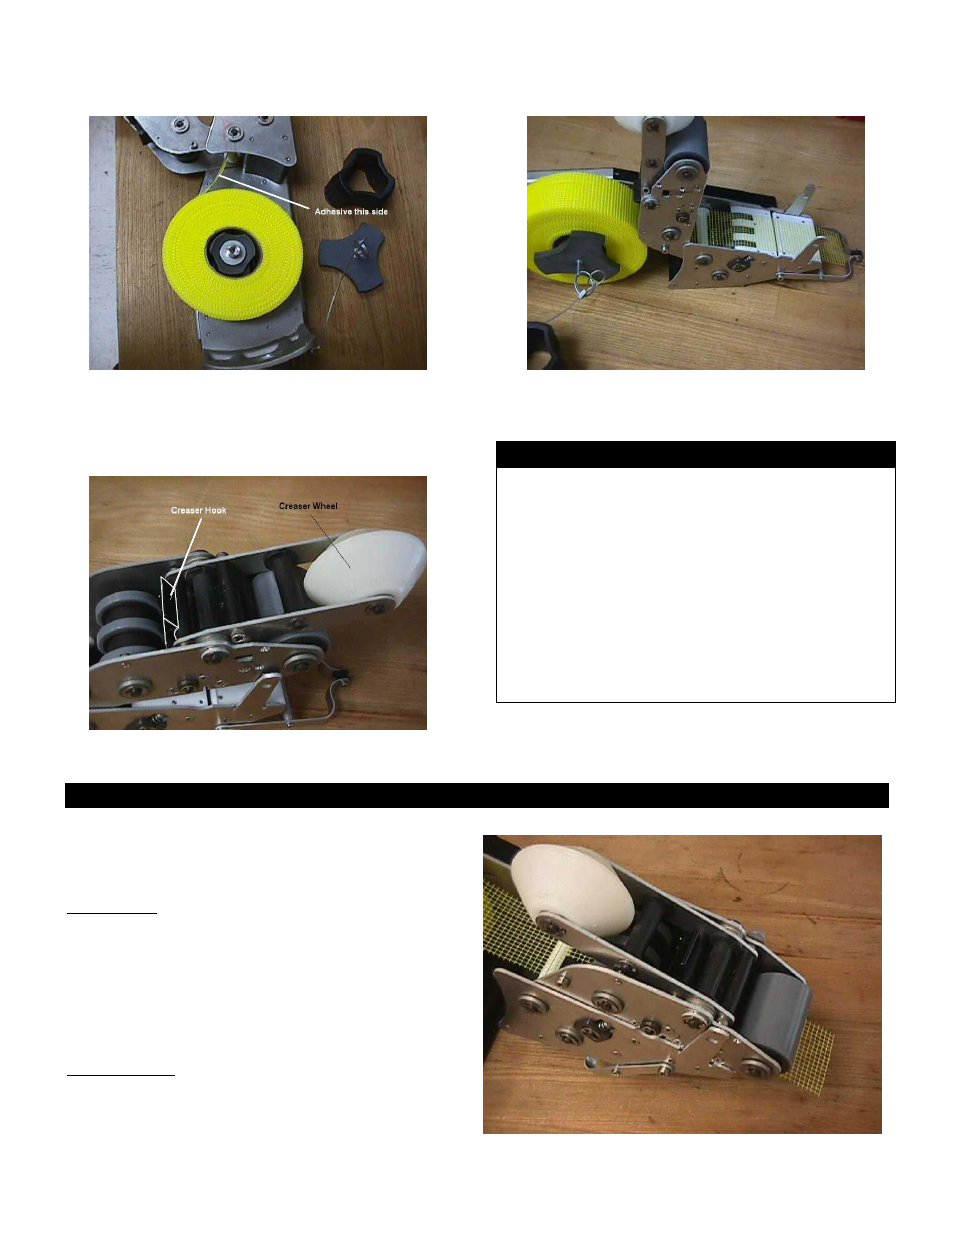
3. Install tape with wrap in clockwise direction –
adhesive side to Main Chassis.
4. Install
Tape
Retainer.
5. Ensure white Creaser Wheel is in forward (toward
Front Roller) position and open Jaw Assembly.
6. Pull tape between Jaw and Main Chassis until it
protrudes approximately 1” past end of Chassis.
7. Close Jaw Assembly.
GENERAL USE
1. For right-handed individuals: place the left hand on
the Control Tube and the right hand between the 2,
black grip rings on the rear of the Main Tube. This
may be reversed for left-handed users.
2. Advance tape by pushing forward on the Control
Tube until mechanism stops. Return Control Tube
to “neutral” position.
3. Cut tape by pulling back on the Control Tube until
mechanism stops. Return Control Tube to
“neutral” position.
4. Do not attempt to roll tape while cutting. This WILL
cause Taper to jam.
ROLLING FLAT JOINTS
Ensure Creaser Wheel is in stowed position. Lock in
place by pulling forward on Creaser Hook. The Hook
should snap into place.
For verticals:
1. Advance tape once. Place Front Roller firmly against
wall and roll upward (tape spool should be to the left of
the operator). Maintain a 45° to 90° angle between
Taper and wall. This prevents Creaser Wheel from
contacting wall.
2. Approximately 4” from the end of the seam stop rolling
and cut tape. Roll out remainder of tape.
For horizontals:
1. Same as above. It is recommended that taping be
done from left to right (with the tape roll on top). This
allows tape to seat better on Tape Spool.