Loading tape – TapeTech 12TT Monster Mesh Taper User Manual
Page 2
Page 2 of 4 ©2001 Ames Taping Tool Systems
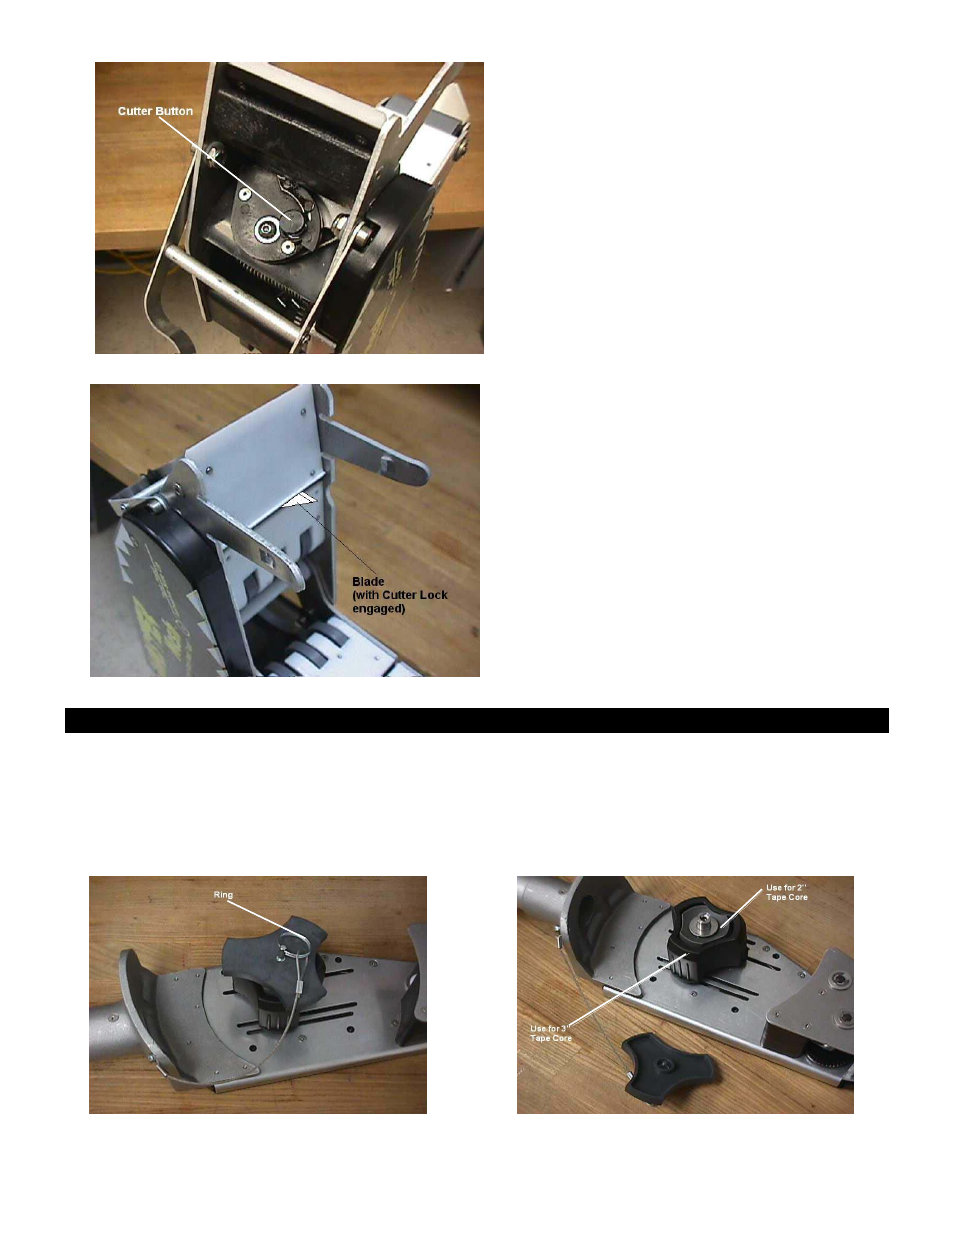
3. Rotate Taper until AMES logo cover is facing
operator. Place left thumb on small button located
on top of the Cutter mechanism.
4. Slowly push down on Control Tube with right hand
while pushing on Cutter button. Just before control
tube bottoms on stop, the button will engage Cutter
lock.
5. (If necessary) Remove used blade from holder
using pliers. Keep left thumb on Cutter button to
prevent lock from disengaging.
6. Using pliers, install a new blade in holder with
cutting edge facing away. Keep left thumb on Cutter
button to prevent lock from disengaging. When
blade is completely inserted, it will protrude only
about ⅜” from face of Main Chassis. It may be
helpful to spray some lubricant on the portion of the
blade being inserted – this will aid installation.
7. Remove left thumb from Cutter button and push
down on Control Tube. Cutter Lock should
disengage. Release Control Tube and allow Cutter
mechanism to “snap” back into stowed position.
When properly stowed, no portion of the blade
should be visible between Jaw and Main Chassis.
8. Close Jaw Assembly. The Jaw should snap into
tangs of Main Chassis.
LOADING TAPE
1. Grasp Tape Retainer by ring and pull away from
Taper.
2. The small, gray tape spool is used with 2” core tape
rolls. The large, black spool is required if 3” core tape
rolls are being used. Remove the black spool (3”
core) by grasping the edges with forefingers and
pulling while, simultaneously, pushing with thumbs on
the gray spool.