S&S Cycle Air Cleaner Covers User Manual
Page 5
5
8- Thread the breather bolts in and finish torque breather bolts to 10-12 ft.-lbs.
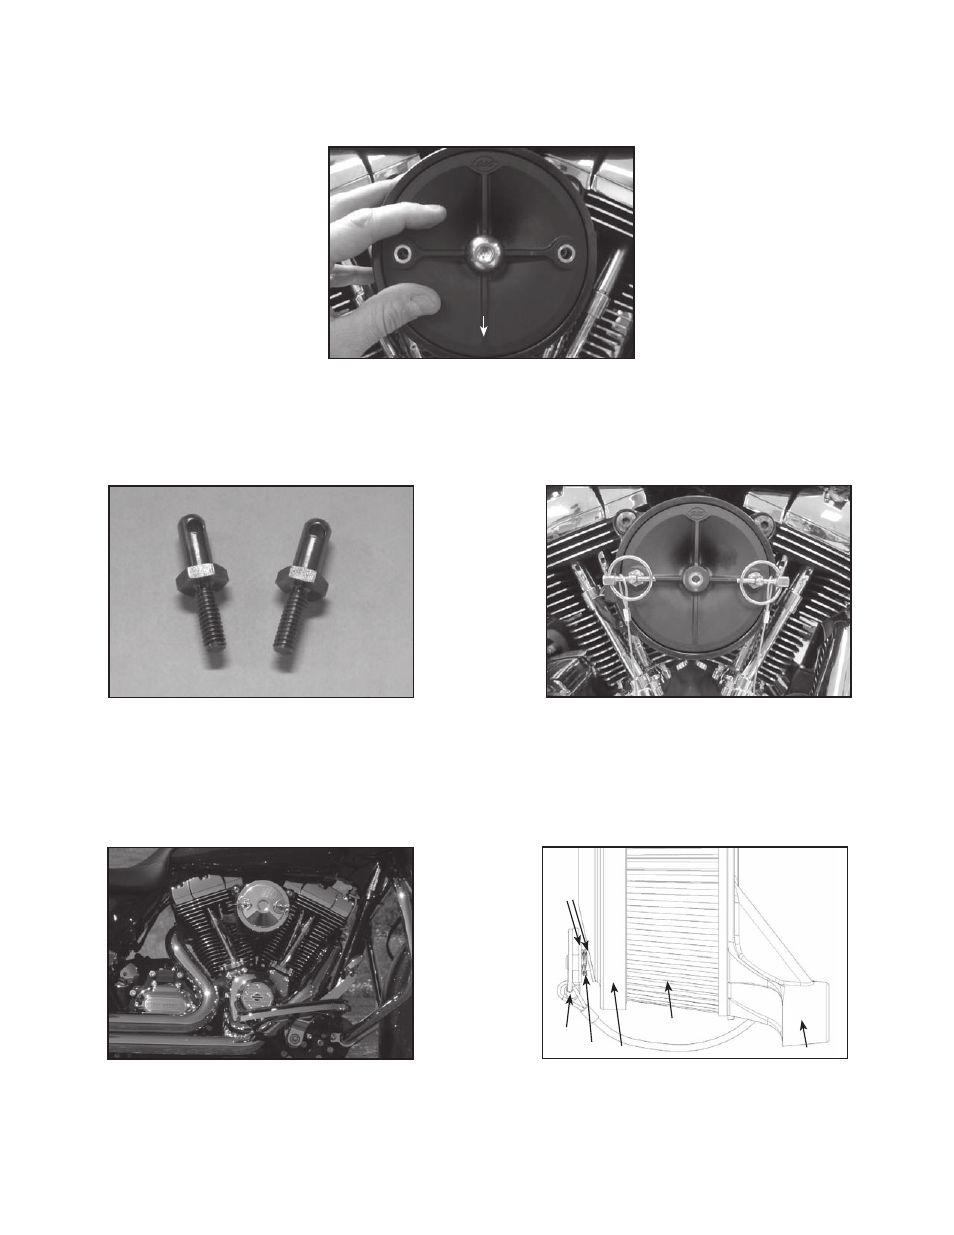
9- Remove the 5/16" button head screw from the plastic top filter plate if it has not been already. Picture 14 illustrates the button head screw. Hold
the filter on the backplate and put the filter top plate on top of the filter making sure that the word “Down” is facing down and sitting flat on
the filter and locked into the groove as illustrated in Picture 14.
10- Install the two threaded pin studs in place of where the flanged head screws were removed at disassembly. A small amount of 243 blue
Loctite® should be applied to the threads of the pin stud. Picture 15 illustrates the pin studs.
11- Tighten the pin studs down and make sure the holes are horizontal. Picture 16 illustrates the pin studs installed and the holes in a horizontal
position with the lynch pins installed.
12- If the lynch pins are not sitting straight on the pin studs take this time adjust them to the desired location.
13- Remove the lynch pins from the pin studs.
14- Install the Muscle cover over the pin studs followed by a flat washer, a spring washer, a flat washer and the lynch pin. Picture 17 illustrates the
Muscle cover assembled on the motorcycle.
15- Picture 18 illustrates a diagram of the Muscle cover and parts assembly.
Cover
Picture 18
Lynch Pin
Flat
Washer
Spring Washer
Filter
Backplate
Picture 17
Picture 15
Picture 16
Picture 14
DOWN
5/16" Button Head Cover Screw