S&S Cycle Stroker Kits 106 for Harley-Davidson Twin Cam 88 Engines User Manual
Page 4
F.
Assemble lower end - final assembly.
1.
Disassemble cylinders and pistons. Remove flywheel
assembly from right crankcase.
2. Clean all lower end parts for final assembly.
NOTE - Cleaning parts prior to and during assembly and keeping
parts clean after final assembly are imperative to minimize
contaminants that may circulate in oil and shorten engine life.
Many parts can be cleaned with soap and water first. Then,
reclean all internal parts and gasket mating surfaces using high
quality solvent that does not leave any harmful residues.
3. Install flywheel assembly. Follow factory procedure.
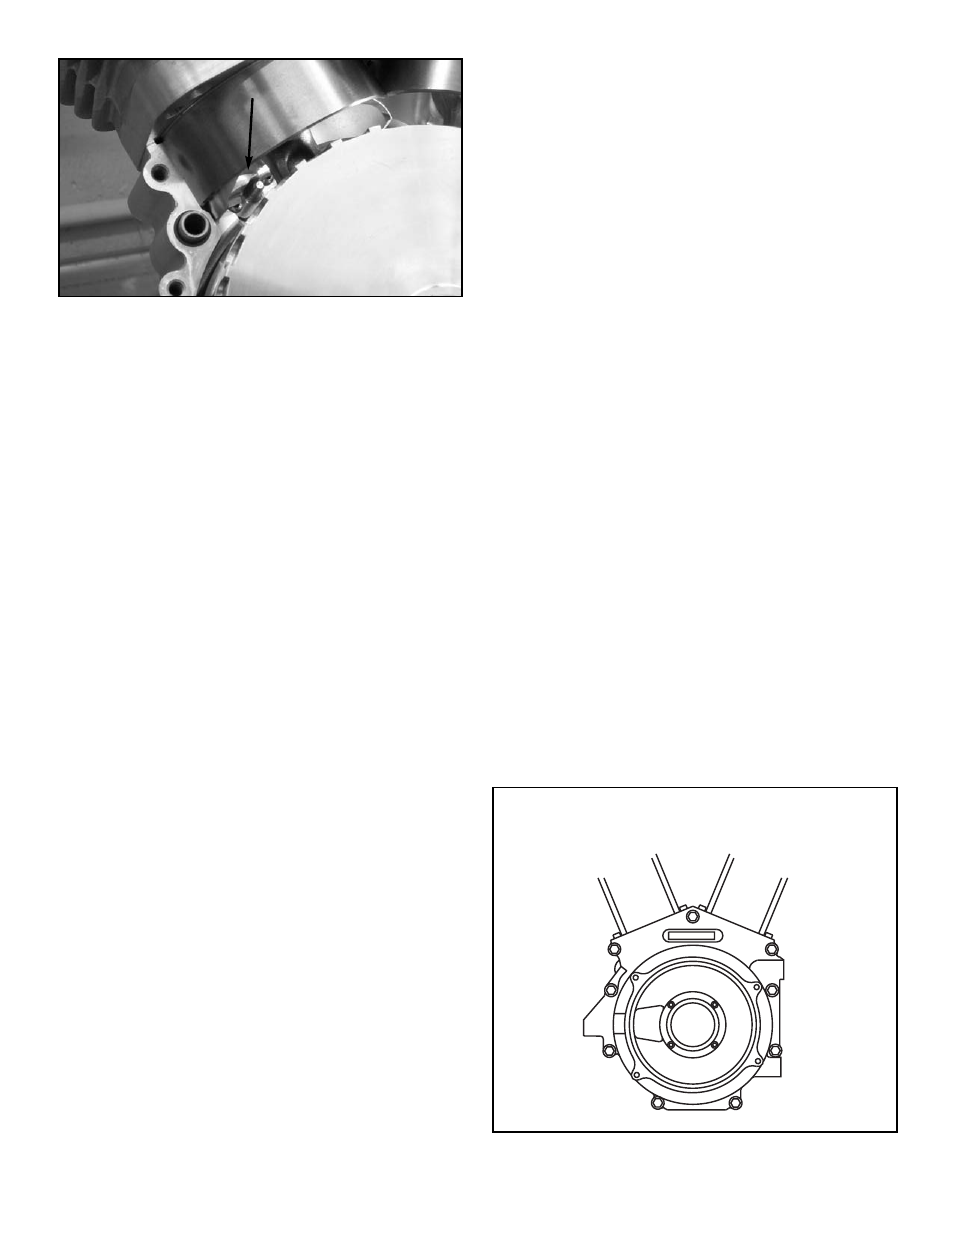
4. Bolt crankcases together. Use S&S
®
torque specs for
crankcase bolts. Torque case bolts in two stages to
10 ft-lb. and finally 15 ft-lb. in the sequence shown
in Figure 1.
5. Assemble gear case components. Follow S&S
instructions if installing S&S gear drive cams. Follow
factory procedures for all other components.
G. Check valve pocket fit.
1. Install pistons without piston rings on correct
connecting rods. Install cylinders.
2. Turn engine over until piston in front cylinder is at
top dead center. Paint area around valve pockets
on pistons with machinist’s blue.
3. Place valves in cylinder head leaving off springs and
retainers. Place head on cylinder and secure with
one bolt.
4.
Lower valves until they contact piston. Rotate valve,
marking painted area.
5. Remove head and check points of contact. Valve
should fit in valve pocket machined in piston dome.
6. If insufficient clearance exists, remove piston and
machine valve pocket until head of valve fits flush.
7. Repeat procedure for other cylinder head.
H.
Check Valve to piston clearance at TDC.
1. Spread layer of putty into valve pockets in
both pistons.
2. Assemble cylinder heads and bolt on cylinders with
head gaskets in place. Install rocker covers and
pushrods. Adjust pushrods so the hydraulic piston
in tappet is bottomed in the tappet bore or on the
HL
2
T washer if used. This insures that tappets can
not bleed down so valve position will be accurate
for clearance check.
NOTE- The earlier Harley-Davidson
®
Twin Cam 88
®
lifters, H-D
®
part numbers 18538-99 & 99A, require the S&S HL
2
T kit number
33-5339. Later lifters, H-D
®
part number 18538-99B, require the
S&S HL
2
T kit number 33-5338. Both kits are included with the
stroker engine kits, and either kit is installed & adjusted the same
way - remove the retaining clip from the top of the lifter, and
remove the piston assembly and spring from lifter body. Place the
appropriate HL
2
T travel limiter into the bore of the lifter and
replace removed components in the order that they were
removed. See Picture 7.
All reference to Harley-Davidson part numbers is for
identification purposes only. We in no way are implying that any
of S&S
®
Cycle’s products are original equipment parts or that they
are equivalent to the corresponding Harley-Davidson part
number shown.
3.
Turn engine over in normal direction of travel two
complete revolutions.
4. Disassemble engine and check thickness of putty in
valve pockets.
4
Picture 6
Torque In Sequence
Shown In Two Stages.
Stage 1 - 10 ft-lb.
Stage 2 - 15 ft-lb.
4
6
2
8
5
1
7
3
9
Figure 1