Step one, Step two, Tools needed – Pavement Ends 43910 Front Bumpers User Manual
Page 2: Parts list step three
43910 pg 2
0411 Rev. C
Step One
R
EMOVE
THE
P
LASTIC
S
KID
P
LATE
Use a fl at screwdriver or pliers to pry out the four (4) fasteners
that secure the edge of the skid plate. Then use a phillips
screwdriver to remove the push fasteners that secure the
brackets on the skid plate to the frame.
Step Two
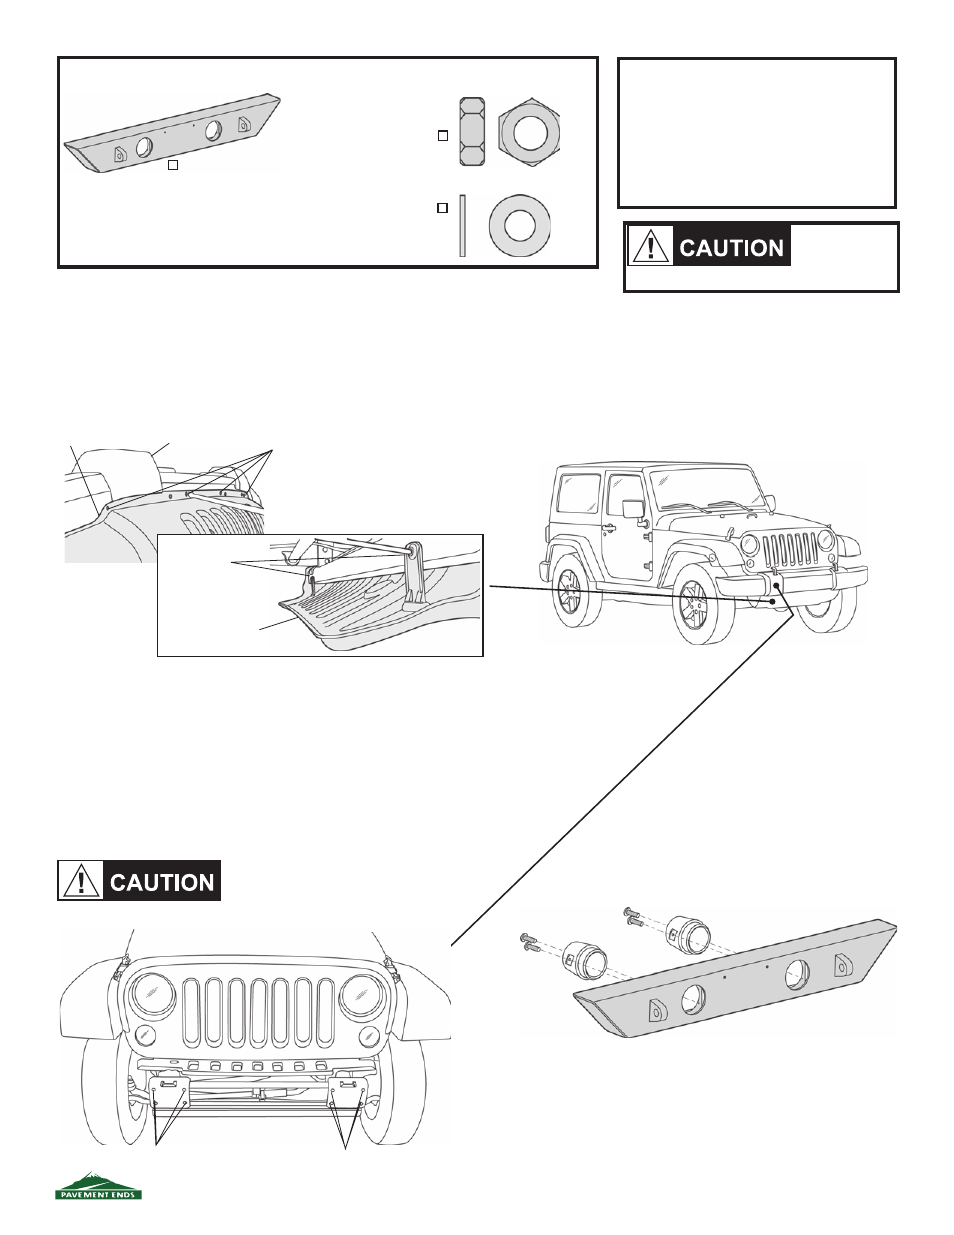
Remove t he Or iginal Bumper
Use a socket wrench to remove the four (4) nuts on each
side of the bumper that secure the bumper to the frame.
Access these nuts from behind the bumper.
Set the screw
s and nuts aside to be reinstalled later.
Slide the bumper off the studs.
Tools Needed
Ratchet
15mm, 18mm and
1/2" Sockets
T55 Torx Socket
18mm Wrench
3/16" and 6mm
Allen Wrenches
Phillips Screwdriver
Flat Screwdriver
Pliers
Safety Glasses
M10 Washer,
Part Number
422.77, Qty - 8
M10 Nylock Nut,
Part Number
422.76, Qty - 8
Front Bumper, Part
Number 478.96, Qty - 1
Two or more
people may be
required to lift the bumper safely.
Use Flat Screwdriver
to pry out fasteners
Plastic Skid
Plate
Bumper
Plastic Skid
Plate
Use Phillips
Screwdriver to
remove push
fasteners
If you have Factory Fog Lights,
disconnect them before you
remove the bumper.
Remove Nuts that
secure bumper
Remove Nuts that
secure bumper
Parts List
Step Three
Instal l Factory Fog Light s on Bumper
Orient the Lights with the adjustment screw facing
down. Use the factory screws, removed in Step Two, to
secure the Light Assemblies to the Bumper. Mount the
assemblies from behind the Bumper.