Step one, Parts list and hardware identification, Tools needed – Pavement Ends 51210 Sun Cap User Manual
Page 2
51210 2
Rev. A 7/96
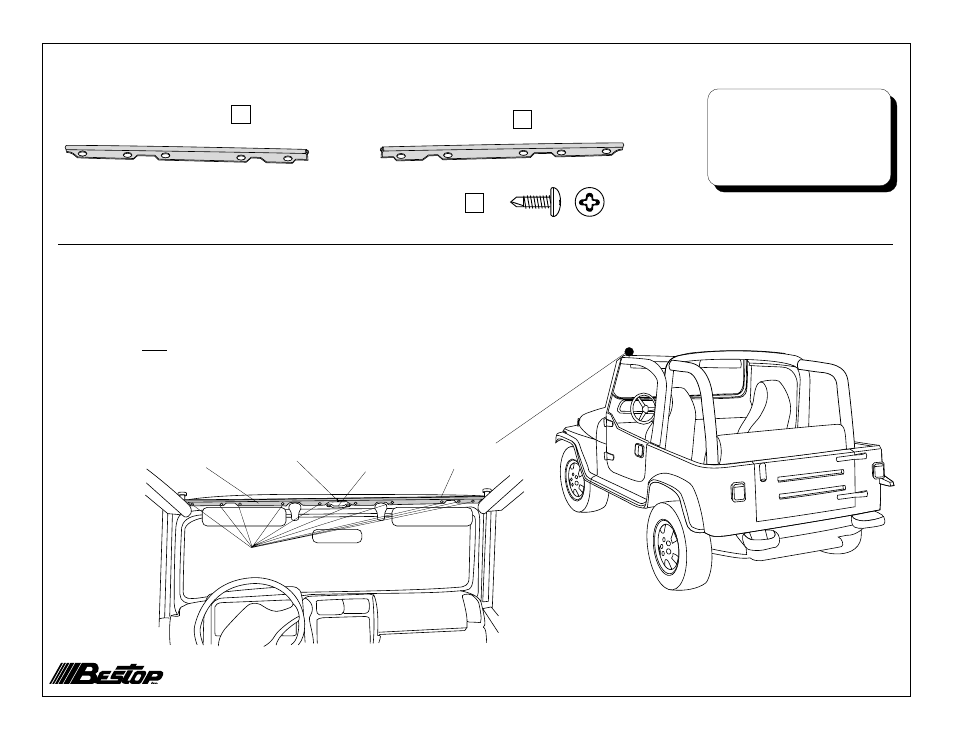
View from inside vehicle -
looking toward front
Windshield
#8 x 1/2" Self-Tapping
Phillips Head Screws
Right Windshield
Channel
Footman
Loop
Butt Channels
Together
Left Windshield
Channel
Parts List and Hardware Identification
Windshield Channel - Left, Qty - 1,
Part Number 314.13
Windshield Channel - Right, Qty - 1,
Part Number 314.14
Tools Needed
1/8" Drill Bit and Drill Motor
Phillips Screwdriver
Center Punch
Hammer
Pencil
Step One
Locate the Left and Right Windshield Channels in the parts kit. Orient them with the
open edge up, the foam gasket in the channel facing the windshield and place them
along the top, inside of the windshield. The cutouts at the outside corners of the
channels are round to accommodate the sport bars. The ends with the rectangular
cutouts will and must butt up together to form an opening around the footman loop
attached to the windshield frame at the center of the windshield. The other cutouts in
the channels will fit around the header latches.
Mark the locations of the five mounting holes in each channel. Center punch and drill
a 1/8" hole at each location. Install both channels using ten (10) #8 x 1/2" Self-Tapping
Phillips Head Screws.
#8 x 1/2" Self-Tapping Phillips Head
Screw, Qty - 10, Part Number 200.48