Sth-55jd-tc — initial start-up – Multiquip STH User Manual
Page 15
STH-10 FT. • RIDE-ON POWER TROWEL — PARTS & OPERATION MANUAL — REV. #5 (06/08/05) — PAGE 15
STH-55JD-TC — INITIAL START-UP
3.
It is recommended that the kill switch be used to stop the
engine after every use. Doing this will verify that the switch
is working properly and presents no danger to the
operator. Remember to turn the key to the “OFF” position
after stopping the machine. Not doing so may drain your
units’ battery.
4.
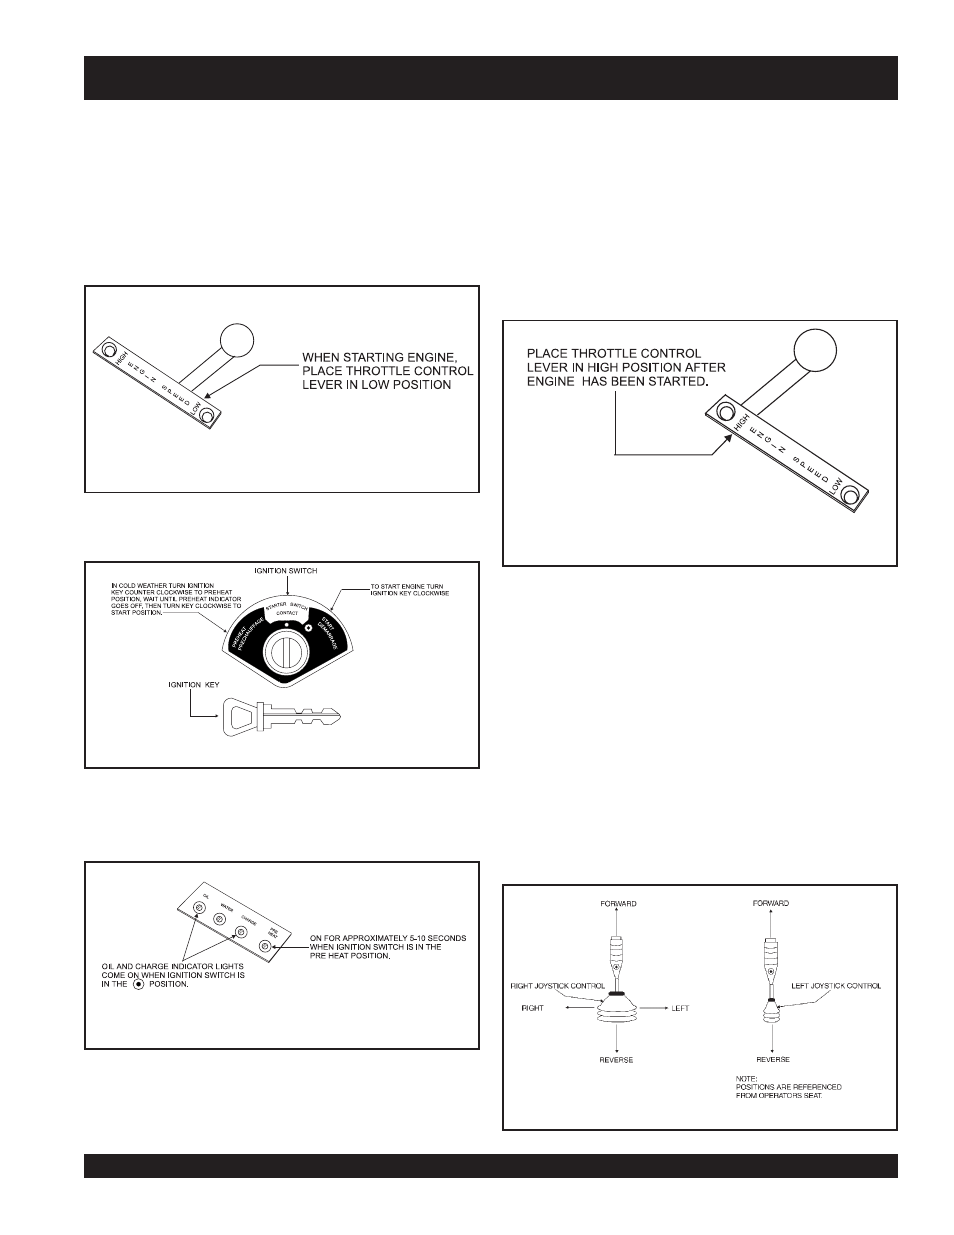
Place the
engine
throttle lever (
Figure 7
)
in the
LOW
position.
5.
Insert the
ignition key
into the ignition switch (Figure 8).
NOTE
In
cold
weather turn the ignition key counter clockwise to the
preheat position, wait until the BLUE preheat indicator goes off
before turning the ignition key clockwise to the start position.
7.
Turn ignition key fully clockwise and listen for engine to
start. Once engine has started release ignition key. Let
engine warm for a few minutes.
8.
Place the
engine
throttle lever
(Figure 10)
in the
HIGH
position.
9.
The engine should be running at full RPM.
10. Repeat this section a few times to get fully acquainted with
the engine starting procedure.
Steering
Two joysticks (Figure 11) located to the left and right of the
operator’s seat provide directional control for the HTH Ride-On
Power Trowel. Table 3 (Page 15) illustrates the various directional
positions of the joysticks and their effect on the ride-on trowel.
NOTE
All directional references with respect to the joysticks are from
the
operator’s
seat position.
Figure 9. Oil and Charge Indicator Lights
Figure 7. Engine Throttle Control Lever (Low)
Figure 10. Engine Throttle Control Lever (High)
6.
Turn the ignition key clockwise to the (start) position. The
oil
and charge indicator lights (Figure 9) should be on.
Figure 11. Left and Right Joystick Controls
Figure 8. Ignition Switch and Key