Maintenance – Multiquip JWN24HSCSL User Manual
Page 26
page 26 — JWN-SeRIeS RIDe-ON pOWeR TROWeL • OpeRaTION maNuaL — Rev. #1 (05/12/12)
Maintenance
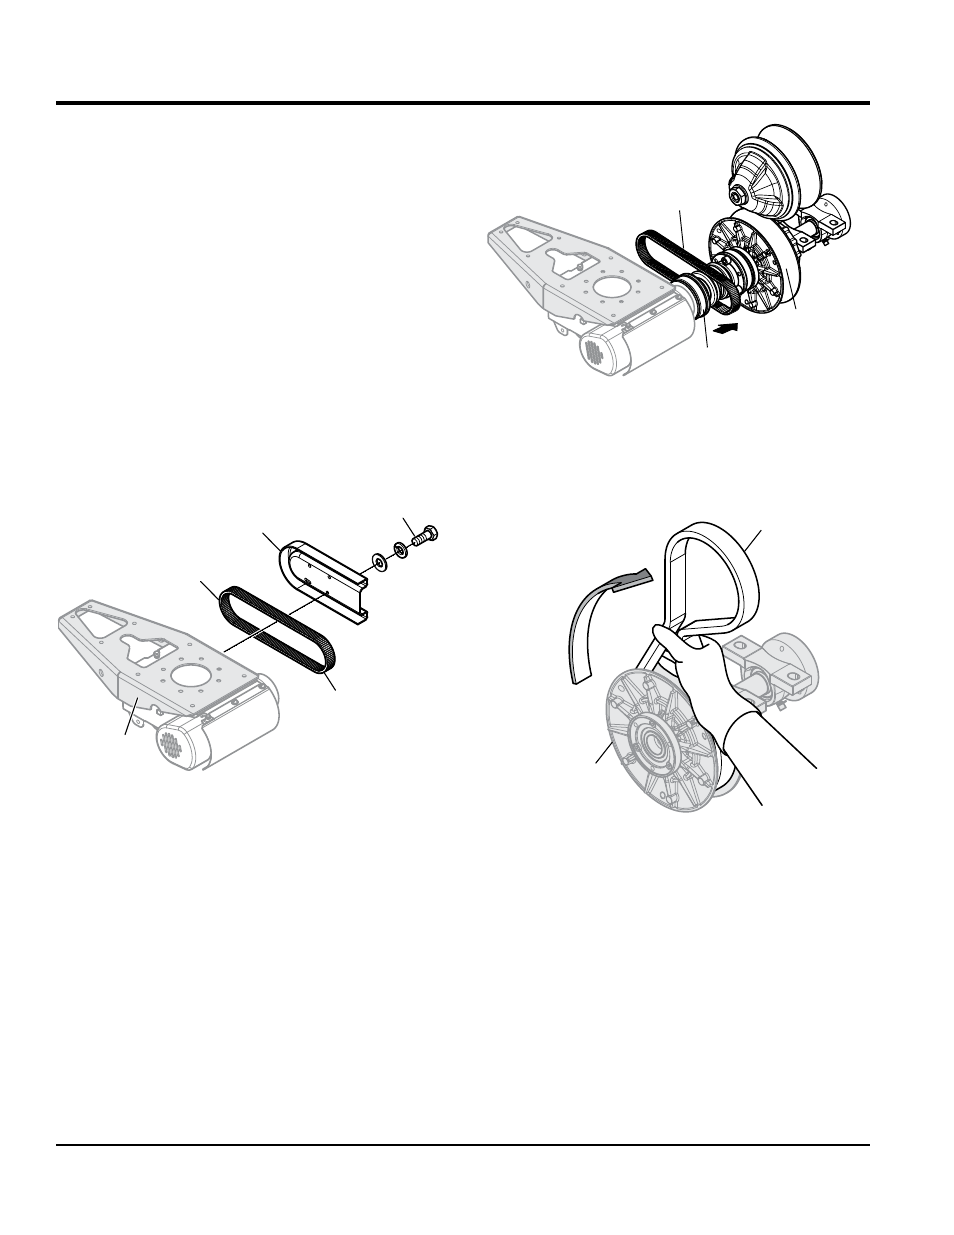
SpaRe DRIve BeLT RemOvaL
(uSINg RepLaCemeNT DRIve BeLT)
The JWN-SERIES Ride-On Power Trowel is equipped with
a replacement drive belt (spare) carrier, which is mounted
on the inboard side of the left-side gearbox . Make sure that
there is
aLWayS a spare drive belt in the drive belt carrier
before the trowel is placed on a slab to finish concrete.
In the event of a drive belt failure, the spare (replacement)
drive belt can be used for quick replacement at the job site
for continued trowel operation.
1. To replace an existing drive belt with the spare drive
belt, remove the 2 bolts that secure the spare belt
holder to the left-side gearbox adapter plate. (Figure
17) Take care not to contaminate the replacement drive
belt with grease or dirt.
Figure 17. Spare Belt Removal
2. Remove existing drive belt from clutch and lower drive
pulley, by cutting belt.
3. Ensure all remnants of old drive belt have been
removed from the sheaves/grooves of the clutch and
lower pulley
4. Slide spare drive belt over the CV-joint (Figure 18) an
onto the lower drive pulley.
LEFT-SIDE
GEARBOX
ADAPTER PLATE
REMOVE
SPARE DRIVE
BELT HOLDER
SPARE
DRIVE BELT
REMOVE
2 PLACES
Figure 18. Spare Drive Belt Routing
5. Next, squeeze the drive belt (Figure 19) and pull
upwards and towards the rear of the trowel. This will
spread open the faces of the lower drive pulley.
Figure 19. Spare Drive Belt Placement
(Lower Pulley)
CV-JOINT
SPARE
DRIVE BELT
LOWER DRIVE
PULLEY
PULL UPWARDS
AND TOWARDS
REAR OF TROWEL
LOWER
PULLEY
DRIVE BELT