Jwn-series— maintenance – Multiquip JWN User Manual
Page 28
PAGE 28 — HTN 31V
JWN-SERIES • RIDE-ON POWER TROWEL — PARTS AND OPERATION MANUAL — REV. #8 (12/18/07) — PAGE 28
JWN-SERIES— MAINTENANCE
4
1
2
3
6
5
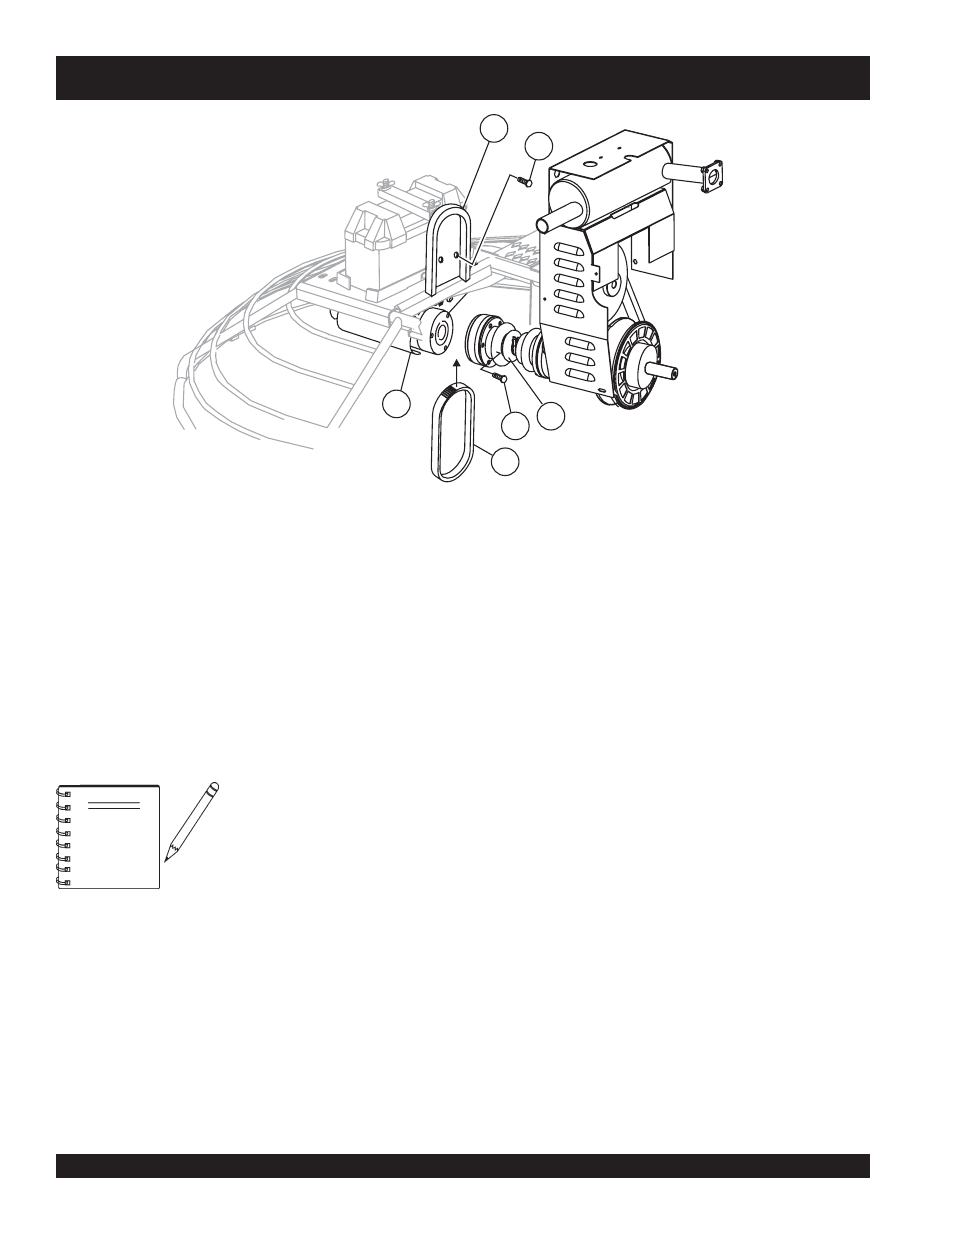
3.
Once the CV-joint has been separated from the left-side
gearbox, push the CV-joint inward so that a gap exists
between the gearbox and the CV-joint (Figure 20). Slide
the spare V-belt between the gearbox coupler and the CV-
joint. Avoid contaminating the replacement belt with grease
or oil when sliding it between the CV-Joint and gearbox
coupler.
4.
Place the spare drive belt inside the drive belt carrier, and
secure the spare belt carrier to the inboard side of the left
gearbox.
5.
Install the three screws that secure the CV-joint to the left-
side gearbox coupler.
Figure 20. Spare Drive Belt Replacement
It will be necessary to disconnect the
CV-Joint from the left-side gearbox
coupler. This means the removal of
the three screws that secure the CV-
Joint to the gearbox.
NOTE
Spare Drive Belt Replacement
1
CV Joint
2
Bolt (Remove 3 places)
3
New Spare Drive Belt
4
Bolt, Spare Drive Belt Carrier
5
Spare Drive Belt Holder
6
Left Side Gearbox
To replace a spare drive belt, be prepared to disconnect the CV-
joint from the left-side gearbox. See Figure 20.
1.
Place the trowel on suitable supports and observe all safety
precautions.
2.
Remove the three screws that secure the CV-joint to the
left-side gearbox coupler.