V. tubing connections, Iv.c. filter cartridge installation – Purenex Multipure Aquaperform For Model MP880SB User Manual
Page 13
Elbow Adapter Connection:
1. Connect the blue faucet tubing to the Elbow Adapter (#3) that you previously
connected to the OUTLET port.
2. Using wire cutters or knife, cut (square cut) the tip end off of the blue plastic tube con-
nected to the faucet. Do not use scissors.
3. The tubing must be fully inserted in the adapter / switch. It is recommended that you
measure and mark the end of the tubing that you are inserting in the adapter to assure
that it is inserted as far as it will go. The 1/4” blue tubing should be inserted about 5/8”.
4. Push the tubing through the small hole in the adapter until you feel resistance; at this
point, the tubing is not fully inserted. Then push firmly until the tubing is inserted as far
as it will go (see Item 3 above for measurements).
5. Pull to check that the tubing is secure.
Insert tubing and push until you
feel resistance -- at this point,
the tubing is not fully inserted.
Push firmly until the tubing is
inserted as far as it will go.
13
V. Tubing Connections
Note: Use wire cutters or sharp knife to cut tubing. Do not use scissors.
V.A Connecting the Blue Faucet Tubing to Outlet Port
blue
tubing
OUTLET
Adapter
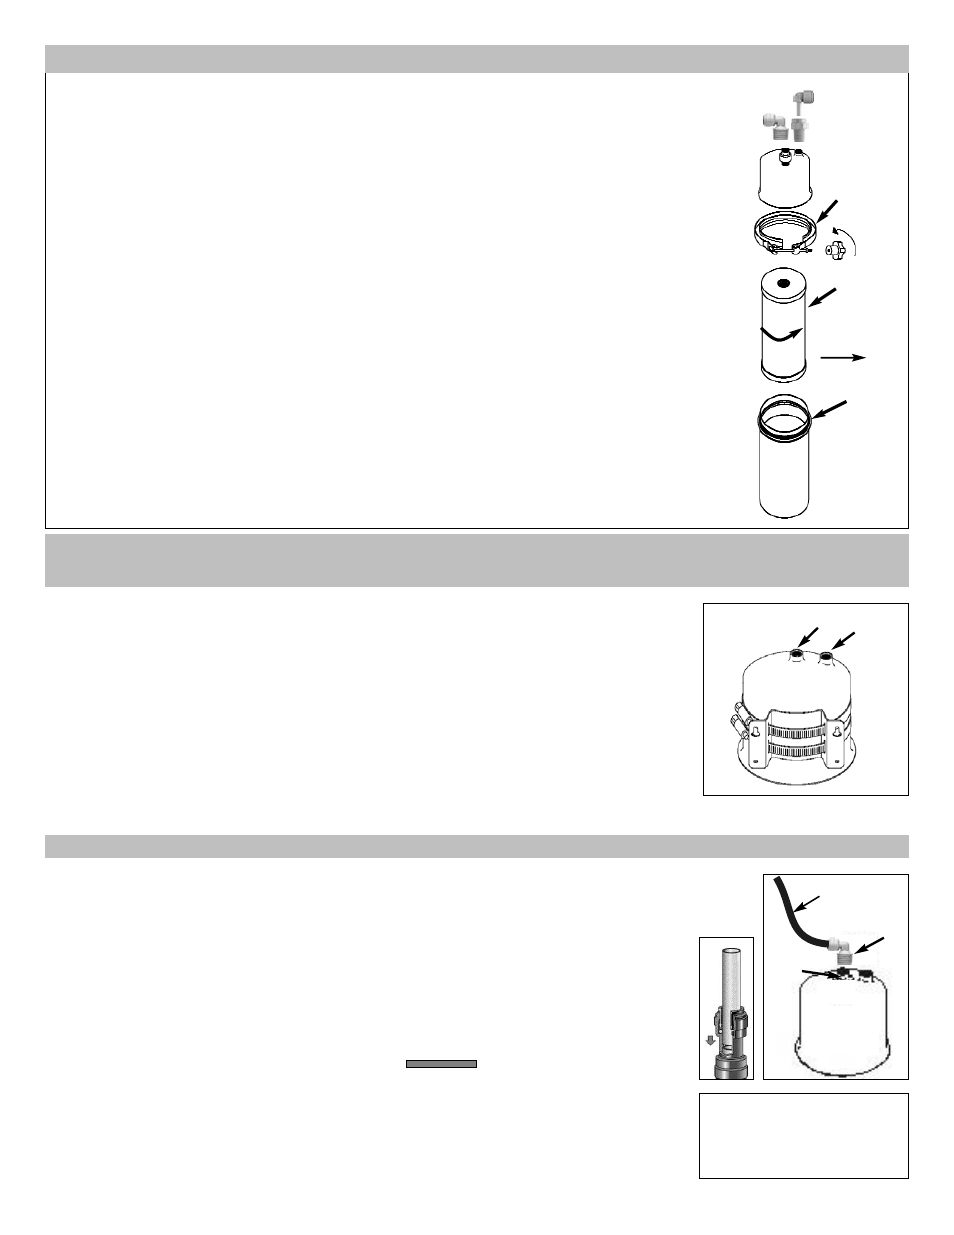
The filter cartridge is shipped outside of the unit housing (in most cases) to protect your
filter and drinking water system from damage during shipping. Be sure to insert the filter
cartridge into the drinking water system housing before finalizing the installation. First,
remove the plastic wrapper and instruction wrap from around the filter.
1.
With the housing in an upright position, open the unit by unscrewing the black knob on
the Locking V-Band. Spread it apart and remove the Locking V-Band.
2.
Separate the unit, leaving the black o-ring in place on the housing bottom.
3.
Screw the new filter (cartridge) in the housing top, turning the cartridge in the direction
shown. Be sure that the filter has been screwed in STRAIGHT. DO NOT OVER
TIGHTEN.
4.
Reconnect the housing top with bottom and replace Locking V-Band; replace black knob
and turn until tight. Be sure that the Locking V-Band is fastened tightly by:
a. Checking the V-Band to confirm that it is secured evenly around the housing top
and bottom.
b. Hand-tightening the black knob on the V-Band until it is as tight as possible.
Filter turn to
connect
o-ring
v-band
CB11As
Filter
IV.C. Filter Cartridge Installation
Now that you have installed the faucet, connected to the plumbing, and prepared the
housing, you are ready to complete the installation of your Drinking Water System.
Reference Section II for installing the faucet.
Reference Section III for connecting to the plumbing.
Reference Section IV.A for attaching the bracket to the housing top.
Reference Section IV.B for connecting housing Inlet and Outlet adapters.
Reference Section IV.C for installing the filter in the housing.
Housing Top
OUTLET
INLET
Insert blue tubing 5/8”